The allure of homebrewing beer is truly captivating. For many, it begins as a simple curiosity, transforming into a passionate hobby and even a lifestyle. You might wonder if crafting your own delicious brews at home is overly complicated or requires specialized scientific expertise. However, as the helpful video above illustrates with clarity and precision, the process of homebrewing is fundamentally straightforward, relying on just a few core principles: boiling liquids, transferring them between vessels, maintaining scrupulous cleanliness, and patiently allowing yeast to perform its natural alchemy. Indeed, if you possess the fundamental ability to follow directions for a boxed meal, then you certainly have the capacity to successfully brew your own beer. This guide will elaborate on those essential steps, offering deeper insights and additional context to ensure your first venture into homebrewing is a resounding success.
The Undeniable Appeal of Homebrewing: A Journey Beyond the Glass
Embarking on a homebrewing adventure offers far more than just a refreshing beverage; it provides a creative outlet, a rewarding challenge, and a deeper connection to the craft beer world. Crafting your own beer allows for unparalleled customization, giving you the freedom to experiment with unique flavor profiles, hop varieties, and malt combinations that commercial breweries might never produce. This personal touch transforms each batch into a distinctive expression of your palate and preferences.
Furthermore, homebrewing fosters a significant sense of accomplishment. From the initial measurement of ingredients to the final sip of a perfectly carbonated pint, every step is a testament to your dedication and skill. It’s a journey that builds confidence and offers a tangible reward for your efforts. The homebrewing community itself is incredibly supportive, with countless resources, forums, and local clubs available to share knowledge, troubleshoot issues, and celebrate successes. Engaging with this community provides invaluable learning opportunities and fosters lasting friendships among fellow enthusiasts. Beyond personal satisfaction, homebrewing also offers economic advantages; over time, producing your own beer can be significantly more cost-effective than consistently purchasing craft beers from stores, allowing for a more sustainable enjoyment of diverse styles.
Essential Gear and Ingredients for Your First Homebrew
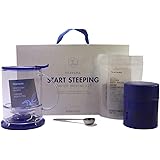
Before you begin the exciting process of brewing, it is imperative to gather all necessary equipment and ingredients. The video above highlights the core components you will need, particularly emphasizing a quality starter kit. These kits are specifically designed to provide beginners with almost everything required to produce their first batch, streamlining the initial setup and minimizing potential confusion.
- **The Starter Kit:** A fundamental investment for any aspiring brewer, a good starter kit typically includes a primary fermenter (like the Northern Brewer Big Mouth Bubbler mentioned), an airlock, a bung, an auto-siphon, a bottling bucket with a spigot, bottle filler, tubing, sanitizer, and often a hydrometer for measuring gravity. These comprehensive kits ensure you have the foundational tools for each stage of the homebrewing process.
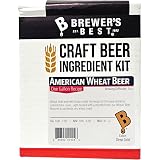
- **Recipe Kit:** This pre-portioned package contains the specific ingredients for your chosen beer style. It generally includes malt extract (either liquid or dry, or both), hops, and sometimes specialty grains and other adjuncts like spices or conditioning agents. Critically, your recipe kit will also contain a packet of brewer’s yeast, which you will have selected at checkout. Understanding your recipe kit’s contents is crucial for a successful brew.
- **Boil Kettle:** A robust kettle capable of holding at least four gallons of liquid is indispensable. While a five-gallon stainless steel kettle is a popular choice, ensure your chosen vessel can accommodate the volume specified in your recipe, as this is where your wort will be created and boiled.
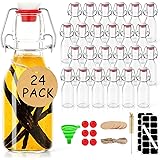
- **Bottles:** You will require approximately two cases of clean, pry-off, 12-ounce beer bottles. Brown glass bottles are highly recommended because they offer superior protection against harmful UV light, which can cause “skunking” or off-flavors in your finished beer. Sanitize your bottles thoroughly before use.
Reading through your recipe’s instruction sheet completely before brewing day cannot be stressed enough. Each recipe has unique requirements and timings, so a thorough understanding prevents errors and ensures a smooth, enjoyable brewing experience. This proactive approach helps to anticipate each step and organize your workspace efficiently.
The Brewing Day Unveiled: Crafting Your Wort
Brewing day is the initial and most hands-on stage of homebrewing, where you transform raw ingredients into “wort,” the unfermented sugary liquid that will eventually become beer. This process involves steeping, boiling, and carefully cooling the wort.
Steeping Specialty Grains for Flavor and Color
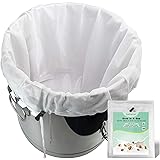
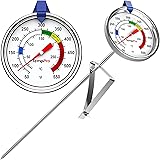
Many beginner recipe kits, such as the Caribou Slobber Brown Ale highlighted in the video, include specialty grains. These grains are steeped in hot water, much like making tea, to extract additional color, aroma, and complex flavors that would not be present with malt extract alone. For instance, crystal malts contribute caramel and toffee notes, while roasted malts can introduce chocolate or coffee characteristics. The steeping process typically lasts for 20 minutes or until the water temperature reaches approximately 170°F, whichever occurs first. It is crucial to avoid squeezing the grain bag, as this can extract undesirable tannins, leading to astringent off-flavors in your final product.
Adding Malt Extract and Hops: The Heart of Your Brew
Once the grains are steeped, the next step involves incorporating the malt extract. Malt extract, which comes in both liquid (LME) and dry (DME) forms, is essentially concentrated sugary wort. The video wisely advises pre-warming liquid malt extract in a hot water bath to reduce its viscosity, making it significantly easier to pour and mix. Crucially, turn off the heat before adding the malt extract. This prevents the sugars from scorching at the bottom of the kettle, which would impart a burnt, unpleasant taste to your beer. Stir vigorously until the extract is fully dissolved, then return the kettle to the heat source to bring the wort to a rolling boil.
The boil itself is a 60-minute process during which hops are added at specific intervals. Hops are the flowers of the hop plant and contribute bitterness, aroma, and natural preservative qualities to beer. The timing of hop additions directly influences their contribution:
- **Bittering Hops (60-minute addition):** These hops are added at the beginning of the boil and contribute primarily bitterness, balancing the sweetness of the malt. Extended boiling extracts alpha acids, responsible for this bitterness.
- **Flavor Hops (15-30 minute additions):** Hops added later in the boil impart more noticeable hop flavor, with less bitterness extracted.
- **Aroma Hops (5-minute or Flame-out additions):** Hops added very late in the boil or immediately after the heat is turned off (flame-out) contribute delicate aromatic compounds, enhancing the beer’s fragrant qualities without adding significant bitterness.
Care must be taken to manage boil-overs, as the frothy, sugary wort can quickly climb the sides of your kettle and create a sticky mess. Vigorous stirring or temporarily reducing the heat can help prevent this common brewing mishap.
Cooling the Wort: A Critical Transition
After the 60-minute boil is complete, the wort must be rapidly cooled to 80°F or below. This quick cooling, often achieved with an ice bath or a wort chiller, is vital for several reasons. Firstly, it prevents the formation of undesirable off-flavors caused by slow cooling. Secondly, yeast thrives within specific temperature ranges; pitching yeast into excessively hot wort will kill it, preventing fermentation. Thirdly, minimizing the time the wort spends between 80-140°F reduces its susceptibility to contamination from airborne microbes. Keeping the kettle mostly covered during cooling further protects your wort from these potential spoilers, laying the groundwork for a clean and successful fermentation.
The Art of Fermentation: Yeast’s Unsung Magic
Fermentation is arguably the most transformative stage of homebrewing, where humble yeast converts the sugars in your wort into alcohol and carbon dioxide. This biological process requires a pristine environment and vigilant temperature control to yield exceptional beer.
The Paramount Importance of Sanitization
Before any wort is transferred, every piece of equipment that will come into contact with your cooled wort or beer must be meticulously sanitized. The video correctly emphasizes that it is impossible to make good beer with dirty equipment. Pathogenic bacteria and wild yeasts, invisible to the naked eye, can quickly outcompete your brewing yeast, leading to off-flavors (sour, vinegary, phenolic) or even completely spoiling your batch. Sanitization is not merely cleaning; it’s the process of reducing microorganisms to a safe level. Most sanitizers, like the commonly used Star San or iodophor, require only a couple of minutes of contact time. Crucially, do not rinse equipment after sanitizing, as this reintroduces contaminants. The foam created by some sanitizers is harmless and will not negatively impact your beer’s flavor or aroma.
Pitching Yeast and Monitoring Fermentation
Once your fermenter and transfer equipment are sanitized, the cooled wort is transferred from the kettle, leaving behind any heavy trub (sediment) that has settled at the bottom. You then top up the fermenter with cool, filtered water to the 5-gallon mark. It is beneficial to gently rock the fermenter back and forth to introduce oxygen, which is essential for healthy yeast reproduction in the early stages of fermentation. Then, the yeast is “pitched” – added to the wort. If using dry yeast, sprinkle it directly onto the surface. If using liquid yeast from a prepped “smack pack,” the inflated pack is a positive sign of active yeast, ready to work.
After pitching, affix an airlock, filled with sanitizer solution, to the fermenter. This allows carbon dioxide to escape while preventing airborne contaminants from entering. Place your fermenter in a dark, temperature-stable location. Within 1-2 days, you should observe signs of active fermentation: bubbling in the airlock and a foamy layer, known as “Krausen,” forming on the surface of the beer. Krausen is a clear indicator of healthy yeast activity. If excessive Krausen threatens to clog your airlock, a blow-off tube can be installed, directing the overflow into a bucket of sanitizer. This simple measure prevents pressure build-up and messy eruptions.
Secondary Fermentation and Clarification
The video mentions the option of transferring your beer to a secondary fermenter. While not strictly necessary for all beers, especially lighter styles, secondary fermentation can be beneficial for longer aging, clarifying the beer, or adding additional ingredients like fruit or spices. This process, often occurring 1-2 weeks after primary fermentation, allows the beer to mature off the bulk of the spent yeast and trub, potentially leading to a cleaner, brighter final product. When racking (transferring) the beer, it is important to minimize splashing to avoid introducing oxygen, which can lead to oxidation and stale, papery off-flavors. The beer typically rests in secondary for an additional 2-4 weeks, depending on the recipe and desired clarity.
From Fermenter to Bottle: The Carbonation Stage
The final stage of homebrewing is bottling, where your flat, uncarbonated beer is prepared for conditioning and eventual enjoyment. This process involves precise measurements and meticulous sanitization to achieve perfect carbonation.
Preparing the Priming Solution
To carbonate your beer naturally in the bottle, a small, carefully measured amount of priming sugar is added. This sugar undergoes a mini-fermentation within each bottle, producing carbon dioxide that dissolves into the beer, creating effervescence. The video specifies mixing 5 ounces of priming sugar with 16 ounces of water, bringing it to a boil, and then allowing it to cool. This solution is then gently poured into your sanitized bottling bucket. Other sugars, such as corn sugar (dextrose) or even specific carbonation drops, can also be used, though the amount will vary based on the desired carbonation level and beer style.
Bottling and Capping Your Brew
With the priming solution in the bottling bucket, siphon the fermented beer from your fermenter into the bucket. Stir gently to ensure the sugar solution is evenly distributed without introducing excessive oxygen. Attach a bottling hose with a bottle filler wand to the spigot of the bottling bucket. Ensure all bottles, caps, the filler wand, and tubing have been thoroughly sanitized prior to this step. Fill each bottle by depressing the bottle filler against the bottom of the bottle; the valve will open, and beer will flow. Lift the filler to stop the flow, leaving approximately one inch of headspace in each bottle. This headspace is crucial for allowing the CO2 to dissolve into the beer and for preventing bottle bombs from over-carbonation. Immediately after filling, place a sanitized cap on each bottle and crimp it tightly with a bottle capper.
Bottle Conditioning and Enjoyment
Once filled and capped, the bottles need to condition in a dark space, ideally around 68°F, for one to two weeks. During this time, the yeast consumes the priming sugar, producing the desired carbonation. After this conditioning period, the bottles can be moved to a cooler or colder storage area. It’s important to remember that homebrew, especially bottle-conditioned varieties, often has a thin layer of yeast sediment at the bottom. This is a natural characteristic of unfiltered, living beer and is a sign of authenticity. When pouring, do so slowly and carefully into a clean glass, leaving the yeast behind for a clearer, brighter pour. This meticulous approach to homebrewing ensures each bottle delivers a delightful and satisfying experience.
Hoppy to Help: Your Homebrewing Q&A
What is homebrewing?
Homebrewing is the process of making your own beer at home. It fundamentally involves boiling liquids, transferring them, maintaining cleanliness, and allowing yeast to create alcohol.
Do I need special skills or scientific expertise to brew beer at home?
No, homebrewing is a straightforward process that doesn’t require specialized scientific expertise. If you can follow directions for a boxed meal, you can successfully brew your own beer.
What essential equipment do I need to start homebrewing?
To begin homebrewing, you will primarily need a starter kit, a recipe kit (including malt extract, hops, and yeast), a large boil kettle, and clean brown glass bottles.
Why is sanitizing my equipment so important when brewing?
Sanitization is crucial because invisible bacteria and wild yeasts can contaminate your cooled wort, leading to undesirable off-flavors or spoiling your entire batch of beer.
How does the beer get its carbonation or bubbles when bottled?
Before bottling, a measured amount of priming sugar is added to the beer. This sugar undergoes a mini-fermentation inside each sealed bottle, producing carbon dioxide that dissolves into the beer to create effervescence.