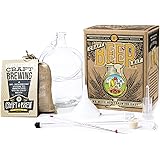
Many people dream of brewing their own perfect pint. They often see the process as overly complicated or too technical. The truth is, learning how to make beer at home is a rewarding journey. The video above shows a quick overview of the essential steps. We will delve deeper into each stage here. This guide makes homebrewing accessible for everyone.
Understanding Your Beer Ingredients
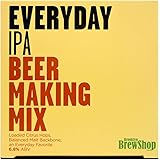
Every great beer starts with quality ingredients. The video highlighted hops, grain, and yeast. These form the fundamental trio for brewing. Water is also a crucial, often overlooked, component.
Grain: The Foundation of Flavor
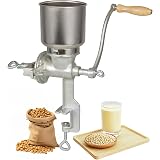
Grain provides the sugars needed for fermentation. Malted barley is the most common type. Different grains offer unique flavors and colors. Imagine if you used a dark roasted malt. Your beer would have notes of coffee or chocolate. A lighter malt creates a crisp, golden brew. Grinding the grain is vital. It exposes the starches for conversion into fermentable sugars.
Hops: Bitterness and Aroma
Hops are tiny flowers that add bitterness to balance sweetness. They also contribute wonderful aromas. Think pine, citrus, or floral notes. Hops are added at different stages of the boil. Early additions provide bitterness. Later additions enhance aroma. It’s a key part of crafting your beer’s character.
Yeast: The Magic Worker
Yeast is a living microorganism. It consumes the sugars in your wort. This process produces alcohol and carbon dioxide. Different yeast strains create distinct flavor profiles. Ale yeasts and lager yeasts are the two main categories. Picking the right yeast is crucial for your desired beer style. It truly transforms sugary liquid into beer.
Water and Other Essentials
Good water quality is important. Tap water is often sufficient. Adding half a Camden tablet, as mentioned, helps remove chlorine. Chlorine can cause off-flavors. Priming sugar is another essential. You add it before bottling. It creates natural carbonation in your finished beer.
The Brewing Process: Step-by-Step
Brewing beer involves several distinct phases. Each step plays a critical role. Following them precisely ensures a great outcome.
Mashing: Extracting Sugars
Mashing is where the magic begins. You combine your ground grain with heated water. The video specifies heating water to 150 degrees Fahrenheit. This temperature is ideal for enzyme activity. These enzymes convert starches in the grain into fermentable sugars. You stir in the grain. Then you maintain the temperature for 60 minutes. This hour allows for maximum sugar extraction. Imagine if your mash temperature was too low. The enzymes wouldn’t work efficiently. You would get less sugar and a weaker beer. A grain basket makes separating the grain easy.
The Boil: Sterilization and Hopping
After mashing, you pull the grain basket. The liquid is now called wort. You bring this wort to a vigorous boil. A 60-minute boil achieves several things. It sterilizes the wort, removing any unwanted bacteria. It also allows for hop additions. As the video states, add hops according to your recipe. Different hops are added at different times. This impacts bitterness and aroma. The boil also concentrates the wort. It helps to develop certain flavors.
Cooling the Wort: A Critical Transition
After the boil, you need to cool the wort rapidly. The video suggests roughly 70 degrees Fahrenheit. This temperature is perfect for pitching yeast. Rapid cooling minimizes the risk of infection. It also prevents unwanted off-flavors. Imagine if you let the wort cool slowly. It would be exposed to airborne contaminants for longer. This could spoil your batch. Using an immersion chiller or ice bath speeds this process up.
Fermentation and Conditioning: The Final Stages
These stages are where the beer truly comes to life. Patience is a virtue here.
Sanitization and Fermentation
Sanitization is paramount in homebrewing. Always clean your equipment thoroughly. Then sanitize everything that touches the cooled wort. The video highlights sanitizing the fermentation equipment. This prevents unwanted bacteria or wild yeasts from contaminating your beer. Transfer the cooled wort into the sanitized fermenter. Now, add your chosen yeast. This is called pitching the yeast. Install an airlock after aeration. An airlock allows carbon dioxide to escape. It keeps oxygen and contaminants out. Store your fermenter for a week at room temperature. This is the primary fermentation period. The yeast gets to work converting sugars into alcohol.
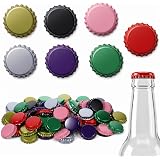
Bottling and Carbonation
After primary fermentation, it’s time to bottle your beer. You’ll transfer the beer from the fermenter. Mix in priming sugar first. The priming sugar gives the yeast a small food source. It allows for carbonation in the bottle. Seal each bottle tightly. Store them at room temperature for one and a half weeks. This period is known as bottle conditioning. The yeast consumes the priming sugar. It produces carbon dioxide. This creates the fizz you expect in a beer. Imagine drinking flat beer. This conditioning step makes all the difference.
Following these detailed steps will guide you. You’ll be enjoying your homemade beer very soon. The process of homebrewing is rewarding. It offers endless possibilities for flavor exploration.
Fermenting Your Curiosities: A Q&A
What are the main ingredients needed to make beer?
The core ingredients for brewing beer are grain (like malted barley), hops, yeast, and water. Priming sugar is also added later for carbonation.
What is the purpose of yeast in homebrewing?
Yeast is a living microorganism that consumes the sugars in your wort, converting them into alcohol and carbon dioxide. This process transforms the sugary liquid into beer.
What happens during the ‘mashing’ step of brewing?
Mashing is when you combine ground grain with heated water, typically around 150 degrees Fahrenheit, for about 60 minutes. This allows enzymes to convert starches in the grain into fermentable sugars.
Why is sanitization so important when making beer at home?
Sanitization is crucial to prevent unwanted bacteria or wild yeasts from contaminating your beer after it has been boiled. This ensures your beer tastes clean and fresh, free from off-flavors.
Why do I need to add priming sugar before bottling my homemade beer?
Priming sugar is added before bottling to give the yeast a small food source. This allows the yeast to produce carbon dioxide within the sealed bottles, creating the natural fizz and carbonation in your finished beer.