Mastering Your First Homebrew: A Comprehensive Guide to Beer Brewing Excellence
Embarking on the journey of **homebrewing** can transform your appreciation for craft beer, offering both a rewarding hobby and delicious results. As demonstrated in the insightful video above featuring Vito Delucchi from MoreBeer!, creating exceptional beer at home is entirely achievable with the right knowledge and tools, especially with a Premium Homebrew Starter Kit. This detailed guide expands upon the essential steps and nuanced techniques highlighted in the video, providing a deeper understanding for every aspiring **beer brewing** enthusiast.Demystifying the Homebrewing Journey
The process of **homebrewing** beer can be logically broken down into three distinct phases, each crucial for the final product. Understanding these stages from the outset helps manage expectations and ensures a smooth operation. 1. **Brew Day**: This initial phase, typically lasting around four hours, involves creating the “wort.” Wort is essentially a sweet, unfermented malt sugar water, which will later become beer. This intensive period requires focused attention on various steps, from heating water to adding hops. 2. **Fermentation**: Spanning approximately two weeks, fermentation is largely a hands-off period where yeast converts the sugars in the wort into alcohol and carbon dioxide. This biological process demands patience and a controlled environment. 3. **Bottling**: The final stage, usually taking about an hour, involves packaging your beer into bottles, where it undergoes a secondary fermentation to achieve natural carbonation. In total, expect the entire **beer brewing** process, from starting brew day to enjoying your first carbonated bottle, to span three to four weeks. Remember that patience truly is a virtue in this craft; rushing any stage can compromise the beer’s quality.Essential Preparations for Your Brew Day
Before the main event, strategic preparation can significantly enhance your **homebrewing** experience, minimizing stress and maximizing efficiency.Assembling Your Homebrew Starter Kit
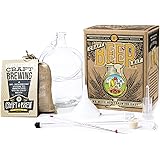
Firstly, upon acquiring your MoreBeer! Premium Homebrew Starter Kit, unpack and familiarize yourself with every component. Read through all provided instructions, including both the general brewing guide and your specific recipe sheet. Each kit may contain different malt extracts or hop varieties, such as a pale ale or an IPA, but the fundamental brewing steps remain consistent. Imagine if you meticulously reviewed your kit; you would feel confident and prepared for the entire process.Sourcing Your Bottles
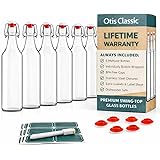
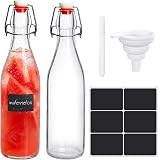
Secondly, consider your bottling needs well in advance. While the starter kit provides most brewing equipment, bottles are typically sourced separately. You can often collect suitable bottles from local breweries or reuse commercial beer bottles. Crucially, avoid “twist-off” bottle caps; only use bottles that require a bottle cap remover, as these are designed for effective sealing with a capper. Since bottling occurs several weeks after brew day, you have ample time to gather the necessary 50-54 bottles for a standard 5-gallon batch.The Golden Rule: Cleaning and Sanitizing
Perhaps the most critical aspect of successful **homebrewing** is meticulous cleaning and sanitizing. These are two distinct but equally vital processes. Cleaning involves the physical removal of visible dirt, debris, and krausen (fermentation foam) from all equipment. Sanitizing, conversely, is the invisible war against microbacteria and wild yeasts that can irrevocably spoil your beer. This is always a two-step process: you must clean before you sanitize. A piece of equipment cannot be truly sanitized if it is still visually dirty. Following cleaning, immerse or spray all equipment that will come into contact with your wort or beer with a sanitizing solution, ensuring at least one minute of contact time. Imagine if a tiny speck of unseen bacteria survived on your fermenter; it could easily turn your carefully crafted brew into an unpleasant, sour experience, far from the desired Belgian ale. Keeping sanitizing solution readily available throughout brew day and bottling day is paramount.Navigating Brew Day: Step-by-Step Excellence
With preparations complete and the golden rule firmly in mind, let’s delve into the actual brewing process, transforming simple ingredients into liquid gold.Water Selection and Heating
The quality of your water directly impacts the taste of your beer, as it constitutes the majority of your finished product. If your tap water tastes good on its own, it is generally suitable for **homebrewing**. However, if you detect off-flavors, consider using filtered or bottled water. A refrigerator’s filtration system can effectively remove chlorine, which can create phenolic off-flavors in beer. Aim to collect approximately six gallons of quality water, then transfer it to your brew kettle and begin heating it on high.The Art of Steeping Grains
Following this, almost immediately after turning on the heat, add your steeping grains, typically housed in a mesh bag. The goal here is to extract color, flavor, and some fermentable sugars, similar to brewing a large tea. Allow the grains to steep as the water slowly heats, but crucially, remove them before the temperature reaches 170 degrees Fahrenheit (approximately 77 degrees Celsius). Exceeding this temperature can extract undesirable tannins from the grains, leading to an astringent or bitter beer. While the natural inclination might be to squeeze the grain bag for every last drop, resist this urge to avoid burns and excess tannin extraction; simply hold it over the kettle to drain.Achieving a Rolling Boil
Once the steeping grains are removed, increase the heat to bring your wort to a vigorous, rolling boil. At sea level, this typically occurs around 212 degrees Fahrenheit (100 degrees Celsius). A true rolling boil is characterized by significant, churning activity across the entire surface of the liquid, much like when boiling pasta. This stage is vital for sterilizing the wort, isomerizing hop acids, and driving off undesirable volatile compounds.Integrating Malt Extract and Hop Additions
Next, turn off the heat before slowly adding the liquid malt extract. This step is critical because malt extract is denser than water and tends to sink, potentially scorching on the bottom of a heated kettle. Gentle stirring during addition helps integrate the extract evenly. Once dissolved, return the heat to high to re-establish a rolling boil. As the wort returns to a boil, you will observe the “hot break,” where proteins from the malt extract coagulate and foam at the surface. Lowering the flame or stirring can help manage this foam. Importantly, never place a lid on your kettle during the boil, as this prevents the escape of volatile compounds that would otherwise negatively impact your beer’s flavor profile. Hop additions are timed carefully to achieve specific characteristics in your beer. 1. **Bittering Hops**: Added at the beginning of the boil, typically for 60 minutes, these hops contribute significant bitterness due to the isomerization of alpha acids. This is when you start your boil timer. 2. **Aroma Hops**: Depending on your recipe kit, some hops might be added later in the boil (e.g., 15-30 minutes) to contribute more aromatic compounds. 3. **Flameout Additions**: These hops are added immediately after turning off the heat, providing maximum hop aroma without increasing bitterness. A gentle “whirlpool” motion can help integrate these for a vibrant hop bouquet. Additionally, a wort clarifier like Irish Moss or a “kick tablet” is often added towards the end of the boil (typically 15 minutes remaining). This ingredient helps bind proteins, leading to a clearer final product. Yeast nutrients can also be added at this point to support healthy yeast growth.Rapid Wort Chilling with a Wort Chiller
Upon completion of the boil and flameout additions, it is crucial to rapidly chill the wort to below 80 degrees Fahrenheit (27 degrees Celsius) before transferring it to the fermenter. Your kit’s wort chiller, essentially a heat exchanger, facilitates this by running cold water through a copper coil submerged in the hot wort. The speed of chilling depends on your ground water temperature; slower water flow allows for more efficient heat transfer. Rapid chilling is vital for several reasons. Firstly, it minimizes the risk of infection as the wort becomes susceptible to ambient microbacteria once it drops below 180 degrees Fahrenheit (82 degrees Celsius). Secondly, it helps prevent the formation of “chill haze,” which can cloud your finished beer. As the wort cools, it is good practice to cover the kettle with sanitized tin foil to protect it from airborne contaminants.The Critical Cold Side Sanitation
Once the wort temperature drops below 180°F, it enters the “cold side” of brewing, where everything coming into contact with it *must* be sanitized. This includes tubing, spoons, hydrometers, and the fermenter itself. Even invisible microflora can infect your beer, leading to off-flavors or spoilage. Ensure all equipment has had at least a minute of contact time with your sanitizing solution. Your goal is to create the cleanest possible environment for your yeast. Imagine if a contaminated utensil touched your chilled wort; it could introduce unwanted organisms that compete with your yeast, resulting in an undrinkable brew.Transferring to the Fermenter and Gravity Reading
After chilling the wort to below 80°F (though 90°F is acceptable as some temperature will be lost during transfer), connect sanitized tubing to your kettle’s spigot and place the other end into your sanitized fermenter. Open the valve to allow gravity to transfer the wort. Once transferred, it is time to measure your “original gravity” (OG) using a hydrometer. This instrument measures the density or viscosity of the wort, indicating its sugar content. Hydrometers are typically calibrated for readings at 65-70 degrees Fahrenheit (18-21 degrees Celsius), so ensure your wort is within this range for an accurate measurement. Pour a sample into a sanitized hydrometer jar, leaving enough space for the hydrometer to float freely without overflowing. Give the hydrometer a gentle spin to dislodge any air bubbles that could skew the reading. The reading at the liquid’s meniscus (the lowest point of the curve) is your original gravity. This measurement is crucial for later calculating your beer’s alcohol by volume (ABV).Pitching Your Yeast for Fermentation
With the wort safely in the fermenter and the original gravity recorded, it’s time to “pitch the yeast” – the magical organisms that convert sugar into alcohol and CO2, transforming wort into beer. Sanitize the yeast packet and a pair of scissors, then quickly cut open the packet and gently dump the yeast into the wort. After pitching, secure the lid and airlock onto the fermenter. Give the fermenter a good shake for about a minute. This step, known as aeration, oxygenates the wort, which is vital for yeast growth and health during the initial phase of fermentation. Fill the airlock with sanitizer solution (or vodka) to the indicated line. The airlock serves a critical function: it allows the CO2 produced during fermentation to escape while preventing any airborne contaminants from entering your fermenter.Optimal Fermentation Environment
The placement of your fermenter significantly impacts fermentation quality. For most ales, an ideal temperature range is 65-68 degrees Fahrenheit (18-20 degrees Celsius). This steady, cooler temperature promotes clean fermentation, minimizing undesirable off-flavors like excessive esters (fruity compounds) or fusel alcohols (harsh, solvent-like flavors). Choose a dark, stable environment like an inner closet or basement, as direct sunlight can also lead to “skunky” flavors. If your ambient temperature is too warm, consider placing the fermenter in a water bath with ice, wrapping it in a damp towel, or utilizing specific temperature control devices.The Transformative Phase of Fermentation
After brew day, the focus shifts to the yeast, which diligently works its magic over several weeks.The Active Stages of Fermentation (Days 1-7)
Within 24 to 48 hours of pitching, you should begin to see signs of active fermentation. The most prominent indicator is the formation of “krausen,” a thick, foamy layer on top of the wort. You might also observe yeast colonies moving within the solution and vigorous bubbling through the airlock. During this highly active period, yeast are rapidly consuming sugars and generating heat, making it especially important to maintain the desired temperature range. Controlling the temperature here is crucial for the yeast to produce balanced flavors rather than an abundance of undesirable byproducts.Maturation and Cleanup (Days 4-12)
Following the initial active phase, typically from day four through twelve, the krausen will begin to subside, and bubbling through the airlock will slow. While less visibly active, this stage is still incredibly important. The yeast are now reabsorbing and cleaning up various compounds they produced earlier, refining the beer’s flavor profile. While temperature control remains beneficial, it is less critical than during the peak of active fermentation.Confirming Fermentation Completion
Fermentation is complete when yeast activity visibly ceases, meaning the krausen has dropped, and there’s minimal to no bubbling in the airlock. To confirm this scientifically, take two consecutive gravity measurements (using your hydrometer) over 24-48 hours. If the readings are identical, indicating a stable “final gravity” (FG), then fermentation has successfully concluded. If the gravity continues to drop, allow more time for the yeast to finish their work. This final gravity reading, along with your original gravity, is essential for calculating the beer’s ABV.Bottling Your Brew: Capturing Carbonation
With fermentation complete, the final step involves packaging your beer and preparing it for carbonation.Preparation for Bottling Day
Firstly, several hours before bottling, carefully move your fermenter to a higher surface, such as the edge of a table or counter. Allow it to sit undisturbed for at least 20 minutes; this allows any yeast sediment and krausen dislodged during the move to settle back to the bottom. Meanwhile, prepare your priming sugar solution. In a small saucepan, boil two cups of water and then stir in the priming sugar packet that came with your kit until fully dissolved. Allow this solution to cool completely, covering it with sanitized tin foil to maintain sanitation.Comprehensive Sanitation for Bottling Equipment
Secondly, dedicate ample time to sanitizing all bottling equipment. Mix one ounce of sanitizer solution with five gallons of water in your bottling bucket, ensuring the spigot is closed. This solution will be used for all subsequent equipment. Thoroughly sanitize your vinyl tubing, bottle filler, bottle caps, and, crucially, all your empty bottles. Ensure each item receives at least one to two minutes of contact time with the sanitizer.Final Gravity Measurement and Priming Sugar Addition
Before transferring the beer, draw a final gravity sample from the fermenter into your hydrometer jar. Take this critical measurement, as it will be used to calculate your beer’s final ABV. After taking the sample, empty the sanitizer solution from your bottling bucket (a little foam is fine). Pour the cooled priming sugar solution into the bottom of the bottling bucket. Adding it first ensures it will thoroughly mix with the beer as it transfers, providing even carbonation.Transferring Beer to the Bottling Bucket
Next, connect your sanitized tubing to the fermenter’s spigot and run the other end into the bottling bucket, which now contains the priming sugar solution. Cover the top of the bottling bucket with sanitized tin foil. Open the fermenter’s spigot to allow the finished beer to flow via gravity into the bottling bucket. This gentle transfer minimizes oxygen exposure and ensures the beer mixes evenly with the priming sugar.Sanitizing and Filling Bottles
With your bottling bucket primed, it’s time to sanitize your bottles. Submerge as many bottles as possible in the sanitizer solution for the required contact time. Remove them, allowing them to drain upside down on a bottle tree or clean surface. Covering the drained bottles with sanitized tin foil until use helps maintain sterility. Attach your sanitized bottling wand to the spigot of the bottling bucket (which should now be elevated). Place the bottle under the wand, pressing the spring-loaded tip against the bottom of the bottle. Fill each bottle completely to the top; as you remove the wand, it displaces liquid, leaving the perfect headspace for carbonation.Capping and Bottle Conditioning
Immediately after filling, place a sanitized bottle cap on each bottle. Use your bottle capper to securely crimp the cap onto the bottle, ensuring a tight seal. After capping, a quick rinse of the bottle can remove any sticky residue. Place your filled bottles back into their cases, protecting them from direct sunlight, which can cause lightstruck flavors. Store them in a cool, stable temperature environment, similar to your fermentation space. This initiates a secondary fermentation within the bottle, where the priming sugar is converted into the CO2 that carbonates your beer. This “bottle conditioning” typically takes one to two weeks.Calculating Your Beer’s ABV
With both your original gravity (OG) and final gravity (FG) measurements, you can now accurately calculate your beer’s alcohol by volume (ABV) using the formula: (Original Gravity – Final Gravity) * 131. This calculation not only gives you a sense of your beer’s strength but also provides valuable data for future **beer brewing** endeavors.The Anticipation of Conditioning and Tasting
After approximately two weeks of bottle conditioning, your beer should be carbonated. To test, select one bottle, chill it in the refrigerator overnight (24 hours), then open it. A satisfying fizz, a good head of foam, and a clear, pleasant aroma indicate successful carbonation. If it meets your expectations, chill the rest of your bottles, and they are ready to be enjoyed.From Grain to Glass: Savoring Your Homebrewed Creation
Completing the journey from raw ingredients to a delicious, carbonated beer is an incredibly satisfying achievement. Each sip represents your dedication to the art of **homebrewing**, offering a unique taste that’s truly your own. Share your creations, experiment with new recipes, and continue to explore the vast and rewarding world of **beer brewing**. Cheers to your handcrafted success!Tapping Into Your Homebrewing Questions
What is homebrewing?
Homebrewing is the process of making your own beer at home, turning raw ingredients into a finished craft beer. It’s a rewarding hobby that allows you to create unique and delicious results.
What are the main stages of making beer at home?
The homebrewing process is divided into three main stages: Brew Day, where you create the unfermented liquid called wort; Fermentation, where yeast converts sugars into alcohol; and Bottling, which packages the beer for natural carbonation.
How long does the entire homebrewing process usually take?
From starting Brew Day to enjoying your first carbonated bottle, the complete homebrewing process typically spans three to four weeks.
Why is cleaning and sanitizing so important when homebrewing?
Meticulous cleaning and sanitizing are crucial to prevent your beer from spoiling. Cleaning removes visible dirt, while sanitizing eliminates invisible microbacteria and wild yeasts that can introduce off-flavors.