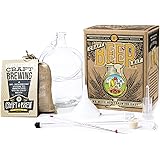
Brewing your own beer at home is a rewarding experience, and tackling a German Pilsner, especially with an easy lager fermentation method, can seem daunting. However, as demonstrated in the video above, achieving a crisp, clean lager is entirely within reach for homebrewers of all experience levels. This guide will expand on the techniques and insights from the video, helping you master the nuanced art of brewing this classic style without the traditional lengthy lagering times.
Understanding Your Ingredients: The German Pilsner Foundation
A German Pilsner, known for its pale color, clean malt profile, and noble hop character, relies heavily on its core ingredients. In the video, nine pounds of Pilsner malt and one pound of Great Chit were used, creating a sturdy foundation for the beer. Pilsner malt provides the light body and subtle sweetness characteristic of the style.
Great Chit malt, though not always a standard Pilsner ingredient, can aid in head retention and mouthfeel, contributing to a more satisfying drinking experience. The specific choice of malts, particularly from local malthouses like Riverbend Malthouse, ensures high-quality fermentables. Furthermore, the video briefly touched upon crushing grains. While recipe kits often come double-crushed for convenience, re-crushing can further improve efficiency by allowing more starches to be converted into fermentable sugars, potentially leading to a slightly higher alcohol content.
The Mashing Process: Extracting Sweetness and Building Body
Mashing is the crucial step where malt starches are converted into fermentable sugars. The video highlights a mash temperature of 149°F, which is ideal for a German Pilsner as it promotes the activity of beta-amylase enzymes. This enzyme primarily produces highly fermentable sugars, resulting in a drier beer with a crisp finish.
Recirculation, as shown with the grain valve and pump, serves two critical functions. First, it significantly improves efficiency by continuously washing the grain bed, ensuring maximum sugar extraction. Second, it maintains a consistent temperature throughout the mash, preventing hot or cold spots that could negatively impact enzymatic activity. While the video featured an abbreviated 30-minute mash for demonstration, standard German Pilsner recipe kits typically call for a 60-minute mash to ensure complete conversion.
Mash Out: Halting Enzyme Activity
Following the mash, a “mash out” step is performed by raising the temperature to around 170°F. This process effectively deactivates the enzymes that convert starches, locking in your sugar profile. Additionally, a mash out reduces the viscosity of the wort, making it easier to sparge (rinse the grains) and improving overall efficiency. It’s a simple yet impactful step in optimizing your brew day.
Efficient Wort Separation and Hop Additions
After the mash out, separating the sweet wort from the spent grains is the next stage. The video demonstrates using grain hooks to lift the basket, allowing the wort to drain. Pressing the grains, even with a simple pot lid, extracts additional wort, minimizing waste and maximizing your yield. The goal is to leave as little fermentable sugar behind as possible.
Bringing the wort to a boil, especially with a 120V system, requires strategic approaches. Using an insulation jacket and a lid spacer helps retain heat and allows steam to escape, significantly speeding up the heating process. This is particularly useful for those brewing on standard household circuits, which are typically limited to 15 amps and 1650 watts.
The Art of Hop Additions: Flavor and Clarity
Hops play a vital role in balancing the malt sweetness and contributing aroma and flavor. The video introduces “first wort hops,” an intriguing technique where a portion of the hops is added directly to the kettle as it heats to a boil, before the actual boil begins. This method can result in a smoother bitterness and enhanced hop aroma, integrating hop character more seamlessly into the beer’s profile. German Noble hops, like the Saphir used in the video, are classic choices for a German Pilsner, offering floral, spicy, and slightly fruity notes.
During the boil, additional hops are added to contribute bitterness and aroma. A Whirlfloc tablet, a popular brewing aid, is introduced towards the end of the boil. This tablet helps to coagulate proteins, leading to a clearer final beer by reducing haze-forming particles. Agitating the hop basket ensures the hops are fully submerged and their compounds are effectively extracted. The final hop addition, another ounce of Saphir, is typically added shortly before the end of the boil to preserve delicate aroma compounds.
Chilling and Fermentation: The Yeast’s Domain
Rapidly chilling the wort after the boil is crucial for preventing off-flavors and ensuring a clean fermentation. A plate chiller, as demonstrated in the video, is an efficient tool for this. Cold water runs counter-current to the hot wort, quickly bringing the temperature down to pitching levels. Proper setup of the plate chiller with wort in/out and water in/out connections is essential for effective heat exchange.
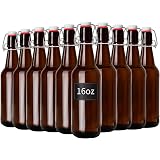
Once chilled, the sweet wort is transferred to a sanitized fermenter. The video correctly emphasizes the importance of sanitation, mentioning PBW (Powdered Brewery Wash) for cleaning and Starsan for sanitizing. This critical step prevents unwanted bacteria or wild yeasts from contaminating your brew. As the narrator aptly states, “Brewers don’t make beer. They make wort. Yeast makes beer.” This highlights the pivotal role of yeast in converting the wort’s sugars into alcohol and carbon dioxide.
For a German Pilsner fermented at colder temperatures, pitching two packets of yeast is recommended. This ensures a sufficient cell count for a healthy and complete fermentation, which is especially important for lagers, as they ferment slower and at lower temperatures. After pitching the yeast, an airlock is attached to the fermenter, allowing CO2 to escape while preventing oxygen and contaminants from entering.
Taking Your Original Gravity (OG) Reading
Before fermentation begins, taking an Original Gravity (OG) reading is a standard practice. Using a hydrometer, the video shows an OG of approximately 1.040 (or 1039). This measurement indicates the sugar content of the wort before yeast activity and is essential for calculating the beer’s final alcohol by volume (ABV).
The Easy Lager Fermentation Method: A Modern Approach
Traditional lagering involves holding beer at very cold temperatures, typically around 33°F, for an extended period of 7-8 weeks. This long conditioning period is what gives lagers their characteristic crispness, clarity, and smooth flavor profile by allowing yeast and other particles to settle out and subtle off-flavors to diminish. However, this process requires dedicated temperature control and significant patience, which can be a barrier for many homebrewers.
The “easy lager fermentation method” described in the video offers a pragmatic alternative. By fermenting the German Pilsner at a cooler temperature, such as in a crawl space, some of the benefits of traditional lagering are achieved without the stringent cold storage requirements for weeks on end. While the beer tasted in the video had only been “lagered” for about four days, it still yielded a positive result, albeit with some “fruity notes” and an “appley kind of a taste” that would typically clean up with a full lagering period. This demonstrates that even a simplified approach can produce enjoyable results, especially for those new to brewing lagers, making the experience more accessible.
Easy Lagering, Crisp Answers: Your German Pilsner Q&A
What is a German Pilsner?
A German Pilsner is a classic beer style known for its pale color, clean malt profile, and the distinctive aroma and flavor contributed by noble hops.
What is the purpose of mashing when brewing beer?
Mashing is the step where starches from the malted grains are converted into fermentable sugars. These sugars are essential because the yeast will later consume them to produce alcohol.
Why is it important to chill the wort quickly after boiling?
Rapidly chilling the wort after boiling is crucial to prevent the development of off-flavors and to ensure a clean fermentation. It also brings the wort to the proper temperature for yeast to be added.
What is the “easy lager fermentation method”?
This method allows homebrewers to ferment lagers at cooler temperatures without the traditional long, extended cold storage (lagering) period. It makes brewing lagers more accessible and quicker.
Why is sanitation so important in homebrewing?
Sanitation is critical to prevent unwanted bacteria or wild yeasts from contaminating your beer. Properly cleaning and sanitizing equipment ensures a clean fermentation and a good-tasting final product.