For many, the journey into brewing one’s own beer might seem daunting, yet the satisfaction of crafting a unique beverage cannot be overstated. Approximately 1.1 million Americans engage in homebrewing, driven by a desire for custom flavors and a rewarding DIY experience. While commercially available beers often cater to broad tastes, the true beauty of making your own lies in complete control over the final product. Imagine if every beer you tried was perfectly tailored to your palate; this is the promise of homebrewing.
The French Saison, often referred to as a farmhouse ale, stands out as an ideal starting point for anyone looking to brew their first homemade beer. This particular style is forgiving and delicious, making it perfect for beginners. The yeast utilized in this recipe thrives at typical room temperatures, which means no fancy temperature-controlled fermentation chambers are required, simplifying the process significantly.
Embarking on Your Brewing Journey: Why Craft Your Own Beer?
The appeal of brewing your own beer extends far beyond mere cost savings; it is deeply rooted in personalization. If a brewer finds that many commercial offerings do not quite hit the mark, the ability to create precisely what is desired becomes a compelling motivation. The creative freedom involved allows for experimentation with flavors, aromas, and textures, resulting in a truly unique beverage.
Furthermore, the process itself is immensely rewarding. The transformation of simple ingredients into a complex, effervescent drink is a fascinating scientific and culinary endeavor. This hands-on project offers a profound sense of accomplishment, especially when a delicious, perfectly carbonated glass of homemade beer is poured for the first time.
Essential Equipment for Beginner Homebrewing
Before any brewing can commence, the right tools are certainly needed. While the list might appear extensive, these are investments in countless future batches of homemade beer. A detailed document outlining all necessary items is often provided by brewers, assisting newcomers in gathering what is required.
Key Fermentation and Boiling Gear
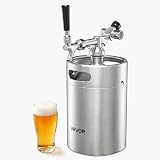
- **Fermenter:** A 6.5-gallon carboy is typically used for a 5-gallon batch. The extra headspace is crucial to accommodate the krausen, a thick foam that forms during vigorous fermentation, preventing overflows.
- **Airlock and Stopper:** These components are essential for allowing fermentation gases to escape without letting unwanted air or contaminants into the beer. They create a one-way valve for your fermenter.
- **Large Brew Pot:** A pot capable of holding at least 5 gallons is necessary for boiling the wort. This ensures sufficient volume for a standard batch size, allowing for expansion during boiling without spilling.
- **Muslin Grain Sack:** Used for steeping grains, this bag prevents grain particles from entering the wort, which could lead to off-flavors or difficulties in clarification. Its reusability makes it a practical choice.
- **Racking Cane:** This long, rigid tube is indispensable for transferring beer from the fermenter to bottles or another vessel without disturbing the yeast sediment at the bottom.
Additional Practical Tools
- **Sanitizer:** A food-grade sanitizer, such as Star San or iodophor, is non-negotiable. Its proper use prevents bacterial contamination, which can ruin a batch of beer.
- **Thermometer:** Accuracy in temperature is vital, especially during steeping and cooling. A reliable thermometer ensures optimal conditions for enzyme activity and yeast pitching.
- **Long Stirring Spoon:** Used for mixing ingredients, particularly during the boil, to prevent scorching and ensure even distribution.
- **Bottle Filler & Bottle Capper:** These tools simplify the bottling process. A bottle filler minimizes oxygen exposure, and a capper securely seals bottles for conditioning.
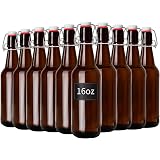
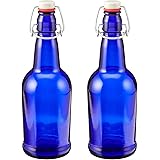
- **Bottles & Caps:** Clean, sanitized bottles and fresh caps are needed for packaging the finished beer. Glass bottles designed for carbonated beverages are recommended.
The Golden Rule of Homebrewing: Sanitization Above All Else
Every seasoned brewer will emphasize the paramount importance of sanitization. Imagine meticulously following a recipe, only for the entire batch of homemade beer to be ruined by a single rogue microorganism. This is precisely why every piece of equipment that will come into contact with the wort *after* it has been boiled must be thoroughly sanitized.
Failure to sanitize properly introduces a significant risk of infection. This does not typically refer to health hazards to the consumer but rather to the beer itself. Unwanted bacteria or wild yeast can cause off-flavors (sour, vinegary, phenolic), cloudiness, or even complete spoilage, rendering the beer undrinkable. For instance, if a fermenter is not properly cleaned and sanitized, the beer could develop an unpleasant buttery taste due to diacetyl-producing bacteria. Therefore, sanitizing everything from the carboy to the airlock and even the scissors used to open the yeast pack is absolutely critical for a successful brew.
Ingredients for Your Flavorful French Saison
The specific ingredients chosen for a beer recipe are what ultimately define its character. For this French Saison, a careful selection of grains, yeast, hops, and spices is used to create its distinctive profile. Local homebrew shops are invaluable resources; they often crack grains for you and offer expert advice, simplifying ingredient procurement significantly.
Grains: The Foundation of Flavor and Body
The combination of various cracked grains contributes significantly to the beer’s color, body, and fermentable sugars. Local shops, like SoCo Homebrew mentioned in the video, are excellent for obtaining these. For a typical Saison, a blend like this is used:
- **1.5 pounds of Belgian Pilsen:** This is the base malt, providing the primary fermentable sugars and a clean, crisp foundation.
- **12 ounces of German Wheat:** Wheat malt contributes to head retention and a slightly hazy appearance, often adding a subtle bready character.
- **12 ounces of Aromatic Wheat:** As the name suggests, this malt enhances the aroma profile, bringing a more pronounced bready or toasty note.
- **8 ounces of Special Roast:** This specialty malt adds complex flavors of toasted bread, biscuits, and sometimes a hint of coffee or chocolate, deepening the beer’s profile.
- **4 ounces of Caramunich Malt:** Caramunich adds rich caramel and toasted notes, contributing to body and a reddish hue, while also providing unfermentable sugars for residual sweetness.
Yeast: The Heart of Fermentation
The choice of yeast is arguably the most critical ingredient, as it dictates the fermentation characteristics and much of the beer’s flavor. For this Saison, the Wyeast 3711 French Saison yeast is specifically recommended. This particular strain is known for its robust fermentation, high attenuation (meaning it ferments most of the sugars), and production of fruity and spicy esters that are characteristic of the Saison style. It is important not to substitute this with bread yeast or sourdough starter, as they will not produce the desired flavor profile or fermentation characteristics. The convenience of a “slap pack” means the yeast is activated simply by giving it a gentle tap and allowing it to swell at room temperature for a few hours before use.
Hops and Spices: Aroma and Bitterness
Hops provide bitterness to balance the malt sweetness and contribute aromatic notes. For this recipe, two distinct hop varieties are used:
- **Sorachi Ace hops:** Known for their unique lemon, dill, and coconut characteristics, these hops add a distinctive, modern twist to the Saison. They are typically added early in the boil for bitterness.
- **Styrian Goldings hops:** These European hops offer a classic spicy, earthy, and floral aroma, commonly used for their late-addition aromatic qualities.
In addition to hops, specific spices are incorporated to enhance the Saison’s complexity:
- **3 grams of Grains of Paradise:** These African seeds impart a peppery, citrusy, and slightly piney flavor, complementing the yeast esters.
- **10 grams of Coriander:** A common spice in Saisons and Belgian whites, coriander contributes a bright, citrusy, and slightly spicy note.
- **65 grams of peeled sliced fresh Galangal (or Ginger):** Galangal, akin to ginger, adds a pungent, citrusy, and peppery kick, providing a refreshing zing to the beer. Wrapping these spices in cheesecloth makes for easy removal after the boil.
Liquid Malt Extract: Supplemental Sugars
To boost the fermentable sugar content without adding more grain, 5 pounds of Pilsen Light liquid malt extract is used. This concentrated sugary liquid is primarily composed of malted barley sugars, making it an efficient way to achieve the desired alcohol content and body in the beer. Once dissolved and boiled with the other ingredients, this liquid becomes known as the “wort.”
Brew Day: Crafting Your Wort for Homemade Beer
The actual process of making beer, often referred to as ‘brew day,’ involves several critical steps that transform raw ingredients into the sugary liquid called wort. Precision in temperature and timing is paramount during this phase.
Steeping the Grains: Extracting the Goodness
First, the muslin grain sack is filled with the cracked grains: 1.5 pounds of Belgian Pilsen, 12 ounces of German Wheat, 12 ounces of Aromatic Wheat, 8 ounces of Special Roast, and 4 ounces of Caramunich Malt. This sack is then immersed into 3 gallons of water that has been heated to 160 degrees Fahrenheit. The grains are dunked in and out to ensure full hydration before steeping for one hour, with the temperature meticulously maintained. This steeping process allows the grains to release their complex sugars, flavors, and colors into the water, creating a flavorful base for the beer. However, it is crucial not to squeeze the grain sack when removing it; squeezing can extract undesirable tannins from the grain husks, leading to astringent off-flavors in the finished beer. Instead, 4 cups of hot water are slowly strained through the bag to rinse out any remaining sugars, then the spent grains are discarded.
The Boil: Sterilization and Flavor Development
The liquid, now enriched with sugars from the grains, is brought to a vigorous boil. At this point, 5 pounds of Pilsen Light liquid malt extract are added, dissolving into what is now officially known as the wort. The boil serves several purposes: it sterilizes the wort, concentrates the sugars, extracts bitterness and aroma from the hops, and helps coagulate proteins, leading to a clearer final product.
Once the boil commences, a timer is set for one hour. Half an ounce of Sorachi Ace hops is added immediately, contributing bitterness and a unique citrusy profile. With 20 minutes remaining in the boil, the spices – 3 grams of grains of paradise, 10 grams of coriander, and 65 grams of peeled sliced fresh galangal (or ginger) – are wrapped in cheesecloth, tied with kitchen twine, and added to the boiling wort. These spices infuse the beer with their distinctive aromatics. Finally, with just 10 minutes left, 1 ounce of Styrian Goldings hops is introduced, primarily for its aromatic contribution, which tends to be more volatile and is preserved better with later additions.
Cooling and Transfer: A Critical Transition
After the full 60-minute boil, the wort must be cooled rapidly to 80 degrees Fahrenheit before yeast can be added. This rapid cooling is vital to prevent bacterial contamination and to minimize the formation of undesirable off-flavors, such as DMS (dimethyl sulfide), which can impart a corn-like taste. An ice bath in the kitchen sink is a common and effective method for cooling the brew pot quickly. It must be noted that during this cooling phase, the wort is in its most fragile state, highly susceptible to infection; therefore, nothing unsanitized should touch it.
Once the wort reaches the target 80 degrees Fahrenheit, it is carefully funneled into a thoroughly sanitized 6.5-gallon carboy. Filtered water is then added to top off the fermenter, ensuring it reaches the 5-gallon mark. While optional for beginners, many brewers at this stage measure the specific gravity with a hydrometer. This reading, ideally around 1.050, provides an initial density measurement that, when compared to the final gravity after fermentation, allows for the calculation of the beer’s alcohol content.
Fermentation: Where the Magic of Homemade Beer Happens
With the wort cooled and transferred, it is time for the yeast to work its magic, transforming sugary liquid into alcoholic beer. This process requires patience and a proper environment.
Pitching the Yeast: Activating the Process
The Wyeast 3711 French Saison yeast, having been activated by a “slap” and allowed to puff up at room temperature, is now ready. The yeast pack and a pair of scissors must first be sanitized to prevent any contamination. A small corner of the pack is then snipped, and the liquid yeast is carefully poured directly into the wort in the carboy. Following this, a prepared airlock and its stopper are securely fitted onto the fermenter, creating a sealed environment that allows CO2 to escape while keeping airborne contaminants out. Imagine if the yeast, which is a living organism, were exposed to bacteria from an unsanitized surface; the beer’s flavor profile could be entirely altered for the worse.
The Fermentation Period: 14 Days in Darkness
The carboy, now containing the pitched yeast and wort, is then placed in a dark area, away from any direct sunlight, and allowed to ferment at room temperature for 14 days. Sunlight is detrimental to beer, especially hops, as it can cause a reaction that results in “skunking,” an off-flavor reminiscent of skunk spray. Therefore, ensuring complete darkness, perhaps by covering the fermenter with a blanket or placing it in a closet, is crucial for preserving the beer’s intended flavor. During this period, several positive signs of fermentation should become apparent after the first few days:
- **Airlock Bubbling:** This indicates that carbon dioxide, a byproduct of yeast activity, is being produced and escaping through the airlock.
- **Foamy Head (Krausen):** A thick layer of foam will form on top of the beer. This krausen is composed of yeast, proteins, and hop resins, and its presence signifies active fermentation.
- **Yeast Cake:** At the bottom of the fermenter, a layer of sediment known as the yeast cake will begin to form. This consists of dormant yeast cells and other precipitated solids.
These are all indicators that the brewing process is on track, and the yeast is diligently converting sugars into alcohol and CO2.
Bottling and Conditioning Your Homemade Beer
After the 14-day primary fermentation, the beer is almost ready, but a few more crucial steps are needed to achieve carbonation and maturation.
Sanitization (Again!): Protecting Your Creation
Just as in the initial stages, sanitization is paramount for bottling. Every single item that will touch the beer, including bottles, caps, the bottle capper, the auto-siphon, and the bottle filler, must be meticulously cleaned and sanitized. Failure at this stage means risking infection after all the hard work, leading to potentially spoiled beer or off-flavors. Imagine the disappointment of perfectly brewed beer turning sour due to an unsanitized bottle.
Priming for Carbonation: The Fizz Factor
For the beer to become effervescent, priming sugar must be added to each bottle. This provides a small amount of fermentable sugar for the remaining yeast in the beer to consume, creating carbon dioxide within the sealed bottle. Many brewers, like the speaker, prefer conditioning tablets (pure corn sugar) because of their ease of use and precise dosing; typically, four to five tabs are used per bottle. These tablets ensure consistent carbonation across the batch without the need for complex calculations or bulk priming.
Siphoning and Filling: A Gentle Transfer
To fill the bottles, an auto-siphon is connected to the racking cane, and a bottle filler is attached to the other end. The racking cane is carefully placed into the fermenter, ensuring it does not touch the bottom where the yeast cake, or “trub,” resides. The trub is a muddy mixture of spent yeast, hop particles, and other solids that can impart undesirable flavors and cloudiness if transferred into the bottles. The siphon is initiated, and gravity then assists in filling the bottles. The bottle filler has a spring-loaded tip that allows beer to flow when pressed against the bottom of a bottle and stops when released. Each bottle is filled completely to the top; as the bottle filler is removed, the liquid level naturally drops to the ideal headspace, leaving enough room for carbonation without risking overpressure. This process is repeated for all bottles, and any underfilled bottles should be avoided to ensure proper carbonation.
Bottle Conditioning: The Final Transformation
Once filled, the bottles are sealed using a bottle capper. This step is often enjoyed more with a friend, as it can be a repetitive task. The capped bottles are then placed back into a dark area, such as a box, and allowed to bottle condition at room temperature for a minimum of 3 weeks. The box provides protection in the unlikely event that a bottle over-carbonates and breaks, though this is rare with proper priming. During this period, the residual yeast consumes the priming sugar, generating CO2 which dissolves into the beer, creating natural carbonation. After these 3 weeks, the bottles are moved to the refrigerator for at least 24 hours. This cold conditioning phase helps the CO2 dissolve more fully, clarifies the beer by dropping out any remaining yeast, and ensures the flavors meld and mature properly. The cold also significantly slows any remaining yeast activity, stabilizing the beer.
Enjoying Your Craft: The Rewards of Homemade Beer
After weeks of careful work and patient waiting, the moment arrives to savor the fruits of labor. With a bottle opener, your first perfectly chilled, homemade beer can be poured and enjoyed. This experience offers not just a drink, but a profound sense of pride and accomplishment. Imagine raising a glass of beer you personally crafted, sharing it with friends, and relishing the unique flavors that only you could create. The beauty of brewing your own homemade beer truly lies in this level of control and the pure joy of making something entirely your own.
Brewing Up Answers: Your First Homemade Beer Q&A
What is homebrewing?
Homebrewing is the process of making your own beer at home. Many people enjoy it for the custom flavors and the satisfying experience of crafting their own beverage.
What kind of beer is good for beginners to brew?
The French Saison, also called a farmhouse ale, is recommended for beginners. It’s a forgiving style, and the yeast used works well at room temperature without special equipment.
What is the most important thing to remember when homebrewing?
Sanitization is extremely important. Every piece of equipment that touches the beer after it’s boiled must be thoroughly cleaned and sanitized to prevent contamination and off-flavors.
How does homemade beer get its fizz or carbonation?
To get fizz, a small amount of priming sugar is added to each bottle before sealing. The yeast in the beer then consumes this sugar, creating carbon dioxide within the bottle, which makes the beer fizzy.