Brewing a Lager on Your Kitchen Stove: An Accessible Guide for Beginners
For many aspiring homebrewers, the idea of brewing a lager can seem daunting. Traditional lagering processes often require specialized equipment, significant space, and a commitment of several months. However, as demonstrated in the video above, brewing a delicious, all-grain lager can be achieved right in your kitchen with minimal fuss and expense. This guide is designed to complement the video, offering expanded insights and practical advice for beginners looking to craft their own crisp, refreshing beer without the need for a dedicated cold-storage setup.Simplifying Lager Brewing for the Home Enthusiast
Brewing a lager is often perceived as a complex undertaking, largely due to the “lagering” process itself. This traditional method involves storing the beer at cold temperatures (typically 1-2°C or 34-36°F) for extended periods—often one to two months, or even longer. This cold conditioning allows for the yeast to slowly clean up any off-flavors, clarify the beer, and develop its signature crispness and purity. However, this essential step, while beneficial for traditional lager profiles, is not always feasible for everyone. Many homebrewers, especially those living in apartments or with small fridges, simply do not have the space to accommodate a 5-liter bottle or mini-keg for such an extended duration. This recipe bravely offers a beginner-friendly solution by bypassing the traditional lagering phase. Instead, a specific yeast strain, SafLager W-3470, is utilized, which has been shown to ferment effectively and cleanly at room temperature. This innovative approach allows a quality lager-style beer to be produced using a standard ale fermentation process: two weeks at room temperature, followed by two weeks of carbonating and conditioning. This significantly reduces the time and equipment demands, making homebrewing a lager much more accessible.Essential Equipment for Your Stove Top Lager
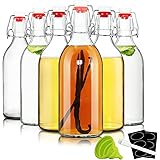
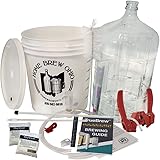
Getting started with all-grain **brewing a lager** on your kitchen stove requires a combination of common kitchen items and a few specialized, yet affordable, brewing tools. Most of the necessary equipment can be found readily, ensuring that the initial investment remains low. * **Pots:** Two large pots are needed for this 4.5-liter batch. An 8-liter pot is ideal for mashing and boiling, while a 5-liter pot is used for heating sparge water. Standard stainless steel pots from stores like IKEA are generally quite affordable, often around £15 each. * **Thermometer:** Precise temperature control is crucial in brewing, especially during the mash. A basic digital thermometer, available for under three pounds, is perfectly sufficient. This tool ensures that your mash is maintained at the correct temperature for optimal starch conversion. * **No-Rinse Sanitiser:** This is arguably the most vital item in your brewing arsenal. Infection can quickly ruin an entire batch of beer, leading to unpleasant off-flavors. A no-rinse sanitiser simplifies the process, making it easy to ensure all equipment that touches the cooled wort or beer is completely sterile. This helps guarantee a clean and delicious final product. * **Siphon:** Transferring your wort or beer cleanly, without introducing oxygen or disturbing sediment, is important. A siphon with a pump action and a long silicone tube attachment can make this process incredibly simple and efficient, ensuring clear transfers to bottles or kegs. * **Bottles:** 500ml swing-top bottles are convenient for their reusability and ease of sealing, but any sturdy bottles capable of withstanding about 5 psi of pressure will work. Alternatively, a 5-liter mini keg can also be a great option for storage and serving. * **Mashing Net:** This inexpensive item simplifies the all-grain process by containing the malt during mashing, making it easy to separate the grains from the wort. It functions similarly to a ‘brew in a bag’ system on a smaller scale. * **Ice:** Used for rapid chilling of the wort after the boil. This quick cooling helps prevent off-flavors and reduces the risk of infection, contributing to a cleaner tasting lager. **Non-Essential, But Recommended Tools:** * **Bottled Water:** While tap water can be used, bottled water often provides a cleaner slate, free from chlorine or chloramines that can negatively impact beer flavor. Understanding basic water chemistry can significantly elevate your **brewing a lager** experience. * **Hydrometer:** This tool measures the specific gravity of your wort and beer, allowing you to track fermentation progress and calculate the final alcohol by volume (ABV). It provides valuable insight into your brew’s development. * **Spray Bottle:** Filled with sanitiser solution, a spray bottle is excellent for quickly sanitizing smaller tools, bottle caps, or work surfaces throughout the brewing day.Key Ingredients for Your Lager
The beauty of **brewing a lager** with this all-grain recipe lies in its simplicity. Only a few core ingredients are needed to produce a flavorful beer. * **Lager Malt (880 grams):** This recipe uses 100% lager malt, which is a very lightly kilned barley malt. It forms the backbone of the beer, providing fermentable sugars and contributing to the light, clean flavor profile characteristic of lagers. For a 4.5-liter batch, 880 grams of malt will typically yield an ABV around 5%. * **Saaz Hops (8 grams):** Saaz hops are a classic European noble hop variety, renowned for their delicate, spicy, floral, and earthy aromas. In this recipe, the hops are added at three different stages during the 90-minute boil, contributing a bitterness level of approximately 15 IBU (International Bitterness Units). To provide context, beers like Budweiser and San Miguel have an IBU around 12, while Heineken is closer to 22 and Stella Artois around 30. A 15 IBU lager is considered to have a medium bitterness, balancing the malt sweetness without being overly hoppy. * **SafLager W-3470 Dry Yeast (4.1 grams):** This specific dry lager yeast is a cornerstone of this simplified recipe. Unlike many lager yeasts that require cold fermentation, W-3470 has been experimentally proven to ferment cleanly and effectively at room temperature, producing a lager-like profile without the need for dedicated cold-fermentation equipment. This yeast minimizes the production of undesirable fruity esters, even at warmer temperatures, which is critical for a crisp lager. * **Finings:** Since traditional lagering is skipped, fining agents are added to help clarify the beer. These products, such as Mangrove Jack’s finings, work by attracting and binding to haze-forming particles (like yeast cells and proteins), causing them to settle out of the beer more quickly. This results in a clearer finished product, enhancing its visual appeal. * **Carbonation Drops:** These small, pre-measured sugar pellets make bottling and carbonation incredibly easy. Each drop contains roughly 3 grams of dextrose. For a 330ml bottle, one drop is typically sufficient, while two drops are recommended for a 500ml bottle to achieve proper carbonation during the two-week conditioning phase. Dextrose (corn sugar) can also be used, measured out precisely for an even carbonation across the batch.The Step-by-Step Brewing Process for Lager
**Brewing a lager** at home, even with a simplified method, involves several key stages. Each step contributes to the final quality and flavor of your beer.Mashing In and Mashing Out
First, 4.5 liters of water in the larger pot and 4 liters in the second pot are heated to 70°C (158°F). The mashing net is then fitted into the main pot, and 880 grams of lager malt are added. The malt is stirred thoroughly to break up any clumps, creating a porridge-like consistency. The mash is then held as close to 64°C (147°F) as possible for 60 minutes. This temperature is crucial because it allows specific enzymes in the malt to convert complex starches into fermentable sugars, which the yeast will later consume. The pot may need to be moved on and off the heat, with regular temperature checks and stirring every 10 minutes, to maintain this range.Sparging: Rinsing the Grains
After the 60-minute mash, the mashing net containing the spent grains is lifted out and placed on a rack or mesh over the pot. The 4 liters of water from the second pot, which should still be around 70°C, are used to slowly rinse the malt in a process known as sparging. This step extracts any remaining sugars from the grains. The liquid collected at this stage is now called wort. The goal is to collect approximately 6.5 liters of wort for the next stage.The Boil: Sterilization and Hop Additions
The collected wort is then brought to a vigorous, rolling boil for 90 minutes. The boil serves several critical purposes: it sterilizes the wort, eliminating any wild yeasts or bacteria; it isomerizes hop acids, extracting bitterness; and it helps to coagulate proteins, leading to a clearer beer. Saaz hops are added at three specific stages during the boil, as detailed in the video’s description, to achieve the target 15 IBU bitterness and contribute their characteristic aroma.Cooling the Wort
Once the 90-minute boil is complete, the pot is removed from the heat. Rapid cooling of the wort is essential to minimize the risk of infection and to encourage a “cold break,” where proteins coagulate and settle out, improving beer clarity. This is effectively achieved by placing the hot pot into a sink filled with ice and cold water. The wort is chilled down to 22°C (72°F). During this cooling phase, it is paramount that *anything* that will come into contact with the cooled wort is thoroughly cleaned and sanitized.Sanitization: Your Most Important Step
Sanitization cannot be overstressed in homebrewing, particularly when **brewing a lager** due to its delicate, clean flavor profile. Any off-flavors from infection will be very noticeable. All equipment, including the fermentation vessel (demijohn), funnel, mashing net, thermometer probe, and later, bottles and siphon, must be soaked or rinsed in a sanitiser solution. This ensures no wild yeasts or bacteria contaminate the beer, preserving its intended taste.Fermentation: Yeast at Work
Once the wort is cooled to 22°C, it is carefully poured into a clean and sanitized demijohn, using a sanitized funnel and a double-layered mashing net to catch any remaining sediment. The wort is then vigorously shaken for a minute or two to aerate it. Aeration is vital as it provides the oxygen yeast needs to multiply and effectively begin fermentation. Next, 4.1 grams of SafLager W-3470 dry yeast are pitched into the wort, followed by more shaking. A sanitized bung and airlock, half-filled with sanitiser solution, are fitted onto the demijohn. The fermenter is then placed in a dark, consistent temperature environment, such as a cupboard, for two weeks to ferment. Within a couple of days, bubbling activity in the airlock will be observed, indicating healthy yeast activity.Bottling and Conditioning
After two weeks of fermentation, if finings are being used, they are added 24 hours before bottling. This allows them time to work and clarify the beer further. For bottling, all bottles and the siphon must be thoroughly cleaned and sanitized. Carbonation drops are added to each bottle—one drop per 330ml bottle or two drops per 500ml bottle. The beer is then carefully siphoned into the bottles, making sure the siphon tube reaches the bottom of each bottle to minimize oxygen exposure, which can lead to stale flavors. Sanitized lids are then fitted securely. The filled bottles are returned to a dark, room-temperature location for another two weeks. During this time, the yeast consumes the sugar from the carbonation drops, producing CO2 that dissolves into the beer, creating the desired fizz.Tasting Your Homemade Lager and Lessons Learned
The moment of truth arrives after two weeks of bottle conditioning. The brewers in the video taste their un-lagered stove-top lager, noting its appearance, aroma, and flavor. They observe good clarity, especially considering no traditional lagering or cold crashing was performed. The final gravity (FG) of 1008 indicates a slight residual sweetness, which is balanced by a pleasant crispness. While perhaps not as intensely crisp as a traditionally lagered beer, it is deemed very drinkable and enjoyable, particularly for a beginner-level brew made with minimal equipment. The comparison to commercial lagers like Corona highlights its respectable quality. It was noted that the carbonation level was lower than desired, which was later attributed to faulty 330ml bottles that allowed CO2 to escape. This underscores the importance of reliable bottles and proper sealing. Brewers can adjust carbonation levels by slightly increasing or decreasing the number of carbonation drops or priming sugar used in future batches. This simplified method for **brewing a lager** opens the door for many homebrewers who previously felt excluded from making this popular style. The success of this experiment proves that a delicious, refreshing lager can indeed be brewed on a kitchen stove with basic equipment and a carefully selected yeast strain, making homebrewing more accessible and enjoyable for everyone.Your All-Grain Kitchen Stove Lager Questions Answered
What is a lager beer, and why is it usually considered difficult for homebrewers to make?
Lagers are a type of beer known for their crisp, clean taste. Traditionally, brewing them requires a long period of cold storage, called lagering, which often demands specialized equipment and significant space that many homebrewers don’t have.
How does this specific recipe simplify brewing a lager at home?
This recipe simplifies lager brewing by using a special yeast, SafLager W-3470, which ferments cleanly and effectively at room temperature. This removes the need for the traditional cold lagering process, making it much more accessible for beginners.
What are some of the basic equipment items I will need to brew this lager on my kitchen stove?
You will need two large pots, a digital thermometer, no-rinse sanitiser, a siphon, bottles, and a mashing net. Many of these are common kitchen items or affordable specialized tools.
What are the main ingredients used in this stove-top lager recipe?
The key ingredients are lager malt for fermentable sugars, Saaz hops for bitterness and aroma, SafLager W-3470 dry yeast for fermentation, and carbonation drops to add fizz during bottling. Fining agents can also be used to help clarify the beer.