The journey of homebrewing is a rewarding one, culminating in the enjoyment of your own crafted beverages. However, a common challenge faced by many aspiring brewers is the final, crucial step: successfully packaging their beer or cider. Improper bottling can lead to various disappointments, from flat, uncarbonated drinks to spoiled batches or, in severe cases, dangerous “bottle bombs.” Ensuring that your meticulously brewed concoction is properly bottled is paramount for preserving its flavor, achieving ideal carbonation, and ensuring safety. This comprehensive guide, building upon the insights shared in the video above, is designed to demystify the process of bottling beer, providing a straightforward method that ensures excellent results every time.
Essential Gear for Successful Beer Bottling
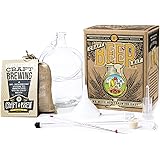
Before any liquid is transferred, the right tools must be gathered. Having all necessary materials at hand streamline the bottling process, allowing for efficiency and minimizing potential contamination. Each item plays a vital role in ensuring a high-quality, properly carbonated final product.
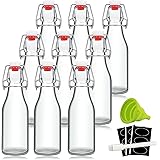
Bottles: Selection and Preparation
Selecting the correct type of bottles is a foundational step. While commercially available 12 oz or 22 oz beer bottles are standard, their reusability is a significant advantage for homebrewers. These bottles are often made from brown glass, which is preferred as it helps protect the beer from harmful UV light, preventing “skunking.” Crucially, screw-top bottles should be avoided; their design does not allow for a hermetic seal when capped, which is essential for retaining carbonation and preventing spoilage. Bottles must always be impeccably clean and free from any residue before sanitization begins.
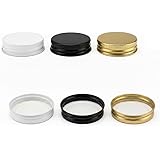
Caps and Capper: Sealing the Deal
New bottle caps are a necessity for every batch. These small, metal disks feature a plastic liner designed to create a tight, airtight seal when crimped onto the bottle. Reusing caps is not recommended as their sealing integrity can be compromised after initial use. To apply these caps, a bottle capper is required. Hand cappers are a popular, economical choice for occasional brewers, offering portability and ease of use. For those bottling more frequently, a benchtop capper provides greater leverage and stability, often resulting in a more consistent and secure seal.
Priming Sugar: The Carbonation Catalyst
For naturally carbonated beer, priming sugar is indispensable. This sugar is consumed by residual yeast in the bottle, producing carbon dioxide gas that dissolves into the beer, creating effervescence. While traditional methods involve dissolving corn sugar (dextrose) in hot water, carbonation tablets offer a convenient, pre-measured alternative. Different types of priming sugar, such as corn sugar, table sugar (sucrose), or dry malt extract (DME), can be used, each potentially influencing the final flavor profile slightly. The amount of priming sugar used will directly impact the level of carbonation, so precise measurement or selection of tablets tailored to your desired fizziness is important.
Sanitization Solutions: Keeping Contaminants at Bay
Sanitizer is arguably the most critical supply in homebrewing. A large pot is typically used for sanitizing bottles, while a medium-sized bowl is practical for caps and smaller equipment. Popular sanitizers include Star San, an acid-based, no-rinse sanitizer known for its effectiveness and minimal contact time. Other options include Iodophor, which is iodine-based and can stain, or bleach solutions, which require thorough rinsing. Following the manufacturer’s directions for dilution and contact time is vital to ensure the sanitizer’s efficacy.
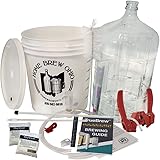
Bottling Equipment: Efficient Transfer
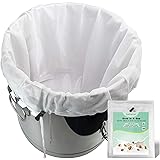
A bottling bucket or a fermenter equipped with a spigot at the bottom is essential for an easy transfer of beer. This setup allows the beer to be drawn from below the yeast sediment, minimizing disturbance. Accompanying this is food-grade tubing and a bottling wand. The bottling wand is a key tool; it features a spring-loaded tip that opens only when pressed against the bottom of the bottle, allowing for a bottom-up fill. This method significantly reduces splashing, which is crucial for preventing oxidation.
Ensuring Fermentation Completion: Avoiding Bottle Bombs
The most critical prerequisite for safe bottling beer is confirming that primary fermentation has fully completed. Bottling beer that is still actively fermenting poses a serious risk, potentially leading to “bottle bombs.” This occurs when ongoing fermentation within the sealed bottle generates an excessive amount of carbon dioxide, building up immense pressure that can cause the glass to explode. Such an event not only creates a significant mess but also presents a severe safety hazard due to flying glass shards.
Typically, fermentation is considered complete after two to three weeks, though this can vary depending on the yeast strain and beer style. A clear indication of finished fermentation is the absence of bubbles coming through the airlock over several days. For more precise confirmation, a hydrometer reading is invaluable. The specific gravity of the beer should remain consistent for at least two consecutive days, ideally reaching a final gravity near or below 1.010 (or 1010). If these conditions are not met, more time should be allowed for the beer to finish fermenting.
The Step-by-Step Bottling Process
With all materials prepared and fermentation confirmed complete, the actual bottling procedure can commence. Each step is designed to maintain sanitation, ensure proper carbonation, and protect the beer’s quality.
Step 1: Thorough Cleaning of Equipment
Before any sanitization takes place, all equipment that will come into contact with the beer must be cleaned. This includes bottles, the bottling bucket, tubing, and the bottling wand. For bottles, washing them in a dishwasher on a sanitize or high-temperature setting is an efficient method. Alternatively, a bottle brush and warm, soapy water can be used, followed by a thorough rinse to remove all soap residue. Proper cleaning removes visible dirt and dried beer, which sanitizers cannot penetrate effectively.
Step 2: Comprehensive Sanitization
Following cleaning, sanitization is performed. This step eliminates microscopic organisms that could spoil the beer or produce off-flavors. All items that will touch the beer, including the inside of the bottles, bottle caps, bottling wand, tubing, and the spigot of the bottling bucket, must be sanitized. Bottles are typically submerged in a large pot containing a diluted sanitizer solution, ensuring all surfaces are contacted. Bottle caps are often soaked in a medium-sized bowl of sanitizer. For the bottling bucket’s spigot, a spray bottle filled with sanitizer solution is convenient. It is paramount to strictly follow the sanitizer’s instructions regarding dilution ratios and contact times to ensure maximum effectiveness, as under-diluted or over-diluted solutions may not work properly.
Step 3: Adding Priming Sugar for Carbonation
The next step involves introducing the priming sugar. Historically, corn sugar or other fermentable sugars were dissolved in hot water to create a syrup, which was then gently stirred into the entire batch of beer in the bottling bucket. A more convenient and increasingly preferred method, as highlighted in the video, is the use of carbonation tablets. These tablets are simply dropped directly into each bottle according to the packaging directions and the desired carbonation level. When handling carbonation tablets, it is advised to wear sanitized gloves to avoid introducing contaminants from bare hands. Precision in sugar dosage is key, as too little sugar results in under-carbonated beer, while too much can lead to over-carbonation or even bottle bombs.
Step 4: Careful Bottle Filling
Bottle filling is a critical stage where oxidation must be diligently avoided. Oxidation occurs when beer is excessively exposed to oxygen, leading to undesirable flavors often described as “wet cardboard” or “sherry-like.” To minimize this, a bottling wand is an invaluable tool. The wand’s design allows for a gentle, bottom-up fill, which reduces splashing and agitation of the beer. Each bottle should be filled, leaving approximately one inch of headspace from the top. This headspace is necessary to accommodate the carbon dioxide gas that will form during the carbonation process without over-pressurizing the bottle.
Step 5: Secure Capping
Once filled, each bottle is immediately capped. A sanitized bottle cap is placed onto the bottle opening, and then a hand capper or benchtop capper is used to firmly crimp the cap onto the bottle’s lip. A thorough inspection of each capped bottle is advised to ensure that the cap is crimped evenly and tightly around the entire rim, creating a secure, airtight seal. A proper seal is essential for both retaining carbonation and preventing oxygen ingress, which could lead to spoilage.
Step 6: Storing for Carbonation
After capping, the bottles are stored at room temperature to allow carbonation to occur. The dormant yeast still present in the beer will consume the priming sugar, producing carbon dioxide gas. This process typically takes at least two weeks, though the exact time can vary based on the specific yeast strain used and the ambient temperature. It is crucial not to refrigerate the bottles during this period, as the colder temperatures will inhibit yeast activity and prevent proper carbonation. After the initial carbonation period, a test bottle can be chilled and opened to assess the carbonation level. If the beer is not yet carbonated to your liking, additional time at room temperature can be provided.
Enjoying Your Homebrewed Masterpiece
Once carbonation is complete and the beer is ready, it should be chilled in a refrigerator before serving. Many homebrewed beers will contain a small amount of yeast sediment at the bottom of the bottle. This is a natural byproduct of bottle conditioning and is completely harmless. To avoid pouring the sediment into your glass, the beer should be poured slowly and steadily, leaving the yeast behind in the bottle. With these steps, the satisfying experience of drinking your own perfectly carbonated, homebrewed bottling beer is achieved, a true testament to the brewer’s skill and patience.
Cap It Off: Your Beer Bottling Questions Answered
What is the main goal of bottling homebrewed beer?
The main goal is to safely package your beer, preserve its flavor, and achieve the right amount of carbonation. Proper bottling also helps prevent spoilage and dangerous “bottle bombs.”
What type of bottles should I use for bottling my beer?
You should use standard brown glass beer bottles (like 12 oz or 22 oz) because they protect beer from harmful UV light. Never use screw-top bottles, as they cannot create a tight, airtight seal for carbonation.
Why is it so important to sanitize equipment when bottling beer?
Sanitization is critical to kill microscopic organisms that could spoil your beer or cause off-flavors. All equipment that touches the beer, including bottles, caps, and tubing, must be thoroughly sanitized.
What is priming sugar used for when bottling beer?
Priming sugar is added to the beer to create natural carbonation in the bottle. Residual yeast consumes this sugar, producing carbon dioxide gas which dissolves into the beer, making it fizzy.
What are “bottle bombs” and how can I avoid them?
“Bottle bombs” are bottles that explode due to excessive pressure from ongoing fermentation after bottling. To avoid them, you must confirm that your beer has completely finished fermenting before bottling.