Every homebrewer eventually finds themselves in a familiar situation: staring at dwindling supplies, a longing for a fresh pint, and the itch to try something new. Much like the experience shared in the video above, this often leads to an exciting brew day – a chance to experiment and perhaps step outside one’s usual comfort zone. While many enthusiasts consistently chase the next super-hoppy IPA, there’s a distinct pleasure in crafting a well-balanced, malt-forward beer. Today, we’re delving into the intricacies of brewing a distinctive **American Brown Ale**, exploring a detailed recipe and specific techniques that aim for a smooth, rich character.
Crafting the American Brown Ale: A Recipe Breakdown
The beauty of brewing lies in the endless possibilities of ingredient combinations, and an American Brown Ale offers a fantastic canvas for malt exploration. The recipe featured in the video is a testament to this, aiming for a satisfying 4.6% ABV (though the brewer anticipates a delicious 4.5% finish) and a notable 41 EBC, indicating a deep brown hue.
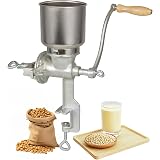
Deconstructing the Grain Bill for a Rich Malt Profile
A significant factor in any beer’s identity is its grain bill. This particular **American Brown Ale** grist is meticulously constructed to deliver layers of flavor and color, even without traditional brown malt. Let’s break down the components:
- 3 kg Golden Promise: This Scottish base malt is renowned for its rich, slightly nutty, and clean flavor, providing a sturdy foundation for the ale.
- 1.5 kg Vienna: Adding a touch of toasty breadiness and a deeper golden color, Vienna malt enhances complexity without overpowering the other specialty grains.
- 600g Oats: Oats contribute to a smoother mouthfeel and improved head retention, giving the beer a luxurious texture.
- 500g Cara Pils: This malt is excellent for boosting body and head stability, ensuring a pleasant drinking experience.
- 350g Aromatic Malt: True to its name, aromatic malt provides an intense malty aroma and flavor, often described as biscuit or toasted notes.
- 300g Dark Crystal: A classic for brown ales, dark crystal malt imparts rich caramel, toffee, and dark fruit flavors, alongside significant color.
- 250g Cara Amber: This caramel malt adds further depth of color and notes of caramel and slight sweetness.
- 250g Chocolate Malt: Crucial for the brown ale’s deep color, chocolate malt offers flavors of cocoa and roasted coffee, but in moderate amounts, avoids harshness.
- 220g Pale Chocolate Malt: A slightly milder version of chocolate malt, it contributes color and a softer chocolate/coffee character, balancing the darker malts.
The thoughtful selection of these malts works synergistically to create a complex and inviting flavor profile, even without brown malt, proving that creativity and understanding of malt characteristics can lead to exceptional results.
Hops: Bitterness, Aroma, and a Twist
In contrast to the speaker’s usual “super hoppy” beers, this **American Brown Ale** leans on a subtle hop schedule, aiming for a balanced IBU of 28. The original plan involved a straightforward approach, but as often happens in homebrewing, substitutions become necessary:
Originally, the hop schedule was planned as:
- 15g Admiral @ 60 minutes for bittering.
- 30g Cascade @ 10 minutes for flavor and aroma.
- 40g Amarillo for a hop stand.
However, due to inventory changes, the actual hop additions for the 40-liter batch were adjusted:
- 20g Admiral @ 60 minutes: A classic English hop, Admiral provides clean, robust bitterness, perfectly setting the stage for the malt profile.
- 30g Cascade @ 10 minutes: Known for its distinctive floral, citrusy (grapefruit), and spicy notes, Cascade adds a pleasant aromatic layer that complements the malt.
- 40g Cascade for a hop stand: A hop stand (or whirlpool addition) involves adding hops after the boil but before chilling, allowing for maximum flavor and aroma extraction with minimal bitterness. Using Cascade again here reinforces its characteristic notes.
This revised schedule still delivers a very respectable 28 IBU, demonstrating how slight adjustments can maintain the desired bitterness profile even with hop substitutions.
Mastering Brew Day Techniques for Optimal Results
The journey from grain to glass is filled with critical steps, each impacting the final beer. The video highlights several key techniques essential for achieving brewing success.
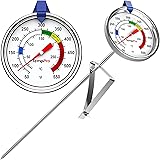
1. Precision Mashing: Temperature and Efficiency
The mash is where starches are converted into fermentable sugars, and temperature control is paramount. A mash temperature of 67°C was used for this brew, a common target for achieving a balanced body and fermentability. The brewer emphasized the importance of monitoring and tweaking efficiency, targeting an impressive 87% mash efficiency and an overall efficiency of 82-83%. Achieving high efficiency means more sugar extraction from your grains, directly impacting your target ABV and potentially reducing costs over time. Regular adjustments to your brewing profile are key to consistently hitting your gravity targets.
2. The Dark Grains at Mash Out Method
A particularly insightful technique shared in the video, and one gaining traction among homebrewers, is adding dark grains at mash out. This process involves holding back the chocolate and pale chocolate malts until the mash out phase, typically at 77°C for 15 minutes. The speaker, inspired by Johnny from Doctor Hans Brewery, attests to its effectiveness in yielding “all of the smoothness, none of the bitter stuff.”
Here’s why this method works:
- Reduced Astringency: Darker roasted malts can sometimes contribute harsh, roasty, or astringent flavors, especially if mashed for extended periods at lower pH levels.
- Smoother Finish: By adding them during mash out, their flavors and colors are extracted without the intense tannin pull, resulting in a significantly smoother and more rounded dark beer.
- Color and Aroma: You still gain the desired deep color and subtle coffee/chocolate aromas, but in a much more refined manner.
This technique is a game-changer for brewers aiming to craft darker beers with a polished, less aggressive character.
3. Effective Sparging Strategies
Following the mash, sparging rinses the grain bed to extract remaining sugars. The video demonstrates a simple yet effective batch sparging approach. After the mash out, approximately 23 liters of sparge water were added, aiming for a pre-boil volume of just under 48 liters. Rather than stirring vigorously, the brewer opts to let the water drain naturally through the mesh, topping up as needed. This minimizes potential off-flavors from excessive stirring and keeps the process straightforward.
4. The Boil and Whirlpool Additions
The 60-minute boil serves multiple purposes: sanitization, isomerizing bittering hops, and concentrating the wort. The brewer employed hop socks for hop additions, praising their ease of use and cleanup over hop spiders, despite the slight additional expense. This is a practical tip for any homebrewer looking to streamline their brew day. After the boil, the whirlpool or hop stand addition (40g Cascade) is critical for capturing delicate hop aromas and flavors without adding much bitterness, as the wort is cooled slightly before the hops are introduced.
Beyond the Brew Kettle: Fermentation and Final Product
The journey doesn’t end after the boil. The post-boil steps are just as crucial for the beer’s ultimate character.
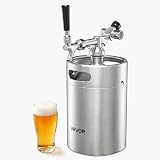
The Power of Pressure Fermenting
Although not explicitly detailed in the video, the brewer mentions the “beauty of this pressure fermenting shit” when discussing early sampling. Pressure fermentation offers several benefits:
- Faster Fermentation: Often, fermentation can be completed more quickly.
- Reduced Esters/Phenols: Fermenting under pressure can suppress the production of certain esters and phenols, leading to a cleaner flavor profile.
- Natural Carbonation: Beers can be naturally carbonated in the fermenter, simplifying the packaging process.
- Oxygen Control: A sealed system significantly reduces oxygen exposure, improving beer stability.
- Early Sampling: As highlighted, the ability to sample beer directly from the fermenter before full carbonation is a delightful perk for quality control and impatience alike.
Tasting Notes and Style Interpretation
The final tasting revealed a beer that, despite appearing darker on camera, was a lovely brown in person. It presented a “little bit roasty” on the nose, true to its malt-forward design. The brewer expressed absolute delight with the “lovely bitterness” and overall balance, confirming the success of the chosen recipe and techniques. This outcome underscores that a well-executed American Brown Ale can be a remarkably satisfying brew, offering a welcome departure from the prevalence of hoppy styles while still delivering complexity and drinkability.
This extensive brew day, meticulously documented and passionately executed, delivers a delicious **American Brown Ale**, proving that a thoughtful approach to ingredients and techniques can elevate any homebrew project.
Pouring Over Your Brown Ale Queries
What is an American Brown Ale?
An American Brown Ale is a type of beer known for its balanced, malt-forward flavors and deep brown color. It typically has a smooth, rich character and is not as hoppy as some other beer styles.
What is a “grain bill” in brewing?
A grain bill is the specific combination and amount of different malted grains used in a beer recipe. It is essential for defining the beer’s flavor, color, and body.
Why are hops used when brewing beer?
Hops are added to beer to provide bitterness, which balances the sweetness of the malt, and to contribute various aromas and flavors like citrus, floral, or spicy notes.
What happens during the “mash” stage of brewing?
During mashing, the crushed grains are mixed with hot water, allowing enzymes to convert the starches within the grains into fermentable sugars. These sugars are later consumed by yeast to create alcohol.
What is “pressure fermenting” and why is it used?
Pressure fermenting involves fermenting beer in a sealed vessel under pressure. This can lead to faster fermentation, a cleaner flavor profile, and the ability to naturally carbonate the beer in the fermenter.