Every homebrewer, regardless of experience level, eventually reaches a pivotal realization: while the brew day is exciting, the true magic—and often the greatest challenge—unfolds during fermentation. It is a stage where countless variables coalesce, influencing everything from flavor and aroma to clarity and stability. A great mash and boil can be entirely undone if the yeast is not properly cared for or if conditions deviate from optimal.
The insights shared by Andy from Elusive and the interviewer in the accompanying video highlight several critical areas where homebrewers can significantly elevate their craft. This article aims to expand on these invaluable tips, providing a deeper dive into the science and practical application of achieving perfect fermentation.
Cultivating Healthy Yeast for Robust Fermentation
The health and vitality of yeast are paramount to successful homebrewing fermentation. Much like any living organism, yeast requires specific nutrients and optimal conditions to thrive. Ignoring these needs often leads to sluggish fermentation, incomplete attenuation, and the development of undesirable off-flavors.
Understanding Yeast Nutrients and Their Role
As discussed in the video, yeast nutrients are more than just “food” for your yeast; they are a carefully balanced blend of compounds and minerals designed to create an ideal environment for yeast growth and activity. These nutrients typically include:
- Zinc: A crucial cofactor for many yeast enzymes, especially those involved in alcohol production. Zinc deficiency can lead to slow fermentation and poor yeast health.
- Diammonium Phosphate (DAP): A readily available source of nitrogen, essential for yeast cell reproduction and overall metabolic function.
- Vitamins and Trace Minerals: A range of other micronutrients, such as magnesium, manganese, and various B vitamins, are vital for various enzymatic processes and cell wall integrity.
The addition of these nutrients, particularly for higher gravity beers or those brewed with nutrient-poor ingredients like sugar, ensures that the yeast has all it needs to perform its primary function efficiently. Without adequate nutrition, yeast can become stressed, potentially leading to the production of off-flavors like diacetyl (buttery) or acetaldehyde (green apple).
Mastering Yeast Pitching Rates
Pitching the correct amount of viable yeast is frequently cited as the single most important factor for a strong start to fermentation. Under-pitching can lead to a sluggish start, allowing undesirable wild yeasts or bacteria to gain a foothold, resulting in off-flavors like chlorophenol (chlorine-like) or fusel alcohols (harsh, solvent-like). Conversely, over-pitching can lead to an overly rapid fermentation, stripping delicate aromas and flavors, or exhausting nutrients too quickly.
For homebrewers, tools like **Mr. Malty’s Yeast Calculator** are indispensable. This online resource allows brewers to input key parameters such as the wort’s original gravity, the yeast strain, and its manufacturing date, then calculates the precise amount of yeast cells required. It provides guidance on how many dry yeast packets are needed or the volume of a liquid yeast starter to prepare.
For high-gravity worts, creating a yeast starter is often recommended. This involves propagating a small amount of liquid yeast in a diluted wort solution prior to pitching into the main batch. This process dramatically increases the yeast cell count, ensuring a robust and healthy population ready to tackle the sugars in your beer, thereby promoting a vigorous and clean fermentation from the outset.
Mastering Fermentation Temperature Control
Achieving and maintaining a consistent fermentation temperature is a critical aspect often underestimated by new homebrewers. While the brew day itself may garner much attention, post-boil temperature control frequently dictates the final character of the beer. Yeast strains are quite particular about their preferred temperature range, and significant fluctuations can lead to stressed yeast and a host of off-flavors.
Adapting to Environmental Conditions and Yeast Strains
As mentioned in the video, one practical approach for homebrewers without sophisticated temperature control systems is to “ferment with the seasons.” This strategy involves selecting yeast strains that naturally perform well in the ambient temperatures available:
- Summer: Saisons or certain Kveik strains thrive at warmer temperatures (25-35°C), often producing unique fruity and spicy esters that are desirable in these styles.
- Autumn/Spring: Most ale yeasts prefer standard room temperatures (18-22°C), making these seasons ideal for brewing a wide range of ales.
- Winter: Lagers require colder fermentation temperatures (8-13°C), which can be challenging without dedicated refrigeration but might be achievable in unheated basements or garages in colder climates.
For those aiming for more precise control, insulation is a cost-effective solution. Fermenter jackets, towels, or even old sleeping bags can help stabilize the temperature by buffering against ambient fluctuations. For cooling, a “swamp cooler” — placing the fermenter in a tub of water with a wet towel draped over it and a fan blowing on it — can provide a few degrees of cooling through evaporative effects. Conversely, in colder environments, fermentation heating pads or belts can be used to raise and maintain desired temperatures.
A common pitfall is placing fermenters next to heat sources like radiators. While seemingly logical to maintain warmth, radiators typically cycle on and off, creating undesirable temperature swings that stress the yeast. Consistency is key; a stable, albeit slightly less than ideal, temperature is often preferable to a fluctuating one.
Protecting Your Beer from Light Strike
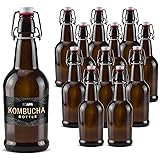
Beyond temperature, light exposure is another factor that can rapidly degrade beer quality, especially for hoppy styles. UV light, even from indirect sunlight or fluorescent bulbs, interacts with hop compounds to produce 3-methyl-2-butene-1-thiol, a molecule that imparts a “skunky” or “catty” aroma. This reaction, known as “light strike” or “skunking,” can occur within minutes of exposure, particularly when using clear glass demijohns. For this reason, opaque fermenters or covering glass vessels with blankets, towels, or purpose-built jackets are essential to protect the beer’s delicate hop character.
The Unsung Hero: Diligent Sanitation Practices
In homebrewing, the adage “you can’t over-sanitize” holds profound truth. Every experienced brewer has, at some point, encountered an infected batch—a frustrating and often heartbreaking experience. Infection can introduce off-flavors ranging from sourness and vinegar notes to unpleasant phenolic characteristics, rendering the beer undrinkable. The critical takeaway is that once the wort leaves the boil kettle, everything it touches must be meticulously cleaned and sanitized.
Cleaning Versus Sanitizing: A Critical Distinction
It is important to differentiate between cleaning and sanitizing:
- Cleaning removes visible dirt, grime, and organic matter from surfaces. This is typically done with hot water and a brewing-specific cleaner (e.g., PBW, OxiClean Free). If a surface is not clean, it cannot be effectively sanitized.
- Sanitizing reduces the population of microorganisms (bacteria, wild yeast) to a level that is safe for brewing. Sanitizers do not sterilize, but they significantly minimize the risk of infection.
A thorough sanitation regime involves disassembling all components that come into contact with the post-boil wort. This means unscrewing fermenter taps, removing airlock grommets, and checking seals and O-rings. These small crevices are prime hiding spots for microbes. Boiling water can be run through lines and small parts for effective cleaning, taking advantage of heat and contact time to dissolve residues.
Following cleaning, an off-the-shelf sanitizer like **Star San** is commonly used. Star San is an acid-based sanitizer that is effective at low concentrations, requires minimal contact time (typically 1-2 minutes), and does not require rinsing if applied correctly. Other options include iodophor, a iodine-based sanitizer, or peracetic acid for more commercial scale operations. The key is to ensure complete contact between the sanitizer and all surfaces for the recommended duration.
Developing a strict sanitation protocol and adhering to it consistently is arguably the most impactful step a homebrewer can take to prevent common issues and ensure consistently high-quality beer.
Demystifying Dry Hopping for Enhanced Aroma and Haze
Dry hopping, the addition of hops to beer post-fermentation, is a technique primarily used to impart intense hop aroma without bitterness. However, as the brewing landscape evolves, particularly with the rise of hazy and New England IPAs, the timing and technique of dry hopping have become subjects of significant debate and experimentation. The video highlights the role of biotransformation and careful contact time.
Harnessing Biotransformation for Modern Beer Styles
Biotransformation refers to the enzymatic activity of yeast during fermentation, where they modify hop compounds (specifically terpenes and polyfunctional thiols) into new, often more desirable aromatic compounds. This process contributes significantly to the unique “juicy” and “tropical” notes found in many contemporary IPAs, as well as playing a role in haze stability.
The practice of adding a small portion of dry hops (around 10-20% of the total dry hop charge) early in fermentation, often during high krausen (the peak of fermentation activity), is a strategy to maximize biotransformation. At this stage, the yeast is highly active, and its enzymes can readily interact with the hop compounds. While the bulk of the dry hop addition typically occurs later for pure aroma, this early addition contributes to the complexity and intensity of hop character, along with contributing to a more stable haze in the final product.
Optimal Dry Hop Contact Time and Temperature
The duration of dry hop contact is a delicate balance. While extended contact might seem to extract more aroma, it can also lead to undesirable vegetal, grassy, or astringent flavors. Professional brewers, as noted by Andy, often limit contact time to a maximum of “three to four days.” Beyond this window, the positive contributions tend to diminish, while the risk of off-flavors increases.
Temperature during dry hopping is also critical. If yeast is cropped for reuse, dry hopping might occur at colder temperatures to minimize further yeast activity. However, if the yeast is not being cropped (as is the case for Elusive in the video), dry hopping is often performed at ambient fermentation temperatures, typically around 19-20 degrees Celsius. This temperature keeps the yeast active enough for any residual biotransformation and helps in the absorption of hop compounds, without promoting excessive re-fermentation if the beer is truly finished.
Navigating Hop Creep
A phenomenon known as “hop creep” can occur during dry hopping. Hops contain enzymes (primarily amylases) that can break down unfermentable dextrins in the beer into fermentable sugars. If these enzymes are active during dry hopping, they can kick off a secondary fermentation, even after primary fermentation has seemingly finished. This can lead to an increase in gravity, over-carbonation, and potential package integrity issues if not managed. Strategies to mitigate hop creep include:
- Extended Conditioning: Allowing sufficient time for any potential hop creep to occur and complete before packaging.
- Temperature Management: Dry hopping at colder temperatures can reduce enzymatic activity, though this might also limit biotransformation.
- Hop Pellet Type: Some hop products, like Cryo Hops, have reduced vegetal matter and thus fewer enzymes, potentially mitigating hop creep.
Ultimately, a robust understanding of homebrewing fermentation principles empowers brewers to troubleshoot issues, refine their recipes, and produce consistently higher-quality beer. The initial stages of fermentation are where the character of your final beer is truly forged, making attention to yeast health, temperature control, sanitation, and advanced dry hopping techniques absolutely paramount for any aspiring homebrewer.
Pitch Your Questions: The Fermentation Q&A
Why is fermentation so important in homebrewing?
Fermentation is crucial because it’s where yeast transforms sugars into alcohol and flavors, defining your beer’s final taste, aroma, and clarity. A successful fermentation ensures all your hard work on brew day results in great beer.
What are yeast nutrients and why are they used?
Yeast nutrients are special blends of compounds and minerals that provide yeast with the essential “food” it needs to grow and ferment vigorously. Using them helps prevent sluggish fermentation and undesirable off-flavors caused by stressed yeast.
Why is controlling fermentation temperature important?
Maintaining a consistent fermentation temperature is vital because yeast strains are sensitive to temperature changes. Proper temperature control prevents off-flavors and ensures the yeast produces the desired characteristics for your beer style.
What is the difference between cleaning and sanitizing my brewing equipment?
Cleaning removes visible dirt and organic residue from your equipment using soap and water. Sanitizing, on the other hand, reduces invisible microorganisms like bacteria and wild yeast to prevent your beer from getting infected.
What is dry hopping in homebrewing?
Dry hopping is the process of adding hops to your beer after it has finished fermenting. Its main purpose is to add strong hop aromas and flavors to the beer without increasing its bitterness.