Making Your Own Beer at Home: A Beginner’s Guide with Flash Brewing Kits
Embarking on the journey of making your own beer at home has been significantly simplified. As showcased in the accompanying video, the advent of products like More Beer’s Flash Brewing kits has truly revolutionized how accessible homebrewing can be for enthusiasts. These kits are specifically designed to strip away the complexities and high initial costs often associated with traditional brewing methods, making it possible for virtually anyone to craft their own batch with minimal fuss.
For those who have ever considered delving into the world of brewing but were deterred by the perceived difficulty or the need for an extensive equipment list, these kits present a compelling solution. The process is streamlined, requiring only a handful of readily available items and a small commitment of time. This ease of use encourages experimentation and allows aspiring brewers to taste the satisfaction of a self-made brew without a steep learning curve.
The Appeal of Simplified Homebrewing Kits
The primary allure of simple homebrewing kits lies in their comprehensive nature and user-friendliness. Historically, a new brewer might have been faced with a myriad of ingredients, complex recipes, and specialized equipment that could seem daunting. These modern kits, however, are curated to include almost everything necessary for the initial fermentation stage, from malt extract to hops and yeast, pre-measured and ready for use.
This approach drastically reduces the preparation time and eliminates the guesswork, allowing more focus to be placed on the simple assembly and monitoring phases. The entire system is engineered for efficiency, meaning less time is spent gathering supplies and more time is dedicated to the actual brewing experience. The promise of making quality homebrew with such a straightforward methodology is indeed a significant draw for many.
Essential Equipment for Easy Homebrewing
While the kits themselves provide most of the ingredients, a few basic pieces of equipment are still required to facilitate the brewing process. Fortunately, these items are neither expensive nor difficult to acquire, aligning perfectly with the ethos of easy homebrewing. The video highlights these necessities, ensuring that your initial investment is kept to a minimum.
The Fermenter: Your Brewing Vessel
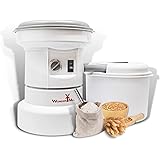
A fermenter is the primary container where your beer will undergo fermentation. A simple, food-grade bucket equipped with a spigot, as demonstrated, is an excellent and cost-effective choice. Its five-gallon capacity is ideal for standard batch sizes, and the spigot allows for easy transfer of the finished beer, minimizing contact with sediment and oxygen. The material of the fermenter is typically plastic, chosen for its durability and ease of cleaning, which is critical in maintaining a sanitary brewing environment.
Airlocks and Sanitizers: Unsung Heroes
An airlock is a small but crucial device that permits carbon dioxide to escape from the fermenter while preventing outside air and contaminants from entering. This maintains an anaerobic environment for the yeast, vital for proper fermentation. Alongside the airlock, a good sanitizer is indispensable. Before any equipment touches your brewing ingredients, it must be thoroughly cleaned and sanitized. This prevents unwanted bacteria or wild yeasts from spoiling your batch, ensuring a clean and enjoyable beer flavor. Without proper sanitation, even the simplest making of beer at home can lead to disappointment.
Water: The Foundation of Great Beer
The quality of water used in homebrewing is often underestimated but plays a pivotal role in the final taste of your beer. As suggested in the video, not all water sources are created equal. Tap water, while convenient, frequently contains chlorine or chloramines, chemicals added for disinfection. These can react with yeast and other ingredients, leading to undesirable off-flavors in your beer, often described as medicinal or plastic-like.
Therefore, it is strongly recommended that five gallons of either bottled reverse osmosis (RO) water or good quality spring water be used. RO water is purified to remove most dissolved solids, offering a clean slate for your brewing. Spring water, on the other hand, often possesses a beneficial mineral profile that can enhance certain beer styles. The choice of water type significantly impacts the character of the finished homebrewed beer, making it a key consideration for achieving a superior product.
Your First Brew Day: Step-by-Step Simplified
The initial brewing process with these kits is remarkably straightforward, designed to be completed quickly and without extensive technical knowledge. Once all your equipment is sanitized and ready, the actual assembly begins. First, approximately three gallons of your chosen good quality water are added to the fermenter. This initial volume helps to dissolve the ingredients effectively.
Subsequently, all the contents of the Flash Brewing kit, which typically include malt extract, hops, and yeast, are introduced into the water. These ingredients are meticulously formulated to produce a specific beer style. After the kit contents are thoroughly mixed until dissolved, the remaining two gallons of water are added, bringing the total volume to five gallons. The fermenter is then sealed, and the airlock is firmly attached to the lid. This marks the completion of your hands-on work for the initial stage of making beer at home.
The Magic of Fermentation: What Happens Next
Once your fermenter is sealed and the airlock is in place, the true transformation begins, often referred to as “the magic.” This “magic” is, in fact, the work of yeast, a microscopic fungus that consumes the sugars present in the wort (unfermented beer) and converts them into alcohol and carbon dioxide. This process is known as primary fermentation. Within 24-48 hours, vigorous bubbling in the airlock will typically be observed, indicating that the yeast is actively working.
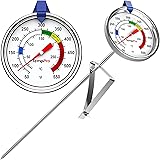
Crucially, the fermenter should be stored in a dark place where the temperature remains stable, ideally around 68 degrees Fahrenheit (room temperature). Maintaining this temperature is vital because yeast health and activity are highly temperature-dependent. Temperatures that are too high can lead to the production of undesirable off-flavors, such as fusel alcohols or fruity esters, while temperatures that are too low can cause the yeast to become sluggish or even dormant, resulting in an incomplete fermentation. Proper temperature control ensures a clean, well-fermented beer with a desirable flavor profile. This stage usually continues for a few weeks, allowing the yeast ample time to complete its work and for the beer to mature.
Anticipating Your First Homebrew
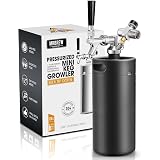
After the initial fermentation period of “a few weeks,” as mentioned in the video, the next step in the journey of making your own beer at home typically involves transferring the fermented beer (now called “green beer”) off the yeast sediment. This might be done into another vessel for secondary fermentation, or directly into bottles or a keg for conditioning. During conditioning, the beer further matures, clarifies, and often develops more complex flavors. If bottled, a small amount of priming sugar is usually added, allowing for a natural carbonation process to occur within the bottle. This waiting period is often the hardest part for new brewers, but the reward of enjoying your own freshly brewed beer makes it all worthwhile.
Fermenting Your FAQs: Homebrew Q&A
What are Flash Brewing kits?
Flash Brewing kits are designed to simplify homebrewing for beginners. They include most necessary ingredients and reduce the need for complex equipment or high initial costs.
What basic equipment do I need to start homebrewing?
To begin, you will need a fermenter (like a food-grade bucket with a spigot), an airlock, and a good sanitizer. These are readily available and not expensive.
What kind of water should I use for brewing beer at home?
It’s best to use five gallons of bottled reverse osmosis (RO) water or good quality spring water. Tap water often contains chemicals like chlorine that can cause undesirable flavors in your beer.
What happens during fermentation?
During fermentation, yeast eats the sugars in your mixture (wort) and turns them into alcohol and carbon dioxide. You should store your fermenter in a dark place at a stable temperature, ideally around 68 degrees Fahrenheit.