It was a familiar story: another morning, another trip to the local coffee shop. The aroma was intoxicating, the convenience unbeatable, but the growing dent in the wallet was becoming undeniable. Sound familiar? Many of us cherish that daily coffee ritual, yet the cumulative cost can quickly add up, especially when considering life’s bigger aspirations, like saving for a new family member or a much-desired getaway. What if the secret to luxurious, café-quality coffee wasn’t about spending more, but about creating it at home? As the insightful video above demonstrates, crafting your own delicious homemade cold brew and custom creamers is not only surprisingly simple but also a fantastic way to reclaim your coffee budget.
Brewing the Perfect Homemade Cold Brew Concentrate
The foundation of an excellent cold brew experience begins with the right ingredients and a touch of patience. Just as a chef selects premium produce, a discerning coffee lover chooses quality beans for their cold brew. The video wisely suggests a really good dark roast coffee, and for good reason: dark roasts tend to have a lower acidity profile and a more robust flavor that stands up well to the cold brewing process, preventing a weak or watery result. Think of it like slow-cooking a rich stew; the longer, gentler process extracts the deep, complex flavors without the bitterness often associated with hot brewing.
-
Selecting Your Coffee & Water
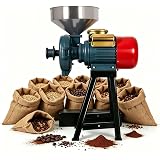
The first step in your cold brew coffee recipe is crucial: select a high-quality dark roast coffee. Freshly ground coffee will always yield the best flavor, so consider grinding your beans just before you begin. Beyond the coffee itself, the water you use plays an equally vital role. Filtered water is non-negotiable here; imagine painting a masterpiece with dirty brushes. Chlorine and other impurities in tap water can significantly detract from the delicate flavors of your coffee, leaving you with an off-taste. Opt for filtered water to ensure a clean, crisp finish to your homemade cold brew.
-
The Golden Ratio for Cold Brew Coffee
A specific ratio is key to achieving that potent, ready-to-dilute cold brew concentrate. The video suggests a powerful 2 ounces of coffee for every 10 ounces of filtered water. This creates a concentrated elixir, much like a potent cordial that needs to be diluted before drinking. While this might seem “deadly” strong initially, remember that it’s designed to be mixed later, allowing you to customize the strength to your exact preference. This flexibility is one of the many benefits of DIY coffee.
-
The Art of Steeping and Patience
Once your coffee and water are combined in a large enough vessel – choose something that can truly sustain your coffee needs, avoiding the “one sip and that’s it” dilemma – seal it up. The steeping process is where the magic happens. Place your container in the fridge for a minimum of 18 hours. This extended cold steep gently coaxes the flavors from the grounds, resulting in a smoother, less acidic brew. Giving it an occasional shake helps ensure all the grounds are evenly saturated, maximizing extraction, much like agitating a teabag to ensure full flavor release.
Crafting Your Signature Cinnamon Creamer
While the cold brew is steeping, why not elevate your coffee experience with a homemade creamer? The video introduces a delightful cinnamon creamer that promises to add a rich, yet delicate, touch to your brew. Forget artificial flavors; this recipe taps into natural ingredients for an authentic taste. Just as a tailor custom-fits a suit, creating your own creamer allows for perfect personalization and avoids unwanted additives found in store-bought options.
-
Unlocking Cinnamon’s Full Potential
To “colonize that cinnamon flavor,” as eloquently put in the video, we’re not just throwing in a stick of cinnamon. The secret lies in a simple yet effective technique: toasting. Briefly toasting the cinnamon stick in a dry pan over medium heat awakens its aromatic oils, deepening its complexity and fragrance. This small step transforms the spice, making its essence more profound and ensuring that its warmth truly infuses your creamer. It’s akin to roasting nuts before adding them to a dish, intensifying their inherent qualities.
-
The Creamer Recipe Basics
While the video provides a visual guide, the creamer recipe generally involves simmering milk or cream (or a combination) with your toasted cinnamon stick and a sweetener of choice. The exact proportions are flexible, but aiming for a yield of about 8 ounces is a good starting point. If you find yourself enjoying it quickly, remember you can always double the recipe, much like having a backup supply of your favorite essential. After simmering to infuse the flavor, let the mixture cool before removing the cinnamon stick.
-
Chilling for Flavor Integration
After your cinnamon stick has done its work, the creamer needs to chill. Two hours in the fridge allows the flavors to meld and deepen further, ensuring a well-rounded and harmonious taste. This cooling period is vital, preventing the creamer from thinning out when added to cold brew and ensuring a smooth, luxurious texture. Think of it as allowing a fine wine to breathe; time enhances its character.
The Grand Finale: Straining and Diluting Your Brew
After 18 patient hours, your homemade cold brew concentrate is ready for its final transformation. This is where attention to detail truly pays off, ensuring a sediment-free, exceptionally smooth coffee. Much like sifting flour for a delicate cake, proper straining is essential for a refined product.
-
Achieving Crystal Clear Cold Brew
The video’s method for straining is highly recommended for a superior brew: first using a cheesecloth, then allowing the liquid to filter through a coffee filter. The cheesecloth catches the larger coffee grounds, preventing them from clogging the finer paper filter. The coffee filter then meticulously removes any remaining fine sediment, resulting in a cleaner, brighter-tasting coffee. While it “is gonna take some time,” this two-stage filtration is an investment in quality, guaranteeing a “better coffee” experience free from gritty surprises. It’s the difference between drinking pure spring water and a cloudy river stream.
-
Dilution: The Key to Personalization
Once strained, you have a potent cold brew concentrate. This is where you become the master barista. Dilute the concentrate with however much water you want – or even milk – to achieve your desired strength. Some prefer a 1:1 ratio, others 1:2 (one part concentrate to two parts water). Experimentation is encouraged! Pour in your custom cinnamon creamer, and voilà – a rich, yet delicate, personalized coffee experience awaits. This adaptability is what makes brewing coffee at home so rewarding.
Embracing the Savings and Joy of DIY Coffee
Making homemade cold brew isn’t just about the exquisite taste; it’s a powerful financial strategy. Consider the daily expense of a café-bought cold brew, often ranging from $4-$6. If you indulge five times a week, that’s $20-$30 weekly, adding up to over $100 a month! By shifting to DIY coffee, your primary costs are good quality dark roast coffee beans and filtered water, which are significantly less per serving. These savings can quickly accumulate, freeing up funds for those significant life events, whether it’s saving money for a new kid, a much-needed vacation, or even investing in a new hobby. This simple switch allows you to enjoy premium coffee without the premium price tag, transforming a daily luxury into a smart, sustainable habit.
Cold Brew, Cash, and Cradles: Your Q&A
What is cold brew coffee?
Cold brew coffee is a smooth, less acidic coffee concentrate made by steeping coffee grounds in cold water for an extended period. It allows you to create café-quality coffee at home.
Why should I make cold brew at home instead of buying it?
Making cold brew at home is a great way to save money while still enjoying delicious, high-quality coffee. It can significantly reduce your daily coffee expenses.
What kind of coffee and water should I use for homemade cold brew?
You should use a high-quality dark roast coffee, ideally freshly ground, and filtered water. Filtered water is important to ensure a clean, crisp finish.
How long does it take to make cold brew?
The coffee grounds need to steep in cold water for a minimum of 18 hours in the fridge. This extended steeping process helps extract deep, complex flavors.
Is cold brew concentrate ready to drink right away?
No, cold brew concentrate is very strong and needs to be diluted before drinking. You can mix it with water or milk to achieve your desired strength.