Did you know that an estimated 96% of your grain bill for a classic Australian Pale Ale can be dedicated to just one type of malt? That’s right, crafting a superb Australian Pale Ale often starts with a foundation of two-row pale ale malt, establishing a canvas for vibrant hop flavors. If you’ve just watched the video above from Flying Wombat TV, you’re already on your way to mastering the art of homebrewing this approachable and delicious beer style.
Homebrewing is a rewarding hobby, blending science with creativity to produce something truly unique. While the video walks you through each step of a brew day, this complementary guide dives deeper into the ‘why’ behind the ‘how,’ expanding on key concepts and offering extra tips for brewers of all experience levels. Whether you’re a seasoned pro or just starting your journey into the golden world of craft beer, understanding these fundamentals will empower you to brew consistently fantastic beer.
Brewing Your Own Australian Pale Ale: A Deeper Dive
Crafting an Australian Pale Ale involves a series of carefully managed steps, each contributing to the final character of your beer. From selecting your grains to the final dry hop, precision and patience are your best tools. Let’s break down the process with added insights and beginner-friendly explanations.
Understanding Your Recipe: The Heart of the Australian Pale Ale
Every great beer starts with a solid recipe, and the Australian Pale Ale is no exception. It’s designed to be refreshing and approachable, balancing a solid malt backbone with a burst of aromatic hops. The recipe featured in the video is a prime example, built around simplicity and flavor.
- Grains: The backbone of your beer. The video highlights using 96% two-row pale ale malt and 4% medium crystal malt.
- Two-Row Pale Ale Malt: This is your base malt, providing most of the fermentable sugars and a clean, bready flavor. It’s chosen for its neutral character, allowing other flavors to shine.
- Medium Crystal Malt: At just 4% of the grain bill, this specialty malt adds a touch of caramel sweetness, a beautiful golden color, and improved body. It’s crucial for that characteristic pale ale richness without making the beer too heavy or cloying. The video mentions Gladfield grains, which are a popular choice, but feel free to use high-quality grains available in your region.
- Hops: These are the “spices” of your beer, providing bitterness, flavor, and aroma. For this Australian Pale Ale, the recipe leverages a strategic hop schedule:
- Bittering Hops (Start of Boil): Just 8 grams of Galaxy hops go in at the beginning of the boil. This provides a gentle bitterness, ensuring the beer is indeed “approachable” rather than aggressively bitter. Galaxy is a fantastic Australian hop known for its passionfruit and citrus notes, even in small bittering doses.
- Flavor and Aroma Hops (Whirlpool): A generous 180 grams mixture of Azacca, Galaxy, and El Dorado hops are added during the whirlpool phase. This is where the magic happens for aroma and flavor, as discussed later. These varieties are chosen for their tropical, citrusy, and piney notes, typical of the Australian Pale Ale style.
- Yeast: The unsung heroes that convert sugars into alcohol and carbon dioxide. The video utilizes a cultured Kveik Yeast, but offers alternatives like Safale S-04 or US-05.
- Kveik Yeast: This Norwegian farmhouse yeast is a game-changer for homebrewers. It ferments incredibly fast at high temperatures (up to 40°C or 104°F) without producing off-flavors, offering a clean or slightly fruity profile depending on the strain. Its robustness and speed are unmatched.
- S-04 (English Ale Yeast) / US-05 (American Ale Yeast): These are standard, reliable yeasts. S-04 leans towards fruity and estery notes, while US-05 is known for its clean, neutral fermentation profile, making hop flavors pop. They prefer cooler fermentation temperatures (around 18-20°C or 64-68°F).
- Clarification Aids: The video suggests three Whirlfloc tablets. These are typically Irish moss extracts that help proteins coagulate during the boil, leading to a clearer final beer.
Equipment: Flexibility for Every Homebrewer
One of the most encouraging messages in the video is the emphasis on equipment flexibility. While Flying Wombat TV uses a 65-liter BrewZilla, they stress that you don’t need high-end gear to brew this Australian Pale Ale. This philosophy makes homebrewing accessible to everyone.
- High-End Systems (e.g., BrewZilla, Grainfather): These all-in-one systems integrate mashing, sparging, and boiling into a single unit, often with pumps for recirculation and chilling. They offer convenience and precision.
- Budget-Friendly Setups:
- Cooler Mash Tun: Many homebrewers start by mashing in an insulated cooler (like an esky in Australia) to maintain temperature.
- Brew-in-a-Bag (BIAB): This popular method involves mashing your grains in a large mesh bag placed directly in your boil kettle. After mashing, you simply lift the bag out, eliminating the need for a separate mash tun or sparging setup.
- Basic Pots: A large stockpot can serve as both your mash tun (with a bag) and your boil kettle.
- Adaptability: Don’t have a whirlpool arm? Stir with a spoon or a drill-mounted paint mixer. Can’t sparge? The recipe can be adjusted for a full volume mash, though efficiency might drop slightly. The key is to work with what you have.
Milling Your Grains for Optimal Efficiency
The crushing of your grains might seem like a small detail, but it significantly impacts your brewing efficiency and wort clarity. The video recommends a 1 millimeter gap for your grain mill, a sweet spot for most systems.
- Why the Right Crush Matters:
- Too Fine (Powdery): If your grains are too finely crushed, you risk creating a “porridgy mess.” This can lead to a stuck mash (liquid can’t drain through the grain bed), making sparging difficult and potentially extracting unwanted tannins from the grain husks, resulting in astringency. While fine crushing might yield higher sugar extraction, the downsides often outweigh the benefits for typical brewing systems.
- Too Coarse (Unbroken): A coarse crush means larger pieces of grain remain unbroken. This significantly reduces the surface area available for enzymatic conversion during the mash, leading to lower efficiency (less sugar extracted) and a weaker beer.
- The 1mm Sweet Spot: Aiming for a crush where the husks are mostly intact but the starchy endosperm inside is fractured allows for efficient sugar extraction without creating a stuck mash or tannin issues. It looks like “ripped up husks with crushed grains, not powder, not unbroken.”
- Milling Options:
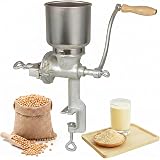
- Home Mill: A great investment for fresh grains and custom crush sizes.
- Local Homebrew Shop: Most shops will crush your grains for you when you purchase them.
- Pre-Crushed Online Orders: Convenient, but be aware that pre-crushed grains can lose freshness faster.
Mashing In: Extracting Sugars for a Balanced Beer
Mashing is the crucial step where starches in the crushed grains are converted into fermentable sugars by enzymes activated at specific temperatures. For this Australian Pale Ale, the video guides you to mash at 66 degrees Celsius (150.8°F), after setting your strike water to 70 degrees Celsius (158°F).
- Strike Water Temperature: The initial temperature of your water before adding grains. Setting it a few degrees higher (70°C) accounts for the cooling effect of the room-temperature grains, ensuring your mash settles at the desired target (66°C).
- Mash Temperature (66°C / 150.8°F): This temperature profile favors beta-amylase enzymes, which produce more fermentable sugars. The result is a beer that is “fairly dry,” as the video states, but still retains enough unfermentable sugars to contribute to a good “mouthfeel” and “body.” This balance is key for an Australian Pale Ale.
- Preventing Dough Balls: When adding grains to water, it’s vital to stir thoroughly to prevent “dough balls”—clumps where the outside is wet but the inside remains dry. These drastically reduce efficiency.
- Technique: Add grains slowly, mixing continuously with a paddle, spoon, whisk, or spatula. The “little bit of grain, mix, little bit more grain, mix” method is highly effective.
- Recirculation: Systems with pumps often allow for recirculation of the wort through the grain bed. This helps maintain a consistent temperature throughout the mash and improves clarity, yielding “really, really clear wort,” which is beneficial for the final beer’s appearance.
- Mash Duration: A 60-minute mash is standard for ensuring complete starch conversion.
Sparging: Maximizing Your Yield
After mashing, sparging is the process of rinsing the grain bed with hot water to extract any remaining sugars. This boosts your brewing efficiency, essentially getting “more beer for your buck.”
- Hot Liquor Tank Temperature: The video recommends setting your sparge water to 78 degrees Celsius (172.4°F). This temperature is hot enough to efficiently rinse sugars without extracting unwanted tannins from the grain husks, which can happen if the water is too hot.
- The Process: Hot water is gently run over the grain bed, collecting the sugary liquid (wort) that drains through. This “rinsing” ensures you capture as much fermentable sugar as possible.
- No Sparge Option: If you’re using a Brew-in-a-Bag method or don’t have sparging capabilities, it’s completely fine! You might adjust your initial water volume or accept a slightly lower gravity, but the Australian Pale Ale will still taste great.
The Boil: Bitterness, Clarity, and Aroma Foundation
The boil serves multiple critical functions: sterilizing the wort, concentrating sugars, driving off undesirable volatile compounds, and, of course, adding hops for bitterness, flavor, and aroma.
- Ramping Up to Boil: Once your sparging is complete and the wort is in the boiler, it’s time to bring it to a rolling boil.
- Boil Over Prevention: The video intelligently highlights using an extender tube for the boiler. Boiling wort can easily foam up and spill over, creating a massive mess. Giving yourself “a little bit of extra wiggle room” is crucial. Antifoam agents can also be used.
- Bittering Hops: As mentioned, 8 grams of Galaxy hops are added at the start of the boil. The longer hops boil, the more alpha acids isomerize, contributing bitterness. A shorter boil for bittering (or fewer hops) results in a less bitter, more approachable Australian Pale Ale.
- Hop Spiders: The video mentions using a hop spider. This mesh container holds your hops during the boil, making cleanup easier and preventing hop debris from entering your fermenter. If you don’t have one, just throw the hops directly into the kettle; it won’t significantly impact the beer’s quality, though you’ll have more trub (sediment) later.
- Whirlfloc Addition: At the 45-minute mark (for a 60-minute boil), three Whirlfloc tablets are added. These are typically added 15 minutes before the end of the boil. The heat helps them release compounds that bind with proteins, aiding in clarifying the beer by causing them to “coagulate” and settle out.
- Boil Duration: A standard 60-minute boil is common for most ale recipes.
Cooling and Whirlpooling: The Art of Hop Flavor
Once the boil is complete, rapid cooling of the wort is generally recommended to prevent off-flavors (like DMS) and create a cold break, which helps with clarity. This is also the prime time for extracting maximum hop flavor and aroma without adding bitterness.
- Cooling Methods:
- Chiller Coils (Immersion or Plate): These are efficient tools that use circulating cold water to rapidly reduce wort temperature. The video mentions both.
- Ice Bath: For smaller batches or simpler setups, placing your boil pot in a larger bucket of ice water is effective.
- No Chiller: While slower, simply turning off the heat and letting the wort cool naturally is an option. However, slower cooling increases the risk of bacterial contamination and can lead to hazier beer.
- Whirlpool Temperature (75°C / 167°F): The video instructs to cool the wort down to 75 degrees Celsius before initiating the whirlpool and adding the flavor/aroma hops.
- Why Whirlpool? This technique involves creating a gentle vortex in the cooled wort. The video explains the core benefit: it gives “much better extraction of the hop oils” without causing the alpha acids to “isomerize,” which is where bitterness comes from. Below 80°C (176°F), bitterness extraction is minimal, but volatile hop oils (responsible for aroma and flavor) are still soluble and readily extracted.
- How to Whirlpool: Use a pump to recirculate, a drill with a paint mixer attachment, or even a large spoon to create a strong vortex.
- Whirlpool Hops: Add the 180 grams mixture of Azacca, Galaxy, and El Dorado during this phase.
- Whirlpool Stand Time: Let the hops sit in the whirlpool for 20 minutes to allow for maximum oil extraction.
- Final Cooling to Pitching Temp: After the whirlpool stand, continue cooling your wort to your specific yeast’s pitching temperature.
Pitching Your Yeast: The Fermentation Begins
Yeast pitching is the moment your wort transforms into beer. The temperature at which you pitch and ferment is crucial for a clean fermentation and optimal flavor development.
- Kveik Yeast Pitching Temperature (35°C / 95°F): As highlighted, Kveik yeast thrives at much higher temperatures than traditional ale yeasts. Pitching at 35°C (95°F) allows it to ferment quickly and cleanly, producing minimal off-flavors even at these elevated temperatures.
- Standard Yeast Pitching Temperature (18-19°C / 64-66°F): If using strains like S-04 or US-05, aim for cooler temperatures around 18-19°C (64-66°F). Fermenting these yeasts too warm can lead to undesirable off-flavors like fusel alcohols (harsh, solventy) or excessive esters (fruity, but can be overwhelming).
- Transferring to Fermenter: Carefully transfer your cooled wort into your sanitized fermenter. The video mentions an SS Brewtech half-barrel fermenter, but any clean, food-grade fermenter will do.
- Pitching the Yeast: Whether you’re using a cultured yeast slurry or a fresh packet of dry yeast, simply “dump them in” after the wort reaches the target pitching temperature. Aerating the wort before pitching can significantly aid yeast health and faster fermentation.
The Art of Dry Hopping: Boosting Aroma and Flavor
Dry hopping is the practice of adding hops to beer after the fermentation process has begun or completed. This technique primarily contributes aroma and flavor, with minimal to no bitterness.
- Why Dry Hop? If you want “that extra boost in hop flavor and aroma,” dry hopping is highly recommended. It enhances the perception of freshness and complexity of hop character.
- Timing is Key: The video specifies dry hopping “when your gravity reading gets to about 1.014,” which for this recipe is about a week and a half, or day 10. This means dry hopping when there are “a couple points left before fermentation finishes.”
- Preventing Hop Creep: Adding dry hops towards the end of fermentation (but not completely finished) helps to prevent “hop creep.” This phenomenon occurs when enzymes in hop material reactivate fermentation, causing an unexpected drop in final gravity and potentially over-carbonation or off-flavors. By dry hopping when yeast is still active, any potential refermentation is quickly completed.
- Dry Hop Quantity: For this Australian Pale Ale, the recipe calls for 60 grams each of Azacca, El Dorado, and Galaxy. That’s a substantial 180 grams total, ensuring a punchy hop aroma!
- Zero Oxygen Dry Hopping: Advanced fermenters might have specialized ports for “zero oxygen dry hopping.” Oxygen is the enemy of beer, especially highly hopped styles, as it can quickly degrade hop compounds, leading to “wet cardboard” off-flavors.
- Homebrewer’s Alternative: If you don’t have a specialized system, simply “open up your fermenter, dump your hops in and close that fermenter up as fast as possible.” While not truly zero-oxygen, minimizing exposure is key. Some brewers purge the headspace with CO2 before opening.
- Letting Hops Drop: The video shows a method where hops are held in a separate chamber, purged with CO2, and then released into the fermenter. This reduces oxygen exposure significantly. For simpler setups, simply adding the hops directly works fine.
Tapping into Your Brewing Questions
What kind of beer is an Australian Pale Ale?
An Australian Pale Ale is a refreshing and approachable beer style that balances a solid malt backbone with a burst of aromatic hops, often featuring tropical and citrus notes.
What are the main ingredients needed for this Australian Pale Ale recipe?
The main ingredients include two-row pale ale malt and crystal malt, a blend of Galaxy, Azacca, and El Dorado hops, and Kveik yeast for fermentation.
Do I need fancy or expensive equipment to brew this beer at home?
No, you don’t need high-end gear to brew this beer. You can use budget-friendly setups like a cooler mash tun, brew-in-a-bag, or basic pots.
What is special about Kveik yeast, which is used in this recipe?
Kveik yeast is a unique Norwegian farmhouse yeast that ferments incredibly fast at high temperatures (up to 40°C) without producing off-flavors, making it robust and efficient.
Why do brewers ‘dry hop’ their beer?
Dry hopping is done to add hops after fermentation, providing an extra boost in hop aroma and flavor, which enhances the beer’s freshness and complexity without adding bitterness.