Crafting Smarter Brews: Advanced Home Brewing Tips & Cost-Saving Hacks
There was a time when my home brewing budget felt stretched. Every batch seemed to demand new gear or more expensive ingredients. This frustration often led to compromises in my brews.
However, I learned that smart strategies can make a big difference. This article, complementing the video above, offers advanced home brewing tips. It focuses on optimizing processes and saving money. We will dive deeper into various techniques and insights for every dedicated homebrewer.
1. Budget-Savvy Brewing Strategies
Harnessing Online Retailer Psychology
Online shopping offers hidden opportunities for home brewers. You can strategically save money on essential supplies. This method leverages common e-commerce practices.
Most retailers employ sophisticated recovery software. This software tracks abandoned shopping carts. They aim to convert nearly-lost sales into completed purchases.
Fill your online cart with desired brewing items. Include both immediate needs and future aspirations. Then, simply walk away from your computer.
Within a few days, an email often arrives. These emails frequently contain discount codes. Expect 10-20% off your entire purchase or a single high-value item.
Another powerful tactic involves a new browser. Or, better yet, ask a trusted friend or spouse to shop. Websites often offer generous first-time buyer discounts.
This bypasses your established browser history. It triggers “new customer” incentives. You might instantly receive a 15% discount on their first order.
Optimizing Hop Costs
Hops are a significant expense for many home brewers. Yet, smart selection and usage can greatly reduce costs. Focus on hops with higher alpha acid content.
Higher alpha acid means more bittering power per gram. You use less hop material for the same IBU contribution. This strategy conserves your valuable hops.
For IPAs, consider front-loading your bittering additions. Then, use larger dry hop additions. This maximizes aroma without needing constant additions throughout the boil.
This approach also minimizes vegetative or grassy flavors. These off-notes can arise from excessive hop matter in the boil. Strategic additions mean better flavor and lower cost.
2. Mastering Yeast and Fermentation
The Power of Forced Fermentation Tests
A forced fermentation test (FFT) is an invaluable diagnostic tool. It quickly reveals a wort’s fermentability. This helps troubleshoot potential issues with your primary fermentation.
Take a small sample of your wort. Pitch it with a large, healthy yeast starter. Let it ferment rapidly at an elevated temperature.
The resulting gravity indicates the true terminal gravity of your wort. If your main fermentation stalls above this FFT gravity, you have a problem. Common culprits include nutrient deficiency or temperature fluctuations.
Many brewers build their own FFT setups cheaply. Simple tubes with airlocks work effectively. Specialized kits are also available for convenience and accuracy.
Optimal Yeast Starter Gravity
Creating a robust yeast starter is crucial for healthy fermentation. The gravity of your starter wort significantly impacts yeast growth. Aim for specific gravity targets.
The ideal starting gravity for maximum yeast cell growth is around 1.040. This provides ample sugars without stressing the yeast. Yeast reproduce effectively at this concentration.
Gravities between 1.020 and 1.040 also work well. For very small yeast samples, start at the lower end. This allows for gentler growth before pitching.
Avoid high gravity starters, above 1.040. While some growth occurs, it promotes actual fermentation. This can lead to yeast stress and unwanted genetic mutations.
Yeast under stress can produce off-flavors. It can also cause sluggish or incomplete fermentations. A foamy, uncontrolled starter is a sign of excessive gravity and stress.
Addressing Stuck Fermentations
A stuck fermentation is a common home brewing headache. The good news is that many can be revived. This often involves re-energizing the existing yeast population.
First, pitch a small amount of fresh, active yeast. Even a half-packet of the same strain can kickstart activity. This introduces vital, healthy cells.
Next, add yeast energizer, not just nutrient. Yeast energizer provides essential compounds. These include nitrogen, vitamins, and trace minerals.
For a five-gallon batch, a half-teaspoon of energizer is effective. Swirl it gently to incorporate oxygen. This small oxygen boost helps yeast metabolic processes.
The combination of fresh yeast and energizer reactivates dormant cells. This allows them to finish the fermentation. It’s a highly reliable method for reviving sluggish brews.
Strategic Yeast Repitching
Reusing yeast from previous batches saves money. It also builds character in your beer. However, proper planning is essential for success.
Always repitch from low ABV to high ABV beers. Higher alcohol levels stress yeast. Reusing yeast from a high ABV beer will weaken it for the next brew.
Move from light-colored to dark-colored beers. Yeast carries some color from previous brews. Repitching dark yeast into a light beer can subtly alter its hue.
Transition from low IBU to high IBU beers. High hop bitterness can also stress yeast cells. Starting with lower IBU batches ensures healthier yeast for bitter beers.
Plan your brewing schedule carefully. Start with a pale, low-alcohol ale. Progress to a stronger, darker IPA. Then finish with a stout or barleywine before harvesting fresh yeast.
3. Advanced Brewing Techniques
Lagering with Warm-to-Cold Fermentation
Lager brewing traditionally requires precise cold fermentation. However, a warm-to-cold approach can yield excellent results. It also reduces yeast pitching rates needed.
Start your lager fermentation at ale temperatures. Pitch your lager yeast around 68-72°F (20-22°C). This allows the yeast to reproduce rapidly and efficiently.
Once fermentation actively begins (usually within 24 hours), gradually lower the temperature. Drop it a few degrees each day. Aim for typical lagering temperatures (45-55°F or 7-13°C).
This technique leverages initial yeast vigor. It then allows for a cleaner, colder fermentation finish. The result is a crisp lager without needing massive yeast starters.
For your initial forays into lagering, dry yeast is a superb choice. Strains like Lalvin’s lager yeast ferment cleanly. They require no starters for a standard five-gallon batch.
Navigating Ingredient Substitutions
Ingredient availability can sometimes be a challenge for home brewers. Supply chain issues or discontinued products necessitate substitutions. Understand their potential impact.
Every ingredient, even from the same source, varies slightly. Malts, being agricultural products, show natural seasonal differences. SRM ratings often come with a range, not a fixed value.
When substituting, aim for the closest possible match. For hops, look for similar aroma profiles and alpha acid percentages. For malts, match color, flavor contribution, and diastatic power.
Acknowledge that any substitution will alter your beer. The change might be minor, or it could be significant. Sometimes, these changes lead to unexpected, delightful results.
Always document your substitutions thoroughly. If you love the new version, you can replicate it. If not, you know to revert to the original ingredients for future brews.
4. Elevating Your Brewing Practice
The Unexpected Value of Video Documentation
Detailed brewing notes are crucial for consistency and improvement. Yet, traditional written logs have limitations. Video recording offers a dynamic alternative for many brewers.
Set up your smartphone or camera during your brew day. Simply record your entire process. Talk to the camera, explaining each step as you perform it.
Later, reviewing these videos provides unparalleled insight. You can visually identify mistakes or inefficiencies. You might recall specific actions or timings missed in written notes.
Video acts as a real-time, timestamped record of your actions. It captures subtle nuances that are hard to describe in writing. This tool significantly enhances learning and replication.
The Imperative to “Brew More”
The single most impactful tip for improving your beer is simple: brew more. Consistent practice refines your skills. It deepens your understanding of brewing science.
Each successive batch reveals new insights. You learn to anticipate issues and adjust processes. What seemed decent before will pale in comparison to your improved work.
You develop a nuanced feel for the brewing process. This includes understanding the “why” behind specific steps. Many experienced brewers still find areas for refinement.
Embrace continuous learning from all sources. Observe other brewers, read industry publications, and experiment. Your dedication to brewing more will undoubtedly elevate your craft.
Embrace Budget Brewing Principles
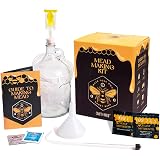
Fancy equipment is enjoyable but not always necessary for great beer. Many home brewing tips can be applied on a shoestring budget. Focus on fundamentals, not frills.
Basic kitchen equipment can produce excellent one-gallon batches. A colander, two pots, and a stove are often sufficient. You don’t need expensive brew-in-a-bag systems initially.
The true key to quality beer lies in process control. Temperature stability during fermentation is paramount. Invest in temperature control if you want consistent, high-quality home brewing results.
Enjoy the journey of refining your home brewing skills. Apply these advanced brewing tips to create exceptional beers. Save money along the way with smart decisions.
Fermentation of Facts: Your Brewing Q&A
How can I save money when buying homebrewing supplies online?
You can fill your online cart and then leave the website; retailers often send discount codes for abandoned carts. Also, using a new browser or account can sometimes trigger first-time buyer discounts.
What should I do if my beer’s fermentation seems to have stopped too early?
If your fermentation is stuck, try adding a small amount of fresh, active yeast along with some yeast energizer. Gently swirling the fermenter can also help by introducing a little oxygen.
Is it possible to reuse yeast from a batch of homebrew?
Yes, you can reuse yeast, but plan carefully by repitching from lower alcohol to higher alcohol beers, and from light-colored to darker-colored beers for best results.
What is the most effective way to improve my homebrewing skills and beer quality?
The most impactful way to improve is simply to ‘brew more’ consistently. Each successive batch helps you refine your skills and deepens your understanding of brewing science.
Do I need a lot of expensive equipment to make good quality homebrew?
No, fancy equipment isn’t always necessary for great beer. Focus on mastering process control, especially maintaining stable fermentation temperatures, which is key for consistent, high-quality results.