Embarking on the journey of homebrewing can seem like navigating a vast ocean, full of complex recipes and technical jargon. However, as the accompanying video perfectly illustrates, there’s no need to feel overwhelmed; getting started with homebrewing is incredibly accessible with the right approach. By focusing on simple, beginner-friendly fermentations, you can build confidence and gain essential experience without the daunting complexity often associated with traditional brewing methods. This guide aims to expand upon the video’s excellent advice, delving deeper into the easiest home brew recipes and offering additional insights to help you craft your first delicious batch with success.
Simplifying Your First Homebrewing Adventure
Many aspiring homebrewers dream of elaborate concoctions, envisioning intricate beer styles or exotic fruit wines right from the start. Nevertheless, much like learning to ride a bicycle, it’s far more effective to begin with training wheels before attempting daring stunts. Focusing on easy fermentations allows you to grasp fundamental concepts like sanitation, yeast health, and basic fermentation science in a low-stress environment. These initial successes, often achieved with minimal ingredients, provide invaluable “experience points” that will serve as a robust foundation for more complex homebrewing projects down the line.
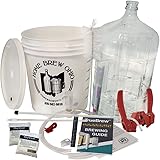
The beauty of these straightforward recipes lies in their simplicity, requiring fewer specialized ingredients or elaborate equipment. This approach minimizes initial investment and reduces the fear of costly mistakes, encouraging more frequent brewing attempts. Think of each successful batch as a stepping stone, gradually building your understanding of how different factors influence the final product. Soon, you’ll be confidently adjusting recipes and exploring new flavors, all thanks to the strong start provided by these beginner-friendly homebrews.
Hard Cider: Your Gateway to Fermentation Success
Hard cider stands out as arguably the easiest home brew recipe for any novice, primarily due to its minimal ingredient list and straightforward process. All you truly need is apple juice and brewer’s yeast, making it as simple as combining two readily available components. For instance, readily available store-bought apple juice works wonderfully, provided it doesn’t contain preservatives like potassium sorbate, which can inhibit yeast activity. Alternatively, if the season permits, freshly pressed cider from a local orchard can yield a truly exceptional and unique flavor profile.
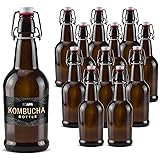
The natural sweetness of apple juice means no additional sugar is typically required to achieve a respectable alcohol content. A common target for original gravity (OG) is around 1.050, which translates to a pleasant 5% to 6% ABV beverage after just about a week of fermentation. Simply pour your chosen apple juice into a sanitized fermenter, pitch your yeast – either a dedicated cider yeast or a clean-fermenting ale yeast works excellently – and let nature do the rest. Once fermentation is complete, you can choose to enjoy your cider still or introduce carbonation through bottle conditioning (adding a small amount of priming sugar to each bottle for a secondary fermentation) or kegging for a fizzy delight.
To further enhance your hard cider, consider incorporating yeast nutrients. These supplements provide essential minerals and nitrogen that promote healthier, happier yeast, leading to a cleaner and often more flavorful fermentation. While not strictly necessary for a successful brew, they can significantly improve the final taste, especially in nutrient-poor environments like plain apple juice. Furthermore, if you find your finished cider too tart, non-fermentable sugars like erythritol or stevia can be added to sweeten it without re-activating fermentation, allowing for precise flavor adjustments.
Expanding Your Horizons: Hard Seltzers and Teas
Beyond the classic hard cider, crafting hard seltzers and teas offers another incredibly easy path into the world of homebrewing. These beverages follow a similar principle: essentially, you’re fermenting a sugary liquid with yeast. The key difference here is that you’ll likely be adding the sugar yourself to achieve your desired alcohol by volume (ABV), rather than relying on the natural sugars of fruit juice.
For hard seltzers, the base is primarily filtered water. You then add a fermentable sugar, like corn sugar (dextrose) or table sugar, until you reach your target original gravity. For example, aiming for an OG of 1.035 will typically result in a refreshing drink around 4.5% ABV, perfect for an easy-drinking seltzer. Dextrose is particularly popular among homebrewers because it dissolves readily and ferments cleanly, contributing minimal flavor of its own. If using other sugars, you might need to gently warm the water to aid dissolution, but always ensure the liquid cools to around 70°F before adding your yeast to prevent shocking or killing the active cultures.
Hard teas follow a nearly identical process, simply beginning with brewing your favorite tea—be it black, green, or herbal—to your desired strength. Once the tea cools, you’ll add your sugar and then pitch the yeast, just like with seltzers. A robust black hard tea can be wonderfully invigorating, offering a unique twist on a familiar beverage. After fermentation, which usually takes about a week, these plain seltzers and teas can be elevated dramatically with flavor extracts or fruit additions before packaging. Imagine a sparkling lime seltzer or a peach-infused black tea; the possibilities for customization are truly limitless.
Brewing Beer with Extract: A Stepping Stone to Craft Beers
For many, homebrewing begins with the dream of crafting their own beer, and while all-grain brewing can appear complex, extract brewing provides a fantastic, beginner-friendly entry point. Think of malt extract as a concentrated form of wort—the sweet, unfermented liquid that forms the basis of beer. Using extract is akin to using a baking mix rather than starting entirely from scratch; it significantly simplifies the brewing process while still allowing for creative input.
Malt extracts come in various forms, some even pre-hopped, meaning the hops have already been added during their production. However, to truly elevate your extract beer, adding fresh hops during a short boil is highly recommended. This allows you to fine-tune the bitterness, flavor, and aroma of your beer. Hops added earlier in the boil contribute more bitterness, much like a slow simmer draws out deep flavors. Conversely, hops added towards the end or after the boil will impart more delicate flavors and vibrant aromas, similar to how fresh herbs brighten a dish at the last moment. Experimenting with different hop varieties and addition times is a rewarding way to personalize your brew.
Once you’ve prepared your wort by dissolving the extract and boiling with any additional hops, you simply cool it to the appropriate temperature (typically around 65-70°F for ale yeast), pitch your brewer’s yeast, and let it ferment for approximately a week. From there, you can bottle condition for natural carbonation or keg your beer for immediate enjoyment. As you gain confidence, you can explore partial mash brewing, which involves steeping a small amount of specialty grains to add more complex malt flavors and character, acting as a perfect bridge to eventual all-grain brewing.
Essential Homebrewing Tips for Beginners
Sanitation: The Unsung Hero of Good Beer
Without a doubt, the single most critical aspect of successful homebrewing, often overlooked by beginners, is meticulous cleaning and sanitization. Imagine trying to bake a cake in a dirty kitchen; the results would be disastrous. Similarly, any equipment that comes into contact with your wort or fermented beverage after the boil must be scrupulously clean and sanitized. Wild yeast and bacteria are ubiquitous, and while many are harmless, even a small number of unwanted microbes can introduce off-flavors (like sourness, band-aid, or cheesy notes) or completely spoil your batch. Investing in proper brewing-specific cleaners and sanitizers, like Star San or PBW, is paramount to keeping your brews pure and delicious.
Yeast Selection and Temperature Control: Keeping Your Cultures Happy
Choosing the right yeast and maintaining appropriate fermentation temperatures are vital for a clean and tasty final product. For beginner homebrewers, ale yeasts are generally recommended because they perform well at typical room temperatures, usually between 60-70°F (15-21°C). However, it’s crucial to avoid exceeding 69°F (20°C) with most ale yeasts, as higher temperatures can stress the yeast, causing them to produce undesirable off-flavors, often described as fruity esters or harsh fusel alcohols. If your fermenting environment tends to be warmer, consider using robust strains like Belgian yeasts or, even better, Kveik yeast. Kveik strains are incredibly forgiving and can ferment cleanly even in temperatures up to 90°F (32°C) or higher, making them an excellent choice for any of the easy fermentations discussed here. Conversely, lager yeasts require strict, colder temperature control, making them less ideal for newcomers.
Safe Bottle Conditioning Practices
If you plan to carbonate your homebrew through bottle conditioning, exercising caution is essential to prevent “bottle bombs”—bottles that explode due to excessive pressure. This often occurs when too much priming sugar is added, or when fermentation wasn’t completely finished before bottling, allowing residual sugars to ferment in the sealed bottle. Always use a reliable bottle conditioning calculator to determine the precise amount of priming sugar needed for your batch volume and desired carbonation level. Furthermore, ensure your initial fermentation has fully concluded, indicated by a stable specific gravity reading over several days, before moving to bottling. These simple precautions will keep your bottles intact and your beverages safely carbonated.
Start Small, Learn Big
Finally, remember that homebrewing is a learning process, and starting small offers immense benefits. Brewing smaller batches—for example, one-gallon instead of five-gallon—reduces the potential waste of ingredients if a batch doesn’t turn out perfectly. This freedom from high stakes encourages experimentation and more frequent brewing, which in turn accelerates your learning and skill development. It’s a bit like learning to cook; you wouldn’t attempt a five-course meal for twenty people on your very first try. So, embrace the small batch philosophy, experiment with different ingredients, and most importantly, have fun with the process. You’ll quickly find yourself brewing up impressive recipes and sharing your unique creations with friends and family.
Brewing Up Answers: Your Beginner’s Home Brew Q&A
What are the easiest types of drinks for a beginner to homebrew?
The easiest drinks for beginners to homebrew are hard cider, hard seltzer, hard tea, and extract beer, as they have simpler processes and fewer ingredients.
Why is cleaning and sanitizing equipment so important in homebrewing?
Meticulous cleaning and sanitizing are critical to prevent wild yeast and bacteria from spoiling your batch or introducing unpleasant off-flavors. All equipment touching your brew after the boil must be spotless.
What is hard cider and how is it made simply?
Hard cider is an alcoholic beverage made by fermenting apple juice with brewer’s yeast. It’s considered very easy because it requires minimal ingredients and a straightforward process.
What is extract brewing when making beer?
Extract brewing is a beginner-friendly method for making beer that uses malt extract, a concentrated form of unfermented liquid, which simplifies the brewing process compared to starting from scratch.