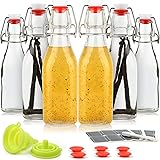
Why Choose Mason Jar Cold Brew?
Opting for homemade cold brew offers several appealing benefits for coffee enthusiasts. This brewing method naturally produces a coffee that is significantly less acidic and smoother than traditional hot-brewed coffee. Think of cold brew as a slow-cooked meal for your coffee beans; the gentle, extended extraction time pulls out sweet, chocolatey notes rather than bitter compounds.
Beyond taste, cold brew is incredibly cost-effective, allowing you to enjoy premium coffee without the daily coffee shop price tag. The simple mason jar method exemplifies convenience and accessibility. You only need a few common kitchen items to start brewing, making it an ideal choice for beginners and experienced coffee makers alike.
The Foundation: Coffee Grounds and Water
The secret to exceptional cold brew begins with selecting the right ingredients. Just like baking, the quality and type of your components profoundly influence the final product. Understanding these elements ensures a flavorful and smooth concentrate every time you brew.
Understanding Coarse Grind for Cold Brew
A coarse coffee grind is absolutely crucial for successful cold brewing. Unlike drip coffee, where hot water quickly extracts flavor from fine particles, cold brewing requires a slower, more deliberate process. Using fine grounds in cold brew is like trying to sift sand through a fine mesh; it clogs everything up and leads to over-extraction and a silty, unpleasant drink.
Coarse grounds, resembling sea salt or breadcrumbs, allow water to circulate freely and extract flavors evenly over time. This prevents over-extraction of bitter compounds and ensures easy straining later. You can ask your local coffee shop to grind beans coarsely for cold brew, or use a burr grinder at home set to its coarsest setting.
The Role of Water Quality
Since water makes up the vast majority of your cold brew, its quality profoundly impacts the final taste. Using filtered water will always yield a cleaner, purer flavor profile, allowing the subtle nuances of your coffee beans to shine through. Tap water, especially if it has strong chlorine or mineral tastes, can introduce unwanted flavors into your brew.
Always use cold or room temperature water for cold brewing. Hot water immediately extracts more acids and bitter oils from the coffee, which defeats the purpose of making a smoother, less acidic cold brew concentrate. Think of it as a gentle soak rather than a quick rinse.
The Perfect Ratio: Crafting Your Concentrate
Achieving a balanced **cold brew** concentrate depends heavily on the coffee-to-water ratio. A popular and effective starting point, as seen in the video, is using four tablespoons of coarse coffee grounds for every six ounces of water. This ratio creates a robust concentrate that can be diluted later, offering versatility in how you enjoy your coffee.
For larger batches, simply scale up the ingredients proportionally. For instance, if you use 12 ounces of water, you would double the coffee to eight tablespoons. Feel free to experiment with this ratio slightly once you become familiar with the process, adjusting it to suit your personal preference for strength and intensity.
The Steeping Process: Patience is Key
The steeping phase is where the magic truly happens, transforming simple grounds and water into a rich, flavorful concentrate. This extended immersion time is what sets cold brew apart from other coffee preparation methods.
Why Twelve Hours (or More) Matters
The video suggests steeping your **mason jar cold brew** for “at least twelve hours,” which is an excellent baseline. However, many find that a steeping time between 12 to 18 hours often yields the best results. Steeping is like marinating meat; it needs adequate time for the flavors to fully develop and meld together.
A longer steep extracts more flavor and caffeine, resulting in a stronger concentrate. Going beyond 18-24 hours can, for some coffee beans, lead to over-extraction, potentially reintroducing some bitterness. Experimentation within this window will help you discover your ideal steeping duration based on your preferred taste and coffee bean type.
Location, Location, Location
During the steeping process, you have a couple of options for where to place your mason jar. Many enthusiasts prefer to let their cold brew steep at room temperature for the initial several hours, or even the entire duration, believing it encourages a more robust extraction. Afterward, or for the entire steep, moving it to the refrigerator is also perfectly acceptable.
Consistency is more important than the exact location. Choose a spot where your jar can remain undisturbed for the entire steeping period. A cool, dark pantry or a stable shelf in your refrigerator works wonderfully.
Straining Your Smooth Cold Brew Concentrate
Once your **cold brew** has steeped to perfection, the next step is to separate the liquid gold from the spent coffee grounds. This stage is crucial for achieving that characteristic smooth texture and clear taste.
The Magic of Cheesecloth
The video demonstrates using cheesecloth for straining, and it is indeed a fantastic tool for the job. Cheesecloth is a finely woven, breathable fabric that effectively filters out coffee grounds while allowing the liquid to pass through freely. Its wide availability and affordability make it a popular choice for home brewers.
You can also consider alternatives like a dedicated nut milk bag, which offers a very fine mesh, or even a paper coffee filter placed within a fine-mesh sieve. These options can provide an even clearer concentrate, free of any fine sediment. Think of your filter, whether cheesecloth or a nut milk bag, as your coffee’s personal bouncer, letting all the good liquid through while keeping the unwanted solids out.
Avoiding the Muddle
When straining your **mason jar cold brew**, resist the temptation to squeeze the cheesecloth or filter bag. While it might seem like you are extracting every last drop, forcefully squeezing can actually push fine coffee particles and unwanted oils through the filter. This often results in a cloudy concentrate that can taste more bitter or muddy.
Allow gravity to do most of the work, letting the concentrate slowly drip through. If you desire an even clearer brew, a second pass through a fresh piece of cheesecloth or a clean paper filter can further refine the concentrate. Patience during this step ensures a clean, crisp, and truly smooth beverage.
Enjoying Your Homemade Cold Brew
With your concentrate ready, the best part begins: savoring the fruits of your labor. Cold brew concentrate is incredibly versatile, offering many ways to customize your drink.
Dilution is Key: The 1:1 Rule
As highlighted in the video, the beauty of **cold brew** concentrate lies in its potency, meaning it needs to be diluted before serving. A common and highly recommended starting point is the 1:1 rule: one part cold brew concentrate to one part water, served over ice. This ratio provides a balanced and refreshing drink that showcases the concentrate’s smooth characteristics.
However, your personal preference is the ultimate guide. Feel free to adjust the dilution ratio to suit your taste; some prefer a stronger 1:0.5 ratio, while others enjoy a lighter 1:2. You can also dilute your concentrate with milk, almond milk, or your favorite creamer for a creamy beverage. Experimentation is encouraged to discover your perfect cup.
Beyond the Glass: Creative Cold Brew Uses
Your homemade cold brew concentrate isn’t just for drinking straight. Its rich, smooth flavor makes it a fantastic ingredient in various culinary creations. Consider adding a splash to your morning smoothie for an energizing kick and deeper flavor. It also makes a superb base for coffee cocktails, adding sophistication without excessive bitterness.
Beyond beverages, cold brew can elevate your baking. Incorporate it into recipes for brownies, cakes, or even glazes to infuse them with a subtle, complex coffee essence. The possibilities are truly endless, extending the enjoyment of your simple mason jar cold brew far beyond just a morning pick-me-up.
Storage Tips for Freshness
Proper storage is essential to maintain the quality and extend the shelf life of your homemade **cold brew** concentrate. Once strained, transfer your concentrate into an airtight container, such as a clean mason jar or a pitcher with a lid. Store it in the refrigerator to keep it fresh and prevent spoilage.
Under optimal refrigerated conditions, your cold brew concentrate can remain fresh and delicious for up to 7 to 10 days. This makes it perfect for meal prepping your coffee for the week, allowing you to enjoy a quick, refreshing drink whenever the craving strikes without additional brewing time.
Pouring Over Your Cold Brew Questions
What is cold brew coffee?
Cold brew is a smooth, less acidic coffee concentrate made by steeping coffee grounds in cold water for an extended period. It offers a mellow coffee experience without needing expensive equipment.
What type of coffee grounds should I use for cold brew?
You should use coarse coffee grounds for cold brewing, resembling sea salt or breadcrumbs. This specific grind allows water to circulate freely and prevents over-extraction.
What is the recommended coffee-to-water ratio for cold brew?
A good starting point for a robust concentrate is four tablespoons of coarse coffee grounds for every six ounces of water. You can scale this up proportionally for larger batches.
How long should I steep my cold brew?
The article suggests steeping your cold brew for at least 12 hours. Many find that 12 to 18 hours often yields the best results for developing rich flavors.
How should I dilute and serve cold brew concentrate?
Cold brew concentrate should be diluted before serving, typically using a 1:1 ratio of concentrate to water over ice. You can adjust this ratio with water or milk to suit your personal taste.