Many aspiring brewers encounter an initial hurdle: understanding the intricate process of creating quality beer. The journey from raw ingredients to a delightful, carbonated beverage might appear complex. Nevertheless, with appropriate guidance, the art of home brewing can be demystified. This companion article expands upon the comprehensive video guide above, offering further insights into brewing beer at home.
The process of brewing, whether commercial or domestic, adheres to fundamental principles. These methods are explored to make homebrewing accessible to everyone.
Insights into Professional Brewing Operations
Before diving into home brewing, it is beneficial to understand larger-scale operations. Commercial breweries employ specialized equipment. These tools are designed for efficiency and volume. For instance, Cellar Head Brewing Company utilizes several large stainless steel containers.
These vessels serve specific purposes:
- Cold Liquor Tank: This tank is where cold water is stored. Water quality is crucial for beer flavor.
- Hot Liquor Tank: Hot water, essential for mashing, originates here. Precise temperature control is paramount.
- Mash Tun: Here, malted grains are steeped in hot water. This step extracts sugars, forming what is known as wort. Huge pallets of malt are processed in these vessels.
- Kettle: The wort is then transferred into the kettle. Hops are added and boiled at this stage. This imparts bitterness and aroma.
- Fermentation Vessels (FVs): After boiling, the wort is cooled and moved into fermentation vessels. Yeast is introduced here. This begins the crucial fermentation process. Cellar Head Brewing Company, for example, maintains seven FVs, all typically full.
The brewers themselves are described as “genius scientist guys.” Their expertise in hops and malts is extensive. They can predict flavor profiles and ABV (Alcohol by Volume). Consequently, crafting exceptional beer is truly a skilled undertaking.
For example, an oatmeal stout may contain 40 kilos of golden syrup. This illustrates how specific ingredients contribute to unique beer styles. Moreover, fermentation duration varies. An English pilsner might ferment for five to eight weeks. Ambient temperature also influences this timeline.
Transitioning to Home Brewing: Essential Equipment
Inspired by commercial practices, many individuals consider brewing their own beer. Large-scale equipment is not required for beginners. Simple, accessible tools are quite effective. A local home brewing shop, such as Beercosm and The Brewers Droop, can provide necessary items. This establishment has a rich history, having been set up on the Gloucester Road in 1984.
Key equipment for a beginner includes:
- A fermentation bucket with a lid.
- An airlock. This device allows CO2 to escape. It prevents outside air from entering.
- A siphon. This is used for transferring beer.
- Sterilizing powder. This ensures cleanliness.
- A beer kit. This contains pre-measured ingredients.
The investment in home brewing equipment is surprisingly low. Thus, it presents a cost-effective alternative to buying store-bought beer. A 40-pint beer kit, for instance, offers significant value.
The Home Brewing Process: A Step-by-Step Guide
The journey to crafting your own beer can be incredibly rewarding. Here is a detailed breakdown of the steps involved, often simplified with a beer kit:
1. Thorough Sterilization: A Critical Foundation
Sterilization cannot be overstated. All equipment must be impeccably clean. This includes the fermentation bucket, airlock, and mixing tools. Imagine if unwanted bacteria or wild yeasts were introduced. These contaminants would spoil the beer. The result would be off-flavors or even unsafe consumption. Consequently, sterilizing powder is used. It eliminates harmful microbes. This step protects your beer during its vulnerable fermentation stage.
2. Preparing the Wort from a Beer Kit
A typical beer kit simplifies the initial stages. Two tins of concentrated beer liquid are often included. These are warmed in hot water. Warming helps the contents flow easily. The sticky, sweet, and bitter liquid is then poured into the sterile fermentation bucket. Warm water is added. This dilutes the concentrate. The bucket is then topped up to the five-gallon mark. Stirring thoroughly ensures proper mixing.
3. Initiating Primary Fermentation
Yeast is the magical ingredient. It consumes sugars and produces alcohol and carbon dioxide. A packet of yeast is added to the wort. It is stirred gently. The fermentation bucket is then sealed. The airlock is attached. This allows CO2 to escape without allowing oxygen in. This setup is then placed in a cool, dark location. Primary fermentation typically takes about 12 days. During this period, the yeast actively converts sugars. Bubbles will be observed in the airlock, indicating active fermentation.
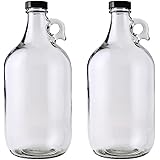
4. Bottling and Secondary Fermentation for Carbonation
After primary fermentation, the beer is ready for bottling. Each bottle receives a small amount of sugar. This is known as “priming sugar.” This sugar initiates a second fermentation within the sealed bottles. The yeast consumes this sugar. It produces more CO2. This carbon dioxide becomes trapped. Subsequently, the beer becomes naturally fizzy. Bottled beer usually requires an additional two weeks. This period allows for proper carbonation and conditioning. The beer’s flavor also develops during this time. It is crucial to monitor bottles for excess pressure, which could lead to an explosive outcome. Properly capped bottles are essential.
Tasting the Rewards of Your Labor
The moment of truth arrives after conditioning. Your homemade beer is ready to be sampled. The initial taste may reveal interesting characteristics. For example, a home-brewed lager might possess a sweeter, cider-like aroma and flavor. This contrasts with commercially produced lagers. Adjustments to priming sugar can refine the sweetness level in future batches. The ABV can be quite significant, with some home brews reaching 8.14% alcohol. Consequently, enjoying it in smaller quantities is often recommended. This homemade beverage can be a lovely accompaniment to a meal, perhaps with a cheese board. The enjoyment of crafting your own beer is unparalleled.
Tapping into Knowledge: Your Homebrewing Q&A
What is home brewing?
Home brewing is the process of making beer at home. It allows you to create your own beer from raw ingredients, often simplified with a beginner’s kit.
What essential equipment do I need to start home brewing?
To begin home brewing, you will need a fermentation bucket with a lid, an airlock, a siphon for transferring beer, sterilizing powder, and a beer kit.
Why is sterilization important in home brewing?
Sterilization is crucial to prevent unwanted bacteria or wild yeasts from spoiling your beer. It eliminates harmful microbes, ensuring your beer has good flavors and is safe to drink.
What happens during the primary fermentation stage of home brewing?
During primary fermentation, yeast is added to the beer mixture (wort), consuming its sugars and producing alcohol and carbon dioxide. This process converts the wort into beer over about 12 days.
Why is sugar added to bottles during bottling?
A small amount of sugar, called priming sugar, is added to each bottle to initiate a second fermentation. This secondary fermentation produces more carbon dioxide, making the beer naturally fizzy.