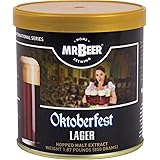
Welcome to the incredibly satisfying world of homebrewing! If you’ve just watched the comprehensive Coopers DIY Beer video above, you’ve already seen how simple and rewarding making your own great-tasting beer can be. This isn’t just a project; it’s an adventure into crafting your very own beverages, resulting in 23 liters of premium quality beer ready to enjoy. Think of this article as your detailed written companion, expanding on the video’s essential steps and offering deeper insights to ensure your brewing journey is a resounding success.
Making your own Coopers DIY Beer is truly one of the most accessible and enjoyable DIY experiences available. It demystifies the brewing process, breaking it down into manageable steps that anyone can follow. We’ll delve into the crucial ‘whys’ behind each instruction, ensuring you not only know *what* to do but also *why* each step is vital for a perfect brew. From meticulous preparation to the final, fizzy product, we’re here to guide every beginner through creating their first batch of delicious homebrew beer.
Embarking on Your Homebrewing Adventure: The Coopers DIY Beer Kit
There’s immense satisfaction in crafting something with your own hands, and homebrewing is no exception. Imagine the pride of pouring a glass of beer that you’ve made yourself, knowing every step of its journey from raw ingredients to refreshing beverage. The Coopers DIY Beer kit provides everything you need to start this journey, making it perfect for beginners. This comprehensive brewing kit ensures you have all the necessary tools and ingredients right at your fingertips to make your very first batch of 23 liters of premium homebrew beer.
Beyond the personal accomplishment, homebrewing also offers practical benefits. It can be a cost-effective way to enjoy quality beer, and it opens up a world of experimentation with different styles and flavors. Many new brewers find a lifelong hobby in this pursuit, constantly refining their techniques and exploring new recipes. With Coopers DIY Beer, the initial hurdle of complexity is removed, allowing you to focus on the joy of the process and the anticipation of tasting your creation.
1. Preparation is Paramount: Setting the Stage for Success
Before you even think about mixing ingredients, meticulous preparation is your most critical step in homebrewing. As the video highlights, cleanliness is not just a suggestion; it’s the bedrock of a successful brew. Contamination is the single most common cause of a failed batch, leading to off-flavors or even spoiled beer. Therefore, every piece of equipment that will come into contact with your brew must be absolutely spotless and, for future brews, properly sanitized.
When you’re starting with a brand-new Coopers DIY Beer kit, a thorough rinse with hot water is sufficient for your initial setup. However, for every subsequent brew, you’ll need to go a step further and sanitize your equipment. Imagine if you were preparing a meal; you wouldn’t use dirty plates. Brewing is similar, requiring an even higher standard of hygiene to protect your delicate yeast and prevent unwanted bacteria from spoiling your homebrew. An unscented household bleach, properly diluted, works effectively as a sanitizing agent, ensuring all harmful microbes are eliminated before brewing begins.
Understanding Water Quality and Temperature Control
The quality of your water also plays a significant role in the final taste of your beer. If your local tap water has a strong chlorine taste, this can transfer to your finished brew, creating an unpleasant chemical flavor. For this reason, using filtered water is highly recommended to give your Coopers DIY Beer the best possible start. It ensures a clean, neutral base that allows the true flavors of your chosen brewing extract to shine through.
Another crucial element in preparation is establishing a suitable spot for your fermenting vessel. This location needs to be out of direct sunlight and, ideally, maintain a consistent temperature between 21°C and 27°C. Direct sunlight can not only cause undesirable temperature fluctuations but also lead to “skunking,” a light-struck off-flavor caused by UV rays. Imagine trying to bake a cake in an oven with fluctuating temperatures; the results would be unpredictable, much like a beer fermented in inconsistent conditions.
2. The Art of Mixing: Bringing Your Brew to Life
Once your equipment is clean and your brewing space is ready, it’s time to combine your ingredients and create the “wort” – the sugary liquid that will become beer. The video recommends a “wet run” without ingredients, and this is an excellent practice. It allows you to understand how your home water supply behaves, helping you gauge how much hot or cold water you’ll need to hit that crucial 21-27°C temperature range for your final mixture. This initial practice run can save you from temperature woes later on, ensuring your yeast has the perfect environment to thrive.
Start by pouring the brew enhancer into your fermenting vessel, followed by two liters of warm water to help it dissolve completely. Next, open your brewing extract can. If you’ve warmed the can in hot water for about 10 minutes beforehand, the extract will be far easier to pour out, as warming reduces its viscosity. After emptying the can, you might even pour a little warm water into the can itself to rinse out any remaining sticky goodness, ensuring no precious brewing extract goes to waste. Mix everything thoroughly with the provided spoon, dissolving all the sugars evenly.
Achieving Optimal Temperature and Observing the “Cold Break”
Now, fill your fermenter with cold water up to the 15-liter mark and check the temperature using your thermometer strip. The strip might show color in a range, so aim for the middle of that range to determine your brew’s temperature. Continue filling to the 23-liter mark, adjusting with either hot or cold water until your brew is firmly within the 21-27°C range, ideally closer to the lower end. Maintaining this specific temperature is vital because it significantly impacts the yeast’s activity and the flavor profile of your finished Coopers DIY Beer; temperatures too high can lead to harsh, boozy off-flavors, while too low can cause sluggish fermentation.
As you fill, you might notice some small particles floating in your brew. Don’t be alarmed! This is a completely normal phenomenon called “cold break.” These are simply proteins and tannins that coagulate and precipitate out of the liquid as it cools, and they pose no threat to your beer’s quality or flavor. They will settle out during fermentation, leaving you with a clearer final product. Think of it like cooking broth; sometimes small particles appear, but they don’t harm the overall dish.
3. Measuring Original Gravity: Your Brewing Baseline
Before adding the yeast, measuring the Original Gravity (OG) of your brew is an essential step. This measurement tells you the density of the sugars in your wort before fermentation begins. You’ll need your hydrometer, a simple but powerful tool for homebrewing. The video demonstrates how to use it: first, draw a small sample from the tap to half-fill the sample tube and discard it. This clears any stagnant liquid from the tap. Then, draw another sample, filling the tube enough to comfortably float the hydrometer.
When reading the hydrometer, look at the scale where the liquid’s surface meets the hydrometer stem, specifically at the “meniscus.” The meniscus is the slight curve formed by the liquid clinging to the hydrometer. Record this number carefully, as it’s your baseline. Imagine if you were tracking your car’s fuel efficiency; the OG is like your starting mileage reading, crucial for calculating how much fuel (sugar) your yeast consumes. This reading is critical for determining the final alcohol content of your homebrew beer and confirming that your fermentation has successfully completed.
4. Adding Yeast and Guiding Fermentation: The Magical Transformation
With your OG recorded, it’s time for the yeast – the true workhorse of your homebrew. First, fit the krausen kollar to your fermenter; this clever accessory helps contain the foam (known as krausen) that will form during active fermentation. Then, simply sprinkle the dry yeast evenly over the surface of the wort. It’s crucial not to stir the yeast in at this stage. Allowing it to hydrate naturally on the surface is best, as stirring can introduce too much oxygen, which, while beneficial for initial yeast growth, can lead to off-flavors later in the process.
Once the yeast is sprinkled, fit the lid securely to the krausen kollar with the lid clips, ensuring it’s sealed. Even if your brew’s temperature is slightly outside the ideal 21-27°C range, it’s more important to add the yeast as soon as possible to get fermentation started. While yeast can ferment in a wider range, striving for a consistent temperature, especially at the lower end of 21-27°C, will yield the cleanest and most desirable flavors in your Coopers DIY Beer. High temperatures can produce unwanted esters and fusel alcohols, leading to “cidery” or harsh tastes.
Monitoring and Maintaining Your Fermentation
Within 12 to 24 hours, you’ll begin to see signs that fermentation is underway. You’ll observe foam (the krausen) forming on the surface, and the liquid will become cloudy. This is a clear indication that your yeast is actively consuming the sugars and converting them into alcohol and carbon dioxide. During this initial, vigorous phase, it’s important to keep the lid fitted tightly to prevent any airborne contaminants from entering your brew. Removing the lid unnecessarily creates an opportunity for unwelcome bacteria or wild yeasts to infect your homebrew.
On day three of fermentation, or once the krausen has noticeably subsided, you can carefully remove the krausen kollar for cleaning. First, gently unclip and remove the lid, then the kollar, and immediately replace the lid onto the fermenter itself. The krausen kollar can often be placed in a dishwasher for easy cleaning. Continue to monitor the temperature and keep your Coopers DIY Beer fermenting in its consistent, dark spot for a few more days, allowing the yeast to complete its work at a steady pace.
5. Testing for Final Gravity: Confirming Fermentation Completion
On day six, it’s time to measure the specific gravity of your brew again. This time, you’re looking for the Final Gravity (FG), which indicates how many sugars are left. Just like with the Original Gravity, draw a sample using your hydrometer. If your sample appears very foamy, you might need to “degas” it by gently stirring the sample with a clean spoon or swirling the tube. Dissolved carbon dioxide bubbles can cling to the hydrometer, giving you a falsely high reading, so removing them ensures accuracy.
Continue testing the specific gravity each day until you achieve a stable reading for two consecutive days. This stability is the key indicator that your fermentation is complete; the yeast has consumed all the fermentable sugars it can. At this point, it’s a great idea to taste and smell a small sample of your Coopers DIY Beer. It should taste like warm, flat beer – meaning it will lack carbonation but should have the core flavors of your chosen beer style. If it tastes and smells good, with no off-notes, you’re ready to proceed to the next exciting stage: bottling!
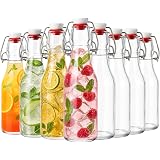
6. Bottling Your Brew: Preparing for Carbonation and Enjoyment
Once your brew has reached its stable Final Gravity and passed the taste test, it’s time to prepare it for bottling. Just like your initial equipment, your bottles demand meticulous cleaning and sanitizing. For bottles used for the first time, a simple rinse with warm water will suffice. However, for subsequent brews, always clean and sanitize your bottles thoroughly to prevent any contamination from previous batches that could spoil your new Coopers DIY Beer.
To make bottling effortless, attach the bottling valve to your fermenter’s tap. This ingenious device allows you to fill bottles quickly and efficiently without constantly turning the tap on and off. It’s also wise to place a container underneath the tap to catch any drips and maintain a clean workspace. Fill each bottle close to the brim; as you remove the bottling valve, it will create the perfect amount of headspace, which is crucial for safe carbonation. Too little headspace can lead to dangerously over-pressurized bottles, while too much can result in under-carbonation.
The Magic of Carbonation Drops and Secondary Fermentation
After filling each bottle, add two carbonation drops for every 740 to 750 ml bottle. These drops are precisely measured amounts of sugar that will fuel a “secondary fermentation” directly within the bottle. This mini-fermentation is what creates the delightful fizziness in your homebrew. Screw the caps onto your bottles tightly, ensuring an airtight seal to contain the newly forming carbon dioxide. If the caps are loose, the CO2 will escape, leaving you with flat beer.
Store your newly capped bottles out of direct sunlight, in a spot that maintains a temperature at or above 18°C. This warmth is important for the yeast to remain active and successfully carbonate your Coopers DIY Beer. You’ll need to let your bottles condition for at least two weeks. This patience is rewarded as the secondary fermentation proceeds, building up natural carbonation and allowing the flavors of your beer to mature and meld beautifully. Some brewers even find that an extra week or two of conditioning further enhances the beer’s complexity and smoothness.
After a couple of weeks, you can transfer your bottles to the fridge to chill them down. Once nice and frosty, your very own handcrafted Coopers DIY Beer is ready to be enjoyed! This entire process, from opening the kit to the final delicious sip, demonstrates how accessible and enjoyable homebrewing can be. It truly is one of the most rewarding DIY projects you’ll ever undertake, yielding fantastic results and a refreshing sense of accomplishment with every pour.
Brewing Up Answers: Your Coopers DIY Beer Q&A
What is the Coopers DIY Beer Kit?
The Coopers DIY Beer Kit is a complete package designed for beginners to easily brew their own beer at home. It provides all the necessary tools and ingredients to make 23 liters of beer.
Why is cleanliness so important when homebrewing?
Meticulous cleanliness is the most critical step because it prevents contamination, which can cause off-flavors or spoil your entire batch. Every piece of equipment that touches your brew must be spotless and sanitized.
What is the ideal temperature for fermenting homebrew?
The ideal temperature range for fermenting your beer is between 21°C and 27°C. Maintaining a consistent temperature helps the yeast ferment properly and creates the best flavors.
How does the beer become fizzy after bottling?
After filling your bottles, you add carbonation drops, which are small amounts of sugar. This sugar fuels a ‘secondary fermentation’ inside the sealed bottle, producing natural carbon dioxide and making the beer fizzy.
How long does it take for bottled homebrew to be ready to drink?
After bottling, your beer needs to condition for at least two weeks in a spot at or above 18°C and out of direct sunlight. This allows time for the carbonation to develop and the flavors to mature.