Brewing a truly exceptional **German Pilsner** at home is an achievable feat. This nuanced style demands precision and control. As seen in the accompanying video, even seasoned homebrewers like Dylan face challenges. His journey from “questionable beers” to a delightful **lager** highlights critical lessons. We will delve into the expert techniques and insights shared by Get Er Brewed. You can elevate your brewing game and craft a **Pilsner style beer** that impresses.
Crafting Your Signature German Pilsner Recipe
A great beer starts with a robust recipe. Think of it as an architect’s blueprint for a strong building. For a **German Pilsner**, ingredient selection is paramount. Purity and tradition guide the choices. The right components ensure an authentic flavor profile. This foundation is where the magic truly begins.
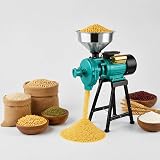
1. The Malt Bill: A Foundation of Purity
The malt bill for a traditional German Pilsner is elegantly simple. It primarily features high-quality German Pilsner malt. This forms the backbone of the beer’s character. In Dylan’s recipe, 3.98 kg of German Pilsner malt dominates. A small addition, 120 grams of Vienna Malt, rounds out the grist. This translates to roughly 97% Pilsner and 3% Vienna, a subtle but effective tweak. The Vienna malt adds a touch of complexity and body. Brewers use grist analysis to ensure correct crush and maximize extract efficiency. It prevents the wort from becoming a sticky, unproductive porridge.
2. Noble Hops: Aroma and Balance
Hops provide the spice and balance in your **Pilsner style beer**. True to tradition, noble hops are essential. These varieties are known for their floral, spicy, and sometimes minty aromas. Dylan’s recipe features Magnum, Hersbrucker, and Tettnang hops. Magnum goes into the boil for clean bitterness. Hersbrucker is a flame-out addition, contributing delicate aromatics. The Tettnang hops, a classic noble varietal, are added as the wort chills to 80°C. This lower temperature allows their delicate oils to shine. It captures their distinctive character. This strategic timing is like fine-tuning an orchestra, each instrument playing its part.
3. Yeast Selection: The Soul of Your Lager
Yeast is the hidden hero of any beer, especially a **lager**. It transforms sugary wort into alcoholic beverage. For this **German Pilsner**, Lallemand’s Diamond Lager yeast is the preferred choice. It is a premium, robust strain. Other options include White Labs liquid yeasts or Fermentis dry yeasts. The health of your yeast is critical for a clean fermentation. It ensures the distinct crispness characteristic of a true lager. Pitching sufficient, viable yeast cells avoids off-flavors. It guarantees a smooth fermentation.
Mastering the Brew Day Ritual
Brew day is where theory meets practice. Precision is key. Each step builds upon the last, like building blocks. Small errors can cascade, impacting the final product. Attention to detail ensures success. Follow the instructions meticulously for best results.
1. Precision Mashing for Optimal Extract
Mashing extracts sugars from your malt. This is a crucial step. A target temperature of 63°C for about an hour is ideal for a **German Pilsner**. This temperature promotes beta-amylase activity. It produces fermentable sugars for a dry finish. Dylan learned this lesson when he impulsively increased his mash liquor volume. He chose 20 liters instead of the recommended 15. This can affect mash efficiency and beer body. Adhering to the recipe’s specifications is vital. Trusting the experts at Get Er Brewed is always a wise move.
2. The Art of the Boil and Hop Additions
Boiling achieves several objectives. It sterilizes the wort, extracts hop bitterness, and develops flavor. Keeping the lid off during the boil allows volatile compounds to escape. It also helps concentrate the wort. Hop additions are timed carefully. Magnum goes in early for bitterness. Hersbrucker at flame-out adds delicate aromatics. This staggered approach builds layers of flavor. It’s similar to a painter adding colors to a canvas.
3. Rapid Chilling for Clarity and Flavor
Promptly chilling the wort after the boil is non-negotiable. This prevents unwanted bacterial growth. It also helps precipitate haze-forming proteins. Immersion chillers are common and efficient. Dylan’s new chiller hangs conveniently. Running cold water through it rapidly drops the wort temperature. The first target is 80°C for the Tettnang hop addition. Then, the wort must cool to below 15°C for yeast pitching. This is an essential step. It protects your carefully crafted wort. It prepares it for healthy fermentation.
The Fermentation Crucible: Where Lager Magic Happens
Fermentation is where yeast converts sugars into alcohol and CO2. For **lager brewing**, temperature control is paramount. It is the single most critical factor. This stage defines the beer’s character. Consistent conditions are non-negotiable for a clean, crisp finish.
1. Unyielding Fermentation Temperature Control
Lagers require cooler fermentation temperatures than ales. Maintaining a consistent 14-15°C is crucial. Fluctuations can lead to off-flavors. These include diacetyl or fusel alcohols. Equipment like the Ferminator, mentioned by Dylan, is a game-changer. This insulated chamber with active temperature regulation ensures stability. It’s like a scientific laboratory for your beer. This precision eliminates guesswork. It removes the stress of inconsistent temperatures. This dedicated control unit is a worthy investment. It turns unpredictable results into consistent excellence.
2. Harnessing the Power of Pressure Fermentation
Pressure fermentation offers a revolutionary approach to **lager brewing**. It allows for faster fermentation times, significantly reducing the traditional three-month lagering period to 7-10 days. Using a pressure fermenter, like the Fermzilla, means the beer ferments under pressure (around 15 PSI). This naturally carbonates the beer. It eliminates the need for priming sugar at bottling. However, as Dylan discovered, seals must be tight. A loose cap or seal can cause pressure drops. Applying PTFE tape to threads can help. This simple fix can save a brew. It ensures proper carbonation and fermentation. The original gravity (OG) of 1050 indicates a highly efficient mash. This means more sugar was extracted than anticipated. It’s like finding extra gold in a mine. This contributes to the final alcohol content.
Post-Fermentation: Maturation and Packaging
The brewing journey doesn’t end with fermentation. Maturation and packaging are final crucial steps. They polish your beer. These stages prepare it for consumption. Patience is often rewarded with superior flavor.
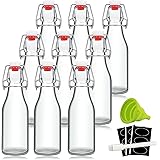
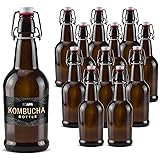
1. Bottle Conditioning vs. Kegging: The Final Polish
After primary fermentation, beer undergoes conditioning. Bottle conditioning is a common homebrewing method. It involves adding a small amount of priming sugar and yeast (like Lallemand’s CBC-1) to bottles. The yeast then consumes this sugar, creating CO2 for carbonation. This process typically takes 2-3 weeks. A drawback is the sediment it leaves. Pressure fermentation, conversely, carbonates the beer in the fermenter. This allows for direct transfer to bottles or kegs. It reduces sediment. It is a more streamlined process. Each method has its merits. The choice depends on your equipment and desired outcome. It’s like choosing between a vintage hand tool or a modern power tool.
2. Learning from Experience: The Brewer’s Imperative
Dylan’s journey is a testament to learning through mistakes. His prior “questionable beers” stemmed from poor sanitation, inconsistent temperatures, and incorrect equipment. His New England IPA, over-sugared and bottle-conditioned, became “sketchy” after two weeks. These experiences highlight universal brewing truths. Maintaining meticulous records is paramount. Documenting every step allows for future adjustments. It’s like keeping a logbook for a ship’s voyage. Sanitation is a brewer’s religion. Temperature control is its sacred scripture. When problems arise, consulting experts, like Johnny from Get Er Brewed, is invaluable. A fresh perspective often unlocks the solution. Even small errors are correctable. They offer invaluable learning opportunities. This dedication leads to brewing excellence. It transforms novice attempts into delightful **German Pilsner**.
Lagering Your Lingering Questions
What is a German Pilsner?
A German Pilsner is a specific and nuanced style of lager beer. It is known for its clean, crisp taste and requires precise brewing techniques to achieve its distinctive character.
What are the main ingredients used in a German Pilsner recipe?
A German Pilsner primarily uses high-quality German Pilsner malt as its base. It also includes noble hops for bitterness and aroma, and a specific lager yeast strain for fermentation.
Why is it important to control fermentation temperature for lagers?
Controlling the fermentation temperature is crucial for lagers because they ferment at cooler temperatures, typically 14-15°C. Consistent temperatures prevent off-flavors and ensure the beer develops its characteristic crispness.
What is pressure fermentation and what are its benefits?
Pressure fermentation involves fermenting beer in a sealed vessel under pressure. This technique can significantly reduce traditional lagering times and naturally carbonate the beer, eliminating the need for priming sugar later.
What are some critical lessons for new homebrewers?
For new homebrewers, meticulous sanitation and consistent temperature control are paramount. Learning from experiences and documenting your process are also key to improving your brewing skills.