Are you eager to streamline your brewing process, achieve excellent results, and keep more money in your wallet? The world of homebrewing constantly evolves, offering innovative techniques and clever workarounds for common challenges. While the video above offers a fantastic glimpse into some game-changing homebrewing hacks, this accompanying article will delve deeper into each tip, providing further context, benefits, and practical advice to elevate your brewing experience.
Rapidly Heating Sparge Water with a Common Kitchen Appliance
One of the most immediate benefits of clever homebrewing is finding quick solutions to seemingly time-consuming tasks. Imagine if you are moments away from sparging, yet you discover you are short on heated water. This common scenario can quickly derail your brew day. Fortunately, a standard kitchen coffee maker can become an invaluable tool in such situations.
A typical coffee maker, often overlooked for its brewing potential, conveniently dispenses water at approximately 180 degrees Fahrenheit. This temperature is remarkably close to the ideal range for sparge water, which is often around 170 degrees Fahrenheit. The narrator highlights how even an older model can be highly effective, emphasizing reliability. By filling the coffee pot and then adjusting with a small amount of room temperature water, you can quickly achieve the precise 170-degree temperature required for efficient sparging.
Utilizing a coffee maker in this manner means you can produce approximately a half-gallon of heated sparge water in mere minutes. This method not only saves time but also eliminates the need to monopolize your stovetop for small, last-minute water heating tasks. Furthermore, by rinsing your grains with this efficiently heated water, you ensure optimal sugar extraction without unnecessary delays, contributing significantly to your overall brewing efficiency.
Achieving Precise Temperature Control with a Sous Vide Stick
Maintaining a consistent mash temperature is absolutely crucial for the enzymatic processes that convert starches into fermentable sugars. Fluctuations in temperature can lead to an inefficient mash, resulting in lower gravity or an undesirable sweetness in your final beer. Consequently, many homebrewers invest in complex systems to achieve this stability.
The introduction of a 1,000-watt sous vide stick, such as the Inkbird model mentioned, offers a highly effective and surprisingly affordable solution for temperature maintenance during the mash and sparge. This device is renowned for its ability to circulate and precisely heat water, maintaining a set temperature with remarkable accuracy. While the sous vide stick is not designed for initial rapid heating of large volumes, it excels at holding temperatures indefinitely once your wort or water has reached the desired level.
Consider this hypothetical scenario: you bring your mash to 152 degrees Fahrenheit using a propane burner, then turn off the gas. By placing the sous vide stick into your mash tun, it will actively monitor and maintain that exact temperature. The narrator’s test confirmed this, as the device held 152 degrees for an hour, and later 170 degrees for another full hour, showcasing its impressive capabilities. This precision is particularly beneficial during colder months when mash tuns tend to cool down quickly, preventing crucial heat loss and ensuring optimal enzyme activity for sugar conversion.
It is important to note that while versatile, the sous vide stick’s effectiveness depends on its fit within your brewing kettle. For instance, in a large 20-gallon kettle, it may only effectively heat if the liquid level is high enough for the element to be fully submerged. This innovative application allows for a semi-electric brewing system, providing stable temperature control without the high cost of a dedicated electric system, although it’s generally not recommended for boiling or kettle sours due to its design.
Revolutionizing Dry Hopping with Food-Grade Magnets
Dry hopping is a popular technique for imparting vibrant hop aromas and flavors to beer, but it often comes with inherent challenges such as oxygen exposure and messy cleanup. Traditional methods involve adding hops directly to the fermenter, which can introduce oxygen and lead to haze or off-flavors, in addition to making cleanup more difficult.
A simple yet ingenious homebrewing hack involves using food-grade magnets for dry hopping, providing a cleaner and more controlled process. These powerful magnets can securely hold hop pellets or cones in a sachet or bag against the inside wall of your fermenter. When it is time to dry hop, you simply attach the sachet to an external magnet, insert the internal magnet with hops into your fermenter, and then position them accordingly.
This method brilliantly minimizes oxygen exposure, a critical factor in preserving delicate hop aromas. The video highlights how these magnets can hold between one and one and a half ounces of hops, and for larger dry hop additions, more magnets can be employed. When the desired contact time is achieved, simply pull the external magnet away, allowing the hops to fall into the beer without opening the fermenter. This not only keeps your beer free from oxygen but also significantly simplifies cleanup, preventing hop particles from clogging your spigot or requiring extensive racking.
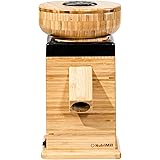
Enhancing Brew-in-a-Bag (BIAB) with a Metal Grain Basket
Brew-in-a-Bag (BIAB) has become a favored method for its simplicity and efficiency, especially for smaller batches. However, traditional fabric grain bags can present their own set of challenges, including tearing, uneven sparging, and the potential for channeling during rinsing. These issues can detract from wort clarity and extract efficiency.
Consequently, many brewers are transitioning to metal grain baskets as a more robust and effective alternative for their BIAB systems. Unlike fabric bags that can sometimes allow water to bypass the grain bed during sparging, a metal basket ensures a more uniform flow of water through the entire grain mass. This improved liquid distribution leads to more thorough sugar extraction and a clearer wort.
The narrator praises a new, wider metal basket from Clawhammer, underscoring the importance of a broad surface area for optimal performance. A wider basket prevents compaction of the grain bed, further facilitating even sparging and runoff. Utilizing a metal grain basket enhances the overall efficiency and consistency of your BIAB process, providing a cleaner, more efficient sparge and superior wort separation without the worries of bag tears or channeling.
DIY Fermenters and Bottling Buckets with Food-Grade Plastic Buckets
The cost of dedicated brewing equipment can quickly add up, particularly when outfitting multiple fermenters or bottling vessels. Fortunately, a highly economical and versatile solution exists in the form of food-grade plastic buckets, readily available at many hardware stores.
These buckets, typically found in the paint aisle of stores like Home Depot for around $5, are perfect for a variety of homebrewing tasks. By simply adding a food-grade spigot, costing a couple of dollars, you can transform a basic bucket into a highly functional fermenter, a convenient bottling bucket, or even a sanitation bucket. The total cost for such a customized bucket typically comes out to a mere $7, offering substantial savings compared to commercially manufactured vessels.
The narrator emphasizes the ease of installation, noting that drilling into plastic is a straightforward process. Using a spade bit to initiate the hole and then a step drill bit to enlarge and smooth it ensures a clean, leak-free fitting for your spigot. This DIY approach eliminates the arduous task of siphoning, which is often described as a “nightmare” due to the risk of oxidation and the physical effort involved. By having a spigot, transferring beer becomes effortless, minimizing disturbance to the yeast cake and reducing the risk of oxygen ingress, ultimately leading to a cleaner, better-tasting final product.
Accelerating Fermentation and Saving Resources with Kveik Yeast
Traditional brewing often dictates specific pitching temperatures, typically around 70 degrees Fahrenheit, to ensure healthy yeast activity and prevent off-flavors. This often requires significant chilling of the wort, a process that consumes time, water, and energy. However, the advent of Kveik yeast has revolutionized this aspect of homebrewing.
Kveik yeast strains are thermophilic, meaning they thrive at much higher temperatures than conventional ale or lager yeasts. The narrator highlights a key benefit: pitching Kveik yeast at a scorching 110 degrees Fahrenheit. This higher temperature dramatically speeds up the fermentation process, often completing it in just a few days rather than weeks. This property significantly reduces the need for extensive chilling, conserving precious water and energy during your brew day.
Furthermore, the discussion touches upon the increasing popularity of dry yeast, particularly Kveik. Historically, dry yeast carried a “bad rap,” but modern strains, including Kveik, offer exceptional performance and reliability. The convenience and cost-effectiveness of dry yeast are undeniable; as the narrator points out, liquid yeast often incurs a hefty $25 charge for overnight shipping with ice packs, a cost entirely avoided with shelf-stable dry options. Utilizing Kveik yeast and embracing dry yeast varieties represent forward-thinking homebrewing hacks that save time, money, and resources, making the brewing process faster and more enjoyable.
Fermenting Your FAQs
How can I quickly heat water for sparging when homebrewing?
A regular kitchen coffee maker can quickly heat about a half-gallon of water to around 180 degrees Fahrenheit, which is perfect for last-minute sparge water needs.
What is a sous vide stick used for in homebrewing?
A sous vide stick helps maintain a precise and consistent temperature in your mash tun, ensuring starches convert efficiently into sugars without temperature fluctuations.
How can I add dry hops to my beer without exposing it to oxygen?
You can use food-grade magnets to hold a bag of hops inside your fermenter. This allows you to add or remove hops by manipulating the external magnet, keeping oxygen out.
What is a metal grain basket and how does it improve Brew-in-a-Bag (BIAB)?
A metal grain basket is a sturdy alternative to fabric bags for BIAB brewing. It ensures more even water flow through your grains, leading to better sugar extraction and clearer wort.
Can I create my own fermenter or bottling bucket cheaply?
Yes, you can use an inexpensive food-grade plastic bucket from a hardware store and add a food-grade spigot to make a functional and cost-effective fermenter or bottling bucket.