For many aspiring brewers, the journey into crafting your own beer can feel daunting, yet incredibly rewarding. As discussed in the insightful video above, common initial frustrations often stem from uncalibrated equipment, with some beginner thermometers reportedly being off by as much as 15 degrees. This seemingly small error can significantly impact your mash temperature, potentially leading to lower alcohol by volume and a consistently malty, under-fermented product. Furthermore, the tedious process of bottling beer is frequently cited as a major reason why new enthusiasts abandon homebrewing altogether, underscoring the need for more efficient methods.
Fortunately, transforming these early challenges into consistent success is entirely achievable for beginning homebrewers. This comprehensive guide expands upon the essential homebrewing tips shared in the accompanying video, providing deeper insights and practical advice to elevate your craft. By focusing on fundamental techniques and smart investments, you can confidently navigate the complexities of brewing, reduce frustration, and produce high-quality beer right from your home. We aim to equip you with the knowledge to refine your process, save time, and ultimately enjoy a more fulfilling homebrewing experience, avoiding common pitfalls that often deter novice brewers.
Mastering Your Brew: Essential Tips for Beginning Homebrewers
1. Calibrate Your Thermometer for Precision Brewing
Accurate temperature control represents a cornerstone of successful homebrewing, particularly during the critical mashing phase. A thermometer that reads inaccurately can profoundly jeopardize your beer’s final profile, influencing everything from fermentability to flavor. For instance, if your thermometer incorrectly indicates a 150°F mash while the actual temperature is only 135°F, crucial enzymes necessary for converting starches into fermentable sugars will not function optimally. Consequently, this leads to a wort with a higher percentage of unfermentable sugars, resulting in a beer that tastes excessively malty, has a lower alcohol content, and often finishes with an undesirable sweetness.
Therefore, routinely calibrating your thermometer becomes a non-negotiable step for beginning homebrewers seeking consistent results. A simple ice bath test, where a properly calibrated thermometer should read 32°F (0°C), provides a quick and reliable method for verification. Upgrading to a more precise instrument, such as an Inkbird or Anvil temperature controller, is a minimal investment—typically ranging from $20 to $30—that yields substantial benefits. Incorporating a thermowell into your fermenter further enhances accuracy by allowing the probe to directly measure the wort’s temperature, ensuring your fermentation process adheres to ideal conditions and promoting robust yeast health for superior beer quality.
2. Embrace Kegging Early for Simplified Homebrewing
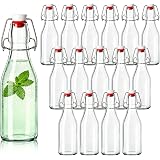
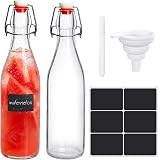
The laborious and time-consuming nature of bottling is a significant deterrent for many beginning homebrewers, often leading to burnout and even quitting the hobby. Washing, sanitizing, filling, and capping dozens of bottles for each batch demands considerable time and effort, transforming brew day into an extended chore rather than an enjoyable pursuit. Moreover, the recurring cost of new bottles or the effort involved in sourcing and cleaning used ones adds an unnecessary burden to your homebrewing budget and workflow. This cumbersome aspect frequently overshadows the joy of creating delicious beer, making the entire process feel less rewarding.
Conversely, transitioning to kegging early in your homebrewing journey dramatically simplifies the post-fermentation process. Kegs provide a quick, efficient, and reusable solution for packaging your beer, cutting down packaging time by more than half compared to bottling. Furthermore, serving beer directly from a tap offers a superior drinking experience, reminiscent of a professional draft system, which is incredibly satisfying for any brewer. While the initial investment in kegging equipment might seem higher, the long-term savings in time, effort, and consumable bottles quickly offset this cost, making it a highly recommended upgrade for beginning homebrewers committed to enjoying their craft without the perpetual bottling headache.
3. Prioritize Your System Over New Recipes
A common mistake among beginning homebrewers involves chasing an endless array of exotic recipes before fully understanding their own brewing system. While experimenting with different styles like IPAs, Saisons, and brown ales is certainly appealing, this approach can inadvertently mask underlying inconsistencies in your technique or equipment. Prioritizing your system means dedicating time to master your specific setup, including everything from your heat-up times to pre-boil gravity measurements. This focused approach allows you to identify and address variables within your process, building a robust foundation for future brewing endeavors.
Expert brewers frequently advise brewing the same simple recipe multiple times—perhaps four or five consecutive batches—until you achieve consistent, high-quality results. This iterative process allows you to fine-tune every aspect of your technique, from mash temperature control to sparging efficiency, without the added complexity of new ingredients or methodologies. Even at a commercial level, perfecting a new recipe can require two or three trials before it meets rigorous quality standards. By focusing on mastering your system first, beginning homebrewers cultivate precision and predictability, which are invaluable assets for confidently tackling any recipe thereafter.
4. Leverage a Dry Erase Board for Organized Brew Days
Effective note-taking and organization are indispensable tools for any beginning homebrewer aspiring to improve their craft. While paper notebooks are useful, they are prone to getting lost, damaged, or becoming illegible over time, especially in a bustling brew environment. A large dry erase board offers a highly visible and durable solution for tracking critical brewing information, serving as a central hub for all your project details. This simple addition can significantly enhance your operational efficiency and memory retention throughout the brewing process, minimizing errors and improving consistency between batches.
Imagine having your budget, ingredient lists, fermentation schedule, and critical deadlines clearly displayed in plain sight, making it impossible to overlook crucial steps or appointments. Many experienced homebrewers also use dry erase boards to track fermentation progress, gravity readings, or even upcoming homebrewing events. This constant visibility acts as an invaluable reminder system, ensuring that key data points are always accessible and not forgotten amid the excitement of brew day. Ultimately, a dry erase board transforms a potentially chaotic brewing session into a streamlined, organized, and more enjoyable experience for beginning homebrewers.
5. Smart Savings: Buying Used Homebrewing Equipment
The allure of shiny, brand-new homebrewing equipment can be strong, but for beginning homebrewers, purchasing used gear represents a fiscally intelligent strategy. Many individuals enter homebrewing with enthusiasm only to discover it is not for them, leading to a surplus of lightly used equipment often available at significantly reduced prices. Websites like Craigslist and OfferUp are treasure troves for finding high-quality stainless steel kettles, fermenters, and other essential items for pennies on the dollar. Stainless steel, by its very nature, is incredibly durable and hygienic, lasting indefinitely with proper care, making it an excellent investment even when pre-owned.
This approach allows new brewers to acquire professional-grade equipment without the hefty upfront cost, redirecting savings towards quality ingredients or other critical upgrades like temperature controllers. Remember that the quality of your beer stems from your technique and sanitation practices, not merely the aesthetic appeal of your equipment. Experienced homebrewers frequently attest that a well-maintained used setup can produce beer just as exceptional as one crafted with brand-new gear. Therefore, for beginning homebrewers, embracing the used market ensures accessibility to better tools while keeping initial expenses manageable.
6. Optimizing Wort Chilling with a Pre-Chiller
Rapidly cooling your hot wort after the boil is a critical step in homebrewing that significantly impacts beer quality and flavor stability. Traditional immersion chillers, while effective, can take upwards of 45 minutes to an hour to bring a standard batch down to pitching temperature, especially during warmer months. This extended cooling period exposes your wort to potential bacterial contamination and also risks the development of undesirable off-flavors, such as DMS (dimethyl sulfide), which can impart a corn-like aroma. Efficient chilling is paramount for preserving the delicate flavors developed during the boil and preparing a healthy environment for your yeast.
Implementing a pre-chiller into your setup dramatically accelerates this process, often cutting chilling time in half, even for larger 10-gallon batches, potentially achieving pitching temperatures in approximately 15 minutes. A pre-chiller typically involves a second chiller submerged in an ice bath before your primary wort chiller, effectively super-cooling the tap water that then flows through your main chiller. This dual-stage cooling system substantially reduces the overall time your wort spends in the “danger zone” between pasteurization and yeast pitching temperatures. For beginning homebrewers, a pre-chiller represents a smart upgrade that enhances both efficiency and the sensory quality of their finished beer.
7. Scale Up Your Batches for More Efficient Brewing
Beginning homebrewers often start with 5-gallon batches, which seems logical; however, the effort-to-reward ratio for smaller volumes can quickly become disproportionate. A typical 5-gallon batch yields approximately 40 pints, which can disappear remarkably fast, especially when shared among friends. Consider the time commitment involved: a typical brew day can span six to eight hours, regardless of whether you’re producing five or ten gallons. Therefore, the return on your time investment significantly increases when you scale up your brewing operations.
Making the leap to 10-gallon or even 15-gallon batches provides a much more satisfying yield without a corresponding increase in labor, as most processes remain fundamentally the same. While the initial ingredient cost will be higher, the operational time investment remains largely constant. This means you brew less frequently, saving precious weekend hours while still maintaining a robust supply of your favorite homebrew. For beginning homebrewers looking to maximize their brewing efficiency and minimize the frequency of full-scale brew days, scaling up your batch size quickly becomes an undeniable advantage.
8. Focus Your Efforts: Brewing by Yourself
While the camaraderie of brewing with friends is undeniable, especially for beginning homebrewers, turning brew day into a social event often detracts from the ultimate goal of making better beer. Distractions, spills, and accidental additions from well-meaning but unfocused guests can easily compromise sanitation and process integrity. The precise steps involved in mashing, sparging, boiling, and transferring wort demand undivided attention to ensure consistency and prevent costly mistakes. Even a small deviation, like an unchecked temperature or an overlooked sanitation step, can significantly impact the final product.
Therefore, brewing by yourself, or with a single, equally dedicated and experienced brewing partner, is highly recommended for honing your skills. This focused environment allows you to meticulously follow your recipe, take accurate notes, and react promptly to any unforeseen issues without external interruptions. Without the distractions of a party, you can fully immerse yourself in the process, developing a deeper understanding of each stage and fostering greater consistency in your results. For beginning homebrewers aiming to rapidly improve their brewing acumen, a solitary, focused brew day offers unparalleled learning opportunities.
9. Maintain Cleanliness: The “Janitor That Brews” Philosophy
Sanitation is perhaps the single most critical factor in homebrewing, effectively defining the difference between delicious craft beer and an undrinkable batch. A common analogy among experienced brewers suggests that homebrewers are essentially “janitors who sometimes brew beer,” emphasizing the paramount importance of cleanliness. For beginning homebrewers, resisting the urge to defer cleaning tasks until “tomorrow” is vital. Post-brew day fatigue, or the effects of sampling your wares, can make scrubbing sticky kettles and grain-filled mash tuns seem unbearable; however, dried-on wort and grain residue are exponentially harder to remove than fresh spills.
Implementing a “clean as you go” philosophy dramatically streamlines the sanitation process and prevents future headaches. During natural downtimes in your brew day—such as mash rests or the 60-minute boil—you can easily rinse and clean equipment that is no longer in use. This proactive approach ensures that by the time your brew day concludes, the majority of your equipment is already clean and ready for storage or the next batch. Avoiding a mountain of dirty equipment prevents the dreaded “beer slump,” where the thought of cleaning outweighs the desire to brew, keeping your passion for homebrewing alive and well.
10. Streamline Fermentation with a Spigot-Equipped Fermenter
Many beginning homebrewers mistakenly adhere to rigid fermentation timelines, such as the widely circulated “two-week rule,” regardless of actual yeast activity. This arbitrary waiting period often results in either unnecessarily prolonged fermentation or, worse, prematurely packaging beer that has not yet reached its final gravity. The actual duration of fermentation is highly variable, influenced by factors like yeast health, pitching rate, fermentation temperature, and wort gravity. Relying on visual cues or calendar dates rather than precise measurements can lead to inconsistent beer quality and unnecessary delays.
A fermenter equipped with a spigot dramatically streamlines the process of monitoring fermentation progress by facilitating easy, sanitary sampling for gravity readings. This allows you to accurately determine when your beer has reached its final gravity, indicating that fermentation is complete and it’s ready for packaging. For example, if your hydrometer readings show a stable final gravity over two consecutive days, you can confidently move to kegging, potentially cutting fermentation time from two weeks down to three or four days. This efficiency not only accelerates your access to fresh homebrew but also encourages more frequent brewing, keeping your enthusiasm high and enhancing your overall homebrewing journey. Notably, simple DIY solutions exist, allowing beginning homebrewers to add spigots to basic fermenters for as little as seven dollars, making this essential upgrade incredibly accessible.
Q&A: Fermenting Your Queries
Why is it important to calibrate your thermometer when homebrewing?
Calibrating your thermometer ensures accurate temperature control during the mashing phase, which is crucial for converting starches into fermentable sugars. An inaccurate thermometer can lead to lower alcohol content and an undesirably malty beer.
What is a major benefit of using kegs instead of bottles for beginning homebrewers?
Transitioning to kegging early dramatically simplifies the post-fermentation process by cutting down packaging time by more than half compared to bottling. It also offers a superior draft drinking experience and reduces the continuous effort of cleaning and filling many bottles.
Why is cleanliness so important in homebrewing?
Sanitation is the most critical factor in homebrewing because it prevents bacterial contamination that can spoil your beer and make it undrinkable. Implementing a ‘clean as you go’ philosophy dramatically streamlines the process and ensures consistently good results.
Should a beginner homebrewer try many different recipes right away?
It’s recommended for beginning homebrewers to first master their specific brewing system by making the same simple recipe multiple times. This focused approach helps identify and address variables in your process, building a strong foundation for future brewing.
Is it okay for a beginning homebrewer to buy used equipment?
Yes, buying used homebrewing equipment is a smart way to save money, as many people sell lightly used gear at significantly reduced prices. Quality stainless steel items, in particular, are durable and can produce excellent beer with proper care, just like new equipment.