Homebrewing has seen a significant surge in popularity, with estimates suggesting millions of enthusiasts worldwide. For many, the journey begins with a reliable kit, offering a structured yet rewarding path into crafting their own beer. The Brewer’s Best American Amber Brew Kit, as showcased in the accompanying video, stands out as an excellent choice for those looking to explore the rich, malty, and subtly hoppy world of American Amber Ales. This guide expands on the brewing process, offering deeper insights and practical tips to ensure your first (or next) batch is a resounding success.
Unpacking the Brewer’s Best American Amber Kit: Your Brewing Journey Begins
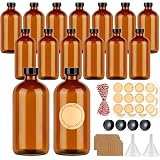
The beauty of a homebrew kit like the Brewer’s Best American Amber lies in its comprehensive nature. It provides nearly everything needed (minus basic equipment) to transform simple ingredients into delicious beer. As seen in the video, these kits typically include:
- Malt Extract: Often a blend of liquid and sometimes dry malt extract, this provides the fermentable sugars that yeast will convert into alcohol. The choice of malts dictates much of the beer’s color, body, and underlying flavor profile.
- Specialty Grains: Even in extract kits, a small amount of specialty grains is often included for steeping. These grains, like those providing the rich amber hue and nuanced flavors, are crucial for adding complexity beyond what malt extract alone offers.
- Hops: The video specifically mentions Willamette hops, a popular choice known for its mild, pleasant aroma and balanced bitterness. Kits typically pre-measure hop additions for specific stages of the boil.
- Yeast: A vital component, the yeast strain determines fermentation characteristics and contributes significantly to the final beer’s flavor.
- Priming Sugar: Added at bottling, this sugar provides a final food source for the yeast to create carbonation within the sealed bottles.
- Grain Bag: Essential for steeping specialty grains, allowing for easy removal.
- Caps: For sealing your bottled homebrew.
- Directions: Step-by-step instructions are invaluable, guiding brewers through each stage of the process.
Each component plays a critical role in developing the unique character of the American Amber Ale, from its enticing color to its balanced flavor profile.
Mastering the Steeping Process: Extracting Rich Flavors and Color
Steeping grains is a foundational step, even in extract brewing, as it introduces non-fermentable sugars, complex carbohydrates, and color pigments that enhance the beer’s depth. The video accurately highlights the precise temperature and time required for this stage.
Optimal Steeping Temperatures and Times for American Amber Ale
For an American Amber Ale, the recommended steeping temperature range is between 150°F and 165°F, for a duration of 20 to 30 minutes. This range is specifically chosen to extract desirable flavors and colors without introducing unwanted astringency. Steeping too hot, above 170°F, can extract tannins from the grain husks, leading to a harsh, tea-like flavor. Conversely, steeping too cold can limit the extraction of beneficial compounds, resulting in a less flavorful and colorful wort.
As the brewer demonstrates, after steeping, simply allowing the grain bag to drip back into the pot is sufficient. It is widely advised not to squeeze the grain bag, as this can also force undesirable tannins and starches into your wort, potentially affecting the final beer’s clarity and flavor. Discard the spent grains responsibly.
The Boil: Bitterness, Aroma, and Essential Sanitization
Bringing the wort to a rolling boil serves multiple critical functions in the brewing process. First and foremost, it sanitizes the wort, eliminating any wild yeasts or bacteria that could spoil your American Amber Ale. Furthermore, the boil is where hop additions are carefully timed to achieve specific bitterness and aroma profiles.
Understanding Hop Additions in Your Homebrew
The Brewer’s Best American Amber kit, featuring Willamette hops, utilizes a staggered hop addition schedule. As demonstrated, the first hop addition is made after the liquid malt extract is stirred into the boiling water. These early additions, often boiled for 60 minutes or more, primarily contribute bitterness to the beer. Willamette hops are renowned for their delicate, floral, and slightly spicy characteristics, offering a balanced bitterness that complements the malt backbone of an American Amber Ale.
The second hop addition, occurring 30 minutes later, often serves to enhance flavor and aroma. Hops added later in the boil, or even after the boil (dry hopping), contribute more volatile aromatic compounds that would otherwise be boiled off. This layered approach ensures a complex hop profile in your American Amber Ale.
Maintaining a consistent “slow rolling boil” is key during this stage. A vigorous boil can lead to excessive evaporation and scorching, while too gentle a boil may not achieve proper sanitization or hop isomerization.
Efficient Wort Cooling: Preventing Off-Flavors and Ensuring Yeast Health
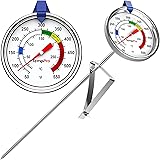
Once the boil is complete, rapidly cooling the wort is a critical step that cannot be overstated. Cooling quickly prevents the formation of off-flavors, such as dimethyl sulfide (DMS), which can impart a corn-like aroma. More importantly, it brings the wort down to a temperature suitable for pitching yeast, typically between 65°F and 72°F for most ale strains.
Cooling Methods for Homebrewers
The video mentions several cooling approaches:
- Ice Bath: As the brewer notes, an ice bath is a commonly recommended and highly effective method. Submerging your brew pot in a larger container filled with ice water can significantly reduce cooling time, often bringing the wort to pitching temperature within 20-30 minutes.
- Wort Chiller: Mentioned by the brewer as a desirable tool, a wort chiller (either immersion or plate-style) uses circulating cold water to rapidly cool the wort. This is often the most efficient method for larger batches.
- Natural Cooling: While the brewer opts for natural cooling due to having “lots of time,” this method is generally less recommended for beginners. It leaves the wort exposed to potential contaminants for a longer period and risks the development of DMS. If chosen, ensure your brew pot is covered with a sanitized lid.
Regardless of the method chosen, sanitization remains paramount throughout the cooling process. Any equipment that comes into contact with the cooled wort must be thoroughly sanitized to prevent infection.
Siphoning and Pitching Yeast: The Fermentation Kick-Off
With the wort cooled, the next crucial steps are siphoning it into the fermenter and pitching the yeast. This transition marks the official start of fermentation.
Sanitization and Siphoning Techniques
The video emphasizes the importance of sanitizing the fermenter. A clean and sanitized fermenter is fundamental to a successful brew. Using a no-rinse sanitizer, such as the one mentioned in the video (often a 1:1:16 ratio solution), ensures a sterile environment for your yeast. When siphoning, the goal is to transfer the wort from the brew pot to the fermenter with minimal splashing, which can introduce oxygen. While some oxygen is beneficial during yeast pitching, excessive oxidation at this stage can lead to stale flavors in the final beer.
The brewer correctly tops off the fermenter with filtered water to reach the target volume, typically around 23 liters for a standard kit. This ensures the beer has the intended strength and balance.
Pitching Your Ale Yeast for American Amber
The yeast is the engine of fermentation, converting sugars into alcohol and carbon dioxide. The video demonstrates a simple pitching method: sprinkling the yeast into a bowl, stirring it, and letting it sit for about 5 minutes. This allows the dry yeast cells to rehydrate properly before being introduced to the wort, giving them the best chance for a healthy start. Once pitched, give the fermenter a gentle swirl to ensure the yeast is well-distributed.
Fermentation and Bottling: Patience Rewards a Great American Amber
After pitching the yeast, the real magic begins. Fermentation typically takes a “couple of weeks,” as the brewer notes, though specific times can vary based on yeast strain and temperature.
The Art of Bottle Conditioning
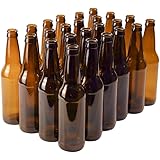
Post-fermentation, your beer is ready for bottling. The video highlights the critical step of sanitizing bottles and caps. “Sanitized ’em before… and rinsing ’em out again” underscores the rigorous cleaning required. The bottling process involves adding priming sugar – which the brewer carefully mixes with a little water in a pot – to the fermented beer. This small addition of sugar provides a final food source for the residual yeast in the bottles.
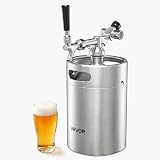
As the video shows, about 28 bottles can be expected from an American Amber batch. Once capped, the bottles need to undergo bottle conditioning, a secondary fermentation where the yeast consumes the priming sugar, producing CO2 that dissolves into the beer, creating natural carbonation.
The brewer recommends “at least two weeks, three to four weeks is preferable” for bottle conditioning. This patience is crucial. Rushing this stage can result in flat beer or inconsistent carbonation. Storing bottles at a stable room temperature during conditioning helps ensure consistent carbonation levels.
Tasting the Brewer’s Best American Amber: A Rewarding Experience
The culmination of your homebrewing efforts is the first pour. The brewer’s enthusiasm is evident as he describes the American Amber Ale’s “real rich taste,” “good smell,” and “decent amount of carbonation” after just a couple of weeks. He estimates the alcohol content to be on the “lower side,” perhaps around 5% ABV, which is typical for many approachable amber ales.
An American Amber Ale is characterized by a balance of malt sweetness, often with notes of caramel, toast, or biscuit, and a moderate hop presence that provides bitterness and aroma without overpowering the malt. The Willamette hops contribute a refined, floral finish. The “good aftertaste” mentioned signifies a well-rounded and enjoyable brew.
The Brewer’s Best American Amber kit, as demonstrated, offers a fantastic entry point into homebrewing, yielding a delicious and satisfying craft beer that you can proudly say you made yourself.
Brewing Up Answers: Your Q&A On Tap
What is homebrewing?
Homebrewing is the process of crafting your own beer at home. Many beginners start with a kit, which offers a structured way to learn the process.
What essential ingredients come in a typical homebrew kit?
A typical homebrew kit includes malt extract (for fermentable sugars), specialty grains (for flavor and color), hops (for bitterness and aroma), yeast (to convert sugars to alcohol), and priming sugar (for carbonation).
Why do you steep specialty grains when making beer?
Steeping specialty grains helps extract rich flavors, colors, and complex carbohydrates, which add depth and character to the beer that malt extract alone cannot provide.
What are the main reasons for boiling the wort in homebrewing?
Boiling the wort serves two main purposes: it sanitizes the liquid by killing wild yeasts and bacteria, and it allows for the timed addition of hops to achieve specific bitterness and aroma profiles.
What happens during bottle conditioning after you bottle your beer?
During bottle conditioning, the priming sugar added before bottling provides a final food source for residual yeast, which produces carbon dioxide to naturally carbonate the beer within the sealed bottles.