Does the thought of brewing your own beer seem complicated? Are you put off by expensive, specialized equipment? In fact, the world of **DIY beer brewing equipment** can be entered quite simply. You do not need a massive initial investment. This guide, expanding on the video above, helps you navigate your journey. It covers everything from starting small to scaling up your homebrewing operation.
Starting Your Homebrewing Journey
Many aspiring brewers feel overwhelmed. They see vast arrays of shiny, costly gear. However, the truth is far simpler. Basic homebrewing requires very little. The video highlights this perfectly. Your initial setup can be quite minimal.
Imagine starting with a simple kit. These kits are often designed for one or five-gallon batches. They include essentials. A basic stainless pot is provided. A small cooling coil is usually included. You also get basic fermenting equipment. Ingredients are often part of the package too. This approach uses extracts. All-grain brewing can be tackled later.
Essential Beginner Homebrewing Gear
Your first foray into homebrewing should be straightforward. Focus on the core components. These items allow you to brew successfully. They also build your confidence.
- Brew Kettle: A sturdy five-gallon pot is foundational. This pot is used for boiling your wort. Stainless steel is often preferred. It lasts for many years.
- Fermentation Vessel: A simple five-gallon food-grade bucket works well. It needs an airlock. This prevents contamination. Some brewers prefer glass carboys. However, buckets are more durable. They are also less prone to breakage.
- Cooling System: Quickly cooling your wort is vital. A basic immersion chiller is ideal. Alternatively, an ice bath in your sink works. Rapid cooling prevents off-flavors. It also protects your yeast.
- Basic Sanitation Supplies: Cleanliness is paramount in brewing. Sterilizers and sanitizers are critical. They prevent bacterial contamination. This ensures your beer tastes great.
You can certainly begin with just these items. Many fantastic beers have been made this way. The brewer in the video started similarly, nearly 20 years ago. His original five-gallon pot is still in use. This proves durability and cost-effectiveness. This basic setup is ideal for getting a return on investment.
Scaling Your Homebrewing Operations
Once comfortable with smaller batches, scaling up is natural. Many brewers move from five to ten-gallon batches. This requires slightly more robust **DIY beer brewing equipment**. These upgrades enhance efficiency. They also allow for greater volume.
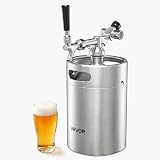
The video showcases several smart upgrades. The brewer uses modified half-barrel kegs. These 15.5-gallon kegs become a mash tun. They also serve as a dedicated cook kettle. This modification is a clever DIY solution. It saves significant money.
Advanced Mash Tuns and Cook Kettles
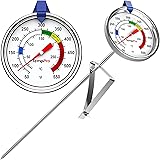
A mash tun is crucial for all-grain brewing. Here, starches convert to sugars. The brewer’s modified keg includes a false bottom. This separates the grain from the liquid. A thermometer gauge is also welded on. It helps maintain precise temperatures. Ceramic fiber insulation is used. This keeps the mash warm. It avoids constant reheating.
The separate cook kettle is equally important. It allows simultaneous mashing and boiling. This streamlines the brewing day. Welded spouts and gauges add convenience. These are practical modifications. They reflect a growing brewer’s needs.
Efficient Wort Cooling Methods
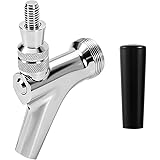
Cooling large volumes of wort needs efficiency. A larger copper immersion coil is shown. This coil rapidly reduces wort temperature. It connects to a garden hose. The water runs through the coil. Then it is diverted to a pool. This prevents water waste. Plate chillers are another option. However, the copper coil is simple and effective. It represents a common piece of **DIY beer brewing equipment** for advanced homebrewers.
The Benefits of Advanced Fermenters
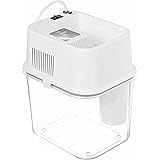
Fermentation is where the magic happens. A 14-gallon fermenter is ideal for 11-gallon batches. It offers distinct advantages. This specific fermenter is fully sealed. It features a pressure blow-off valve. An airlock visibly bubbles during fermentation. These features are standard on quality vessels.
A key upgrade is the racking arm. This component is located inside the fermenter. It allows beer to be drawn off from above the trub. Trub is the yeast bed and sediment. This separation improves beer clarity. It also minimizes off-flavors. A bottom dump valve further simplifies yeast harvesting. Imagine if yeast collection was always easy. This type of fermenter makes it so. However, the brewer notes his current opening is a bit small. Future upgrades might include a wider mouth for easier cleaning and collection.
Storing and Serving Your Craft Brews
After fermentation, your beer needs storage. You also want a way to serve it. The video explores several excellent options. Each offers unique benefits. They cater to different volumes and preferences.
The Joys of Kegging Homebrew
Corny kegs are highly praised. They are fantastic for storing beer. These kegs use ball lock valves. One valve is for CO2 input. The other is for beer output. A typical regulator connects to a CO2 tank. This setup carbonates and serves your beer. Kegging saves significant time. It eliminates bottle washing and capping. Your beer also stays fresh longer.
DIY Kegerator for Ultimate Convenience
Storing kegs requires refrigeration. A kegerator is often the answer. Store-bought models can be pricey. However, a DIY kegerator is a smart alternative. The brewer shares his personal project. He bought a second-hand refrigerator. Holes were drilled for taps. This customization saves money. It provides a dedicated cold storage unit. Imagine if every piece of **DIY beer brewing equipment** could be so practical and affordable.
Alternative Bottling Methods
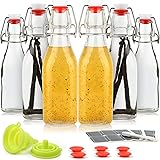
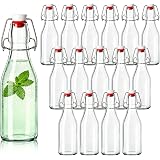
Not everyone needs a kegerator. Bottling is still a viable option. Porcelain pop-top bottles are a good choice. They eliminate the need for caps. They also avoid a capping press. These bottles are reusable. Growlers are another simple option. However, they are generally for short-term storage. For smaller batches, traditional bottles with caps are fine. But for larger volumes, bottling becomes very labor-intensive.
The Philosophy Behind DIY Beer Brewing Equipment
The core message remains consistent. Do not let complexity deter you. Start small, learn, and grow. The journey itself is rewarding. Brewing your own beer is a fulfilling hobby.
Investment Versus Necessity
The initial investment for brewing is often minimal. The brewer’s equipment has lasted over 15 years. This longevity yields an excellent return. Quality **DIY beer brewing equipment** lasts. It proves its value over time. You gain experience. Your passion for brewing also grows.
Embracing Evolution and Future Upgrades
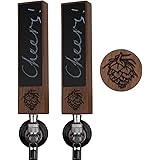
Homebrewing technology continues to advance. Modern equipment offers impressive features. Electric mash tun/cook kettles are now available. These offer precise temperature control. Glycol chillers allow for lager fermentation. These sophisticated tools can be expensive. However, they are not necessary for starting. They are goals for future upgrades. The brewer himself eyes new fermenters. He wants one for lagering. This shows the continuous nature of the hobby. There is always something new to explore. You can also look into canning presses. This offers another way to package your homebrew. But remember, the goal is simple. It is about making and enjoying your beer. So just get a small kit. Start brewing today. Cheers!
Still Thirsty for Knowledge? Your DIY Brewing Q&A
Do I need a lot of expensive equipment to start brewing my own beer?
No, you don’t need a massive initial investment. You can start homebrewing quite simply with minimal, basic equipment.
What are the most important pieces of equipment for a beginner homebrewer?
For a beginner, the core components you need are a brew kettle (a five-gallon pot), a fermentation vessel (like a five-gallon food-grade bucket with an airlock), a cooling system, and basic sanitation supplies.
How much beer can I make when I first start homebrewing?
Many beginner homebrewing kits are designed for making smaller batches, typically one or five gallons of beer.
How can I store and serve my homebrewed beer without a fancy setup?
For smaller batches, you can bottle your beer using reusable porcelain pop-top bottles or traditional bottles with caps, which are practical and affordable options.