Thinking about diving into the world of homebrewing but feel overwhelmed by the complexity, specialized equipment, and potential for mess? Many aspiring brewers hit this wall, imagining elaborate setups and difficult processes. However, making your own delicious beer doesn’t have to be a daunting task. The good news is that kits like the one featured in the video above, our Countertop Beer Kit, are specifically designed to simplify homebrewing, making it accessible even for first-timers. This guide takes you deeper into the process, transforming what might seem like a complex craft into a straightforward, rewarding hobby.
Demystifying Homebrewing: The Magic of Extract Brewing
At its core, extract brewing is the easiest way to make beer because it streamlines the most complex part of the brewing process: converting starches into fermentable sugars. Instead of starting from raw grains, you begin with malt extract, which is essentially a concentrated sugary liquid derived from malted barley. Think of it like baking a cake from a pre-made mix versus milling your own flour and creating every ingredient from scratch. This approach significantly reduces the equipment needed, shortens brew day, and minimizes the risk of common beginner mistakes, ensuring a more consistent and successful brew.
This method is a game-changer for new brewers. It allows you to focus on the essential steps of sanitization, proper timing, and temperature control, rather than grappling with mash temperatures and lautering. As you gain confidence and experience, you can then explore more advanced techniques, but extract brewing provides a solid foundation without the initial headaches. It’s truly an ideal entry point for anyone curious about crafting their own beverages.
Assembling Your Brewing Arsenal: Getting Started with Your Countertop Beer Kit
More Than Just a Fermenter: Your All-in-One Solution
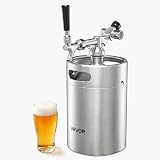
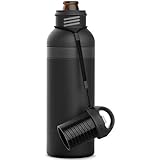
The beauty of a countertop beer kit lies in its integrated design. Unlike traditional setups that require separate vessels for fermentation and bottling, this kit combines these functions into one convenient unit. This design dramatically cuts down on the amount of gear you need to purchase and store, making homebrewing a practical hobby even for those with limited space. It means fewer components to clean and sanitize, simplifying the overall process and reducing the potential for contamination.
The kit typically provides most of what you need, from the fermenter itself to the ingredients and vital accessories like Campden tablets. You will, however, need to supply your own water and a large stockpot, common items found in most kitchens. The ease of assembly also stands out; it’s designed for quick setup, allowing you to move swiftly from unboxing to brewing with minimal effort.
The Foundation: Water Quality for Better Beer
Water, often overlooked, is a critical ingredient in beer. For this recipe, you begin by adding one and a half gallons of water to your stockpot. Heating this water to 160 degrees Fahrenheit is crucial for the next step, the grain steep. However, municipal tap water often contains chlorine or chloramine, disinfectants that can react with yeast and malt during fermentation to create unpleasant, medicinal or “band-aid-like” off-flavors in your finished beer. These undesirable flavors can spoil an otherwise perfect brew.
To combat this, the kit includes Campden tablets. Just a tiny fraction—1/5 of a tablet—is enough to neutralize chlorine and chloramine almost instantly. This simple addition is a powerful shield, protecting your beer’s delicate flavor profile from chemical interference. If you use well water, it’s generally fine, but be mindful of any unusual tastes or smells. These characteristics can transfer directly to your beer, so a simple activated carbon filter can be a wise investment if your well water isn’t perfectly pristine.
The Art of the Steep and the Birth of Wort
Steeping Specialty Grains: Infusing Flavor and Color
Once your water reaches 160 degrees Fahrenheit, the next step introduces specialty grains. These grains, enclosed in a muslin bag, steep in the hot water for 30 minutes. While extract brewing largely relies on malt extract for fermentable sugars, specialty grains provide layers of complexity that transform a basic brew into something more nuanced. They contribute desirable flavors like caramel, toast, or chocolate, add inviting colors ranging from pale gold to deep amber, and can even enhance the beer’s body and mouthfeel.
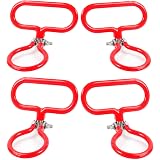
Consider specialty grains as the spice rack of your beer; they add character without being the main course. A smart trick from the video is to clip the muslin bag to the side of your kettle. This makes removal much easier once the steeping time is complete, preventing the bag from sinking and allowing you to drain excess liquid effortlessly. After 30 minutes, remove the grain bag, allowing the infused liquid to remain.
Dissolving Malt Extract: Your Wort Takes Shape
With the specialty grains removed, it’s time to stir in the one and a half pounds of malt extract. Malt extract is concentrated sugar derived from malted barley, essentially pre-made wort. This is the primary source of fermentable sugars that your yeast will later convert into alcohol. The key here is thorough dissolution. You must stir diligently until the extract is completely dissolved, ensuring no sticky residue clings to the bottom of the pot. Undissolved extract can caramelize and burn during the upcoming boil, leaving scorched flavors and a stubborn mess welded to your kettle.
Once the malt extract is fully integrated, the sugary liquid in your pot officially transforms into “wort” (pronounced “wert”). This wort is now primed for the boiling stage, where it will undergo further transformations, including sterilization and hop additions. It’s the sweet, unfermented foundation of your future beer.
The Crucial Boil: Hops, Heat, and Avoiding Disaster
Mastering the Boil: Preventing the Infamous “Boil-Over”
Bringing your wort to a boil is a critical stage, but it requires vigilance. You must be extremely careful to establish a stable boil, meaning a gentle, consistent roll, not a raging inferno. If your wort gets too hot too fast, you risk a “boil-over.” Imagine a giant, sticky, sugary volcano erupting on your stovetop—that’s a boil-over. It is arguably the worst thing that can happen during homebrewing.
Beyond the immense cleanup challenge, a boil-over leads to significant loss of your precious wort. The caramelized sugar can bond stubbornly to your cooktop, requiring rigorous scrubbing. More importantly, it can pose a fire hazard if it spills onto hot burners. Stay by your pot, adjusting the heat as needed, until you achieve a steady boil. Once stable, you can relax slightly, but never fully walk away.
Hopping Through the Boil: A Symphony of Flavors and Aromas
The recipe calls for a 60-minute boil, and this period is when hops enter the picture. Hops, the flowers of the hop plant, are crucial for balancing the sweetness of the malt with bitterness, and for contributing a vast array of aromas and flavors. The timing of hop additions dictates their effect: earlier additions contribute bitterness, while later additions provide flavor and aroma.
The first addition, 4 grams of Citra hops, goes in right when the wort reaches a boil, marking the start of your 60-minute timer. Citra is a famously popular hop, celebrated for its strong citrus and tropical fruit notes, often described as grapefruit, lime, and passionfruit, making it a favorite in American IPAs and pale ales. With 15 minutes left in the boil, you add another 8 grams of Citra. This addition contributes more to flavor than bitterness. Finally, at “flameout”—the moment you turn off the heat—you add the remaining 18 grams of Citra. This “flameout addition” maximizes the delicate aromatic compounds, which are volatile and would otherwise boil away. If you lack a scale, approximate the ratios to ensure a balanced hop profile.
From Hot Wort to Happy Yeast: Cooling and Pitching
Chilling Your Wort: The Race Against Contamination
After the boil, the wort is sterile but dangerously hot. You must rapidly cool it down to yeast pitching temperature, around 70 degrees Fahrenheit. This rapid chilling serves two critical purposes: first, it minimizes the window of opportunity for airborne wild yeasts and bacteria to infect your wort, which could lead to off-flavors or even spoilage. Second, quick cooling helps the “cold break,” where proteins and other undesirable compounds coagulate and fall out of suspension, leading to a clearer finished beer.
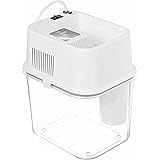
You have a couple of effective chilling options. The quickest method is an ice bath: fill your sink with cold water and ice, then submerge your covered kettle. Stirring the ice water around the kettle and adding more ice as it warms will accelerate the process. A second, more passive option is to place the covered kettle in your refrigerator; this typically cools the wort to 70 degrees within about two hours. Keeping the lid on during chilling is vital to prevent airborne contaminants from entering your precious wort.
The Yeast’s New Home: Aeration and Pitching
Once your wort reaches approximately 70 degrees Fahrenheit, it’s ready for its next transformation. Carefully transfer the cooled wort to your sanitized fermenter, trying to leave behind the layer of hop debris and cold break material at the bottom of your pot. Don’t worry if a little transfers over; it won’t harm the beer. If your volume is slightly low after transfer, top it off with a bit of bottled water until you reach the one and a quarter gallon mark, ensuring the temperature remains around 70 degrees Fahrenheit.
Next comes the yeast. Yeast are the microscopic workhorses that convert sugars into alcohol and carbon dioxide, turning wort into beer. Before pitching the yeast, aeration is critical. Yeast needs oxygen to reproduce vigorously in the initial stages of fermentation. Secure the sanitized stopper and lid onto the fermenter, ensuring your hands are also sanitized. Cover the stopper opening and vigorously shake the fermenter for about 60 seconds. This introduces vital oxygen. Then, carefully add the yeast, secure the airlock (filled with sanitizer solution) into the stopper, and seal your fermenter. Congratulations, you’ve just made wort; the yeast will now perform the actual magic of creating alcohol over the next 7 to 10 days.
The Magic Unfolds: Fermentation and Beyond
The Silent Transformation: What Yeast Does
With the yeast safely pitched, your wort begins its journey to becoming beer. Fermentation is a fascinating biological process where yeast consumes the fermentable sugars in the wort and metabolizes them into ethanol (alcohol), carbon dioxide (CO2), and a myriad of flavor compounds. This initial active period, often called primary fermentation, is visually wild, with a thick layer of foam (krausen) forming and CO2 bubbling vigorously through the airlock. The video’s timelapse beautifully illustrates this dynamic transformation.
For optimal results, place your fermenter in a dark location with a steady temperature as close to 70 degrees Fahrenheit as possible. While a few degrees either side is acceptable, extreme temperature fluctuations can stress the yeast, leading to off-flavors. Darkness is paramount; ultraviolet (UV) rays from sunlight or even fluorescent lights can quickly degrade hop compounds, causing your beer to become “light-struck” or “skunky,” ruining its aroma and taste. Fermentation typically completes in around two weeks, by which point the vigorous activity will subside, and the beer will start to brighten as yeast and other particles fall out of suspension.
The Grand Finale: Bottling Your Brew
Sanitization Station: Preparing for Bottling Day
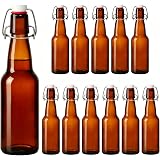
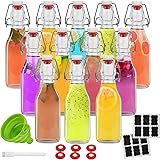
After about 14 days, once fermentation is definitely complete, it’s time to bottle your beer. This final step is just as critical as the initial brewing. Every piece of equipment that will touch your beer must be impeccably clean and sanitized. If you have a dishwasher with a sanitize cycle, use it for your bottles. Otherwise, thoroughly wash and then sanitize each bottle, cap, and your bottling spigot with a fresh sanitizer solution. Think of sanitization as building an invisible fortress around your beer; any breach can allow spoilage organisms to invade and ruin your hard work, leading to sour, off-flavored, or flat beer.
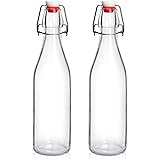
Prepare a large pot of sanitizer for your bottles and a smaller bowl for your caps. Have your bottle capper and new or thoroughly cleaned non-screw-top beer bottles ready. Before you even start filling, spray some sanitizer solution through your bottling spigot to ensure it’s completely clean. Remember to dump out the sanitizer solution from each bottle before filling it with beer; a few drops won’t hurt, but you don’t want to dilute your brew.
Filling and Priming: Gearing Up for Carbonation
The method you use to fill your bottles directly impacts the quality of your finished beer. The preferred technique, as demonstrated in the video, is to use a bottle filler attached to your fermenter’s spigot. This allows you to fill bottles from the bottom up, minimizing splashing and contact with oxygen. Excessive exposure to oxygen during bottling is a major enemy of beer, leading to oxidation, which can result in stale, cardboard-like flavors over time. While you can fill from the top, it’s strongly discouraged for this reason.
To carbonate your beer, you’ll add priming sugar tablets to each bottle according to the directions. These small tablets contain a precise amount of sugar that provides a food source for the remaining yeast in the beer. This secondary fermentation in the sealed bottle produces CO2, which dissolves into the beer, giving it that satisfying fizz. Be sure not to add more sugar than recommended, as over-priming can create dangerous “bottle bombs” due to excessive pressure. Once filled and primed, securely cap each bottle using your capper.
Carbonation and Patience: The Final Wait
After bottling and capping, the journey isn’t quite over. Transfer your bottles back into their box and store them at room temperature for another two weeks. This period is called bottle conditioning. During this time, the yeast consumes the priming sugar you added, generating CO2 that naturally carbonates your beer. Think of it as the beer taking a final, peaceful nap to develop its effervescence.
You will notice a bit of sediment at the bottom of your bottles, a natural byproduct of bottle conditioning. This is harmless yeast sediment and indicates a truly natural homebrew beer. To avoid stirring it up, try not to shake the bottles before pouring. After two weeks, transfer your beautifully carbonated homebrew beer to the refrigerator to chill. Now, all that’s left is to savor the taste of your own handcrafted creation!
Pouring Out Answers: Your Beer Making Q&A
What is the easiest way for a beginner to make beer at home?
The easiest way is called extract brewing, which simplifies the process by starting with pre-made malt extract instead of raw grains.
What essential items do I need to start homebrewing with a kit?
You will primarily need a countertop beer kit, a large stockpot, and water. The kit often combines many functions, reducing extra gear.
Why is the quality of my water important for brewing?
Your water quality matters because chlorine or chloramine from tap water can create unpleasant ‘off-flavors’ in your finished beer.
Why is sanitizing my brewing equipment so important?
Sanitizing prevents unwanted bacteria and wild yeasts from contaminating your beer, which can cause sour tastes or spoilage.